Installation
Follow the steps below to setup your site template:
- Unzip the downloaded package and open the /HTML folder to find all the template files. You will need to upload these files and sub folders to your hosting web server using FTP or file manager in order to use it on your website.
- Below is the folder structure and needs to be uploaded to your website root directory:
HTML/css- Stylesheet filesHTML/fonts– Icon font filesHTML/images- Image filesHTML/js- Javacript filesHTML/video– Video filesHTML/email-templates– Contact and subscription form PHP filesHTML/revolution– Revolution slider library files
- You should upload all or specific HTML files as per your need.
- You're now good to go..! Start adding your content/images and generate your beautiful brand new website for your awesome users.
HTML structure
LITHO follows a simple and easy to customize coding structure. Here is the sample for your reference:
<!doctype html>
<html class="no-js" lang="en">
    <head>
        <!-- title -->
        <meta charset="utf-8">
        <!-- description -->
        <meta name="description" content="">
        <!-- keywords -->
        <meta name="keywords" content="">
        <!-- favicon -->
        <!-- style -->
    </head>
    <body>
        <!-- start header -->
        <header>
            <!-- start navigation -->
            <nav class="navbar navbar-expand-lg navbar-dark bg-transparent header-light fixed-top navbar-boxed header-reverse-scroll">
                ...
            </nav>
            <!-- end navigation -->
        </header>
        <!-- end header -->
        <!-- start sections -->
        <section>
            ...
        </section>
        <!-- end sections -->
        <!-- start footer -->
        <footer>
            <div class="container">
                ...
            </div>
        </footer>
        <!-- end footer -->
        <!-- javascript libraries -->
    </body>
</html>
Logo settings
The logo container can be found in the Nav Container - .navbar
<!-- start logo -->
<div class="col-auto col-sm-6 col-lg-2 me-auto ps-lg-0">
    <a class="navbar-brand" href="#">
        <img src="images/logo-white.png" data-at2x="images/logo-white@2x.png" class="default-logo" alt="">
        <img src="images/logo-green-dark.png" data-at2x="images/logo-green-dark@2x.png" class="alt-logo" alt="">
        <img src="images/logo-green-dark.png" data-at2x="images/logo-green-dark@2x.png" class="mobile-logo" alt="">
    </a>
</div>
<!-- end logo -->
NoteThree images are used for logo, one for default logo (Logo that will display when you are on the top of the page), second for alternate logo (Logo that will display when header will be sticky) and third for mobile logo (Logo that will display in mobile). .default-logo is used to set which image you want as default, .alt-logo is used to set which image you want as alternate. .mobile-logo is used to set which image you want to display in mobile.
NoteIf you want to increase the size of your logo container then you can increase max-height as per your need in /css/style.css file under this css class: header .navbar .navbar-brand img, header.side-menu .logo img, header .sidebar-nav-menu .navbar-brand img
Image & favicon settings
Image settings
LITHO download package does not contain actual images which are there in our online demo due to licensing limitation and this is already mentioned in item description also as per Envato policy. We are using placeholder images instead of real images. You can replace placeholder image url with your image url like images/yourimage.jpg and make sure to put the image in /images/ folder.
<img src="https://placehold.it/750x500" alt="image alt text">
Change to
<img src="images/yourimage.jpg" alt="image alt text">
Background image settings
You can change background image from placeholder image to your own easily like the below code reference:
background-image:url('https://placehold.it/1920x1200')
Change to
background-image:url('images/yourimage.jpg')
Favicon settings
To change the favicon image of your site, you need to load a new ICO image in a site root or to point out a new address of the image.
<!-- favicon -->
<link rel="shortcut icon" href="images/favicon.png">
<link rel="apple-touch-icon" href="images/apple-touch-icon-57x57.png">
<link rel="apple-touch-icon" sizes="72x72" href="images/apple-touch-icon-72x72.png">
<link rel="apple-touch-icon" sizes="114x114" href="images/apple-touch-icon-114x114.png">
Changing fonts
LITHO uses 2 fonts: Roboto & Poppins from the Google Fonts Library. You can change the fonts from /css/style.css file in below lines. If you want to use self hosted fonts other than Google fonts then here is an article of self hosted fonts to review. In this case you need to remove below lines and change font names in /css/style.css file as per your fonts used.
<!-- Google font -->
@import url('https://fonts.googleapis.com/css?family=Roboto:100,300,400,500,700,900&display=swap');
@import url('https://fonts.googleapis.com/css?family=Poppins:100,100i,200,200i,300,300i,400,400i,500,500i,600,600i,700,700i,800,800i,900,900i&display=swap');
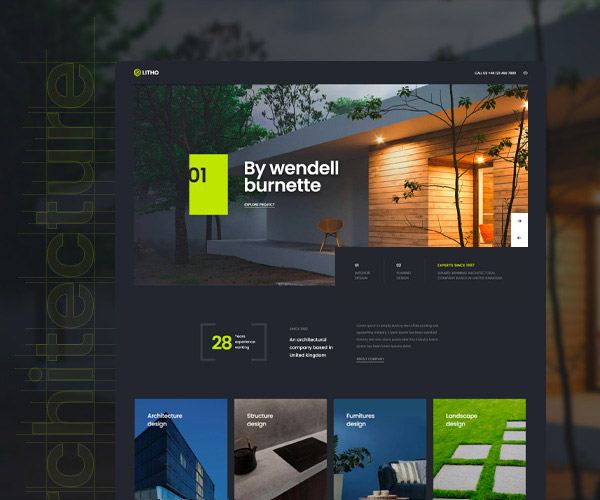
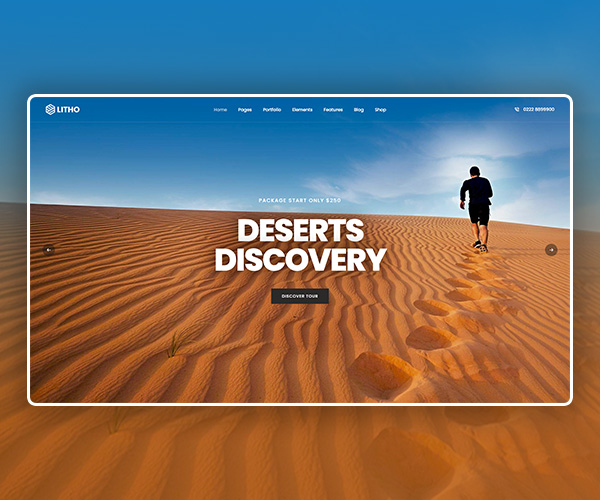
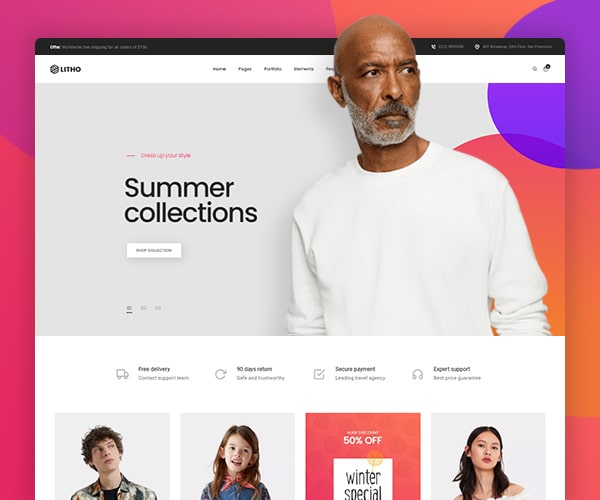
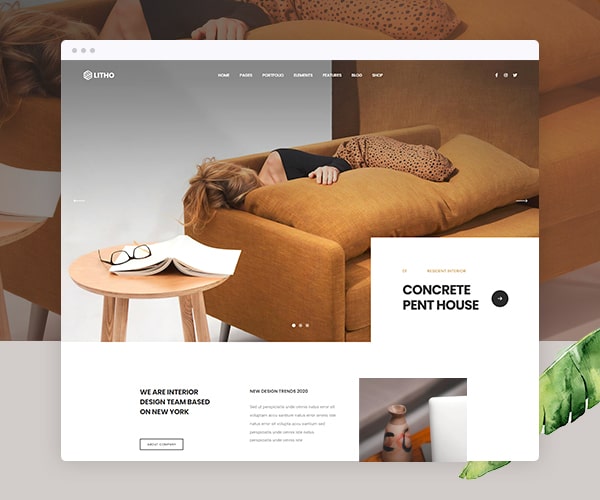
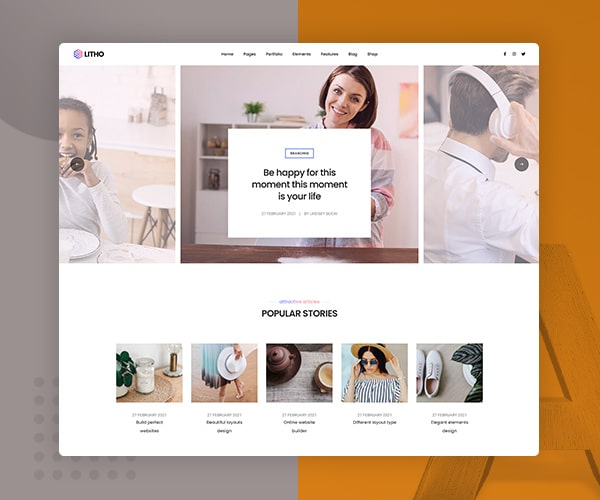
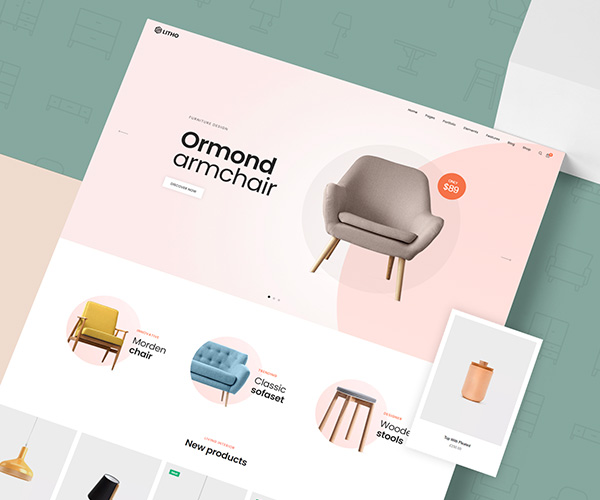
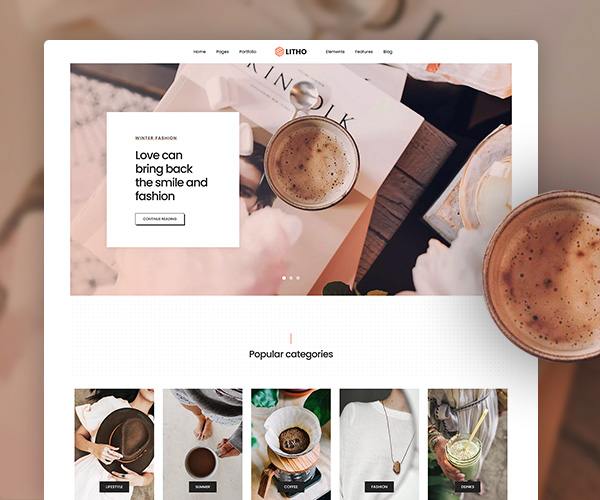
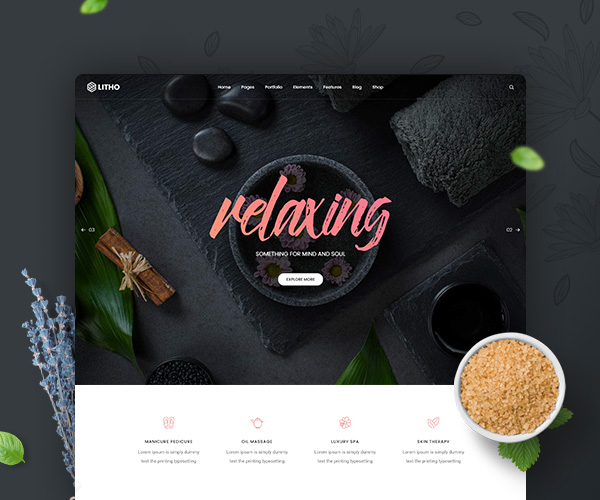
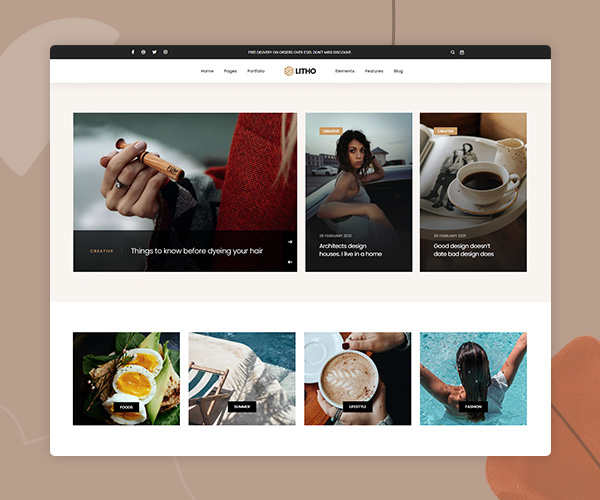
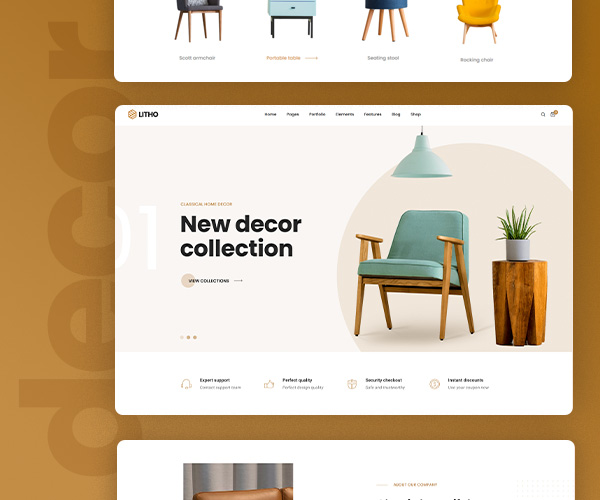
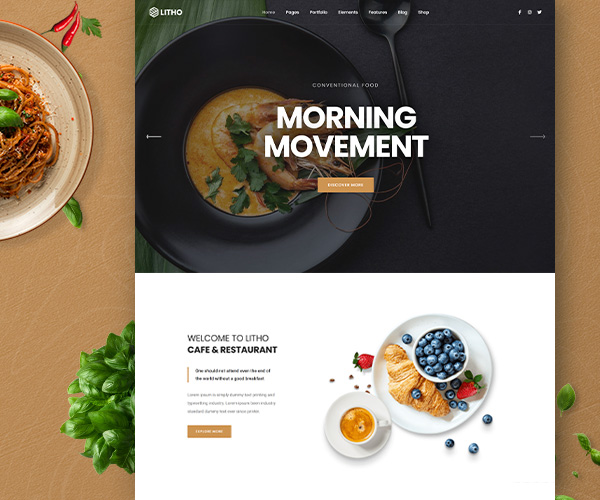
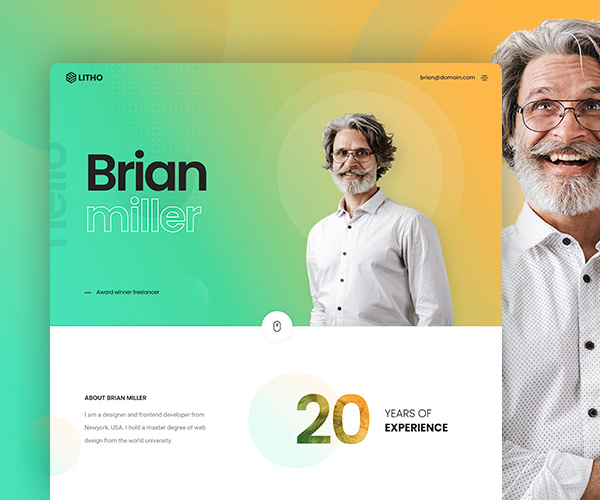
Home pages demos
LITHO is a clean and modern design, BootStrap 5 responsive, business and portfolio multipurpose HTML5 template with 37+ ready homepage demos.


Header types
You can choose between 14 Types of headers while creating your Pages. The list of various header types & its descriptions are provided below for your reference:
1. Transparent header
Header with no background color.

<!-- start navigation -->
<header>
    <nav class="navbar navbar-expand-lg navbar-dark bg-transparent header-light fixed-top header-reverse-scroll">
        <div class="container-lg nav-header-container">
            ...
        </div>
   </nav>
</header>
<!-- end navigation -->
2. White header
Header with white background & dark navigation text.
<!-- start navigation -->
<header>
    <nav class="navbar top-space navbar-expand-lg navbar-light bg-white header-light fixed-top header-reverse-scroll">
        <div class="container-lg nav-header-container">
        ...
        </div>
    </nav>
</header>
<!-- end navigation -->
3. Dark header
Header with dark background & light navigation text.
<!-- start navigation -->
<header>
    <nav class="navbar top-space navbar-expand-lg navbar-boxed navbar-dark bg-black header-dark fixed-top header-reverse-scroll">
        <div class="container-fluid nav-header-container">
           ...
        </div>
    </nav>
</header>
<!-- end navigation -->
4. Header with topbar
Header with topbar and default navigation menu to showcase the additional information as per your requirements.

<!-- start navigation -->
<header class="header-with-topbar">
    <!-- start top bar -->
    <div class="top-bar bg-light-gray border-bottom border-color-black-transparent d-none d-md-inline-block">
        <div class="container-lg nav-header-container">
            ...
        </div>
    </div>
    <!-- end top bar -->
    <nav class="navbar navbar-expand-lg top-space navbar-light bg-white header-light fixed-top header-reverse-scroll">
        <div class="container-lg nav-header-container">
            ...
        </div>
    </nav>
</header>
<!-- end navigation -->
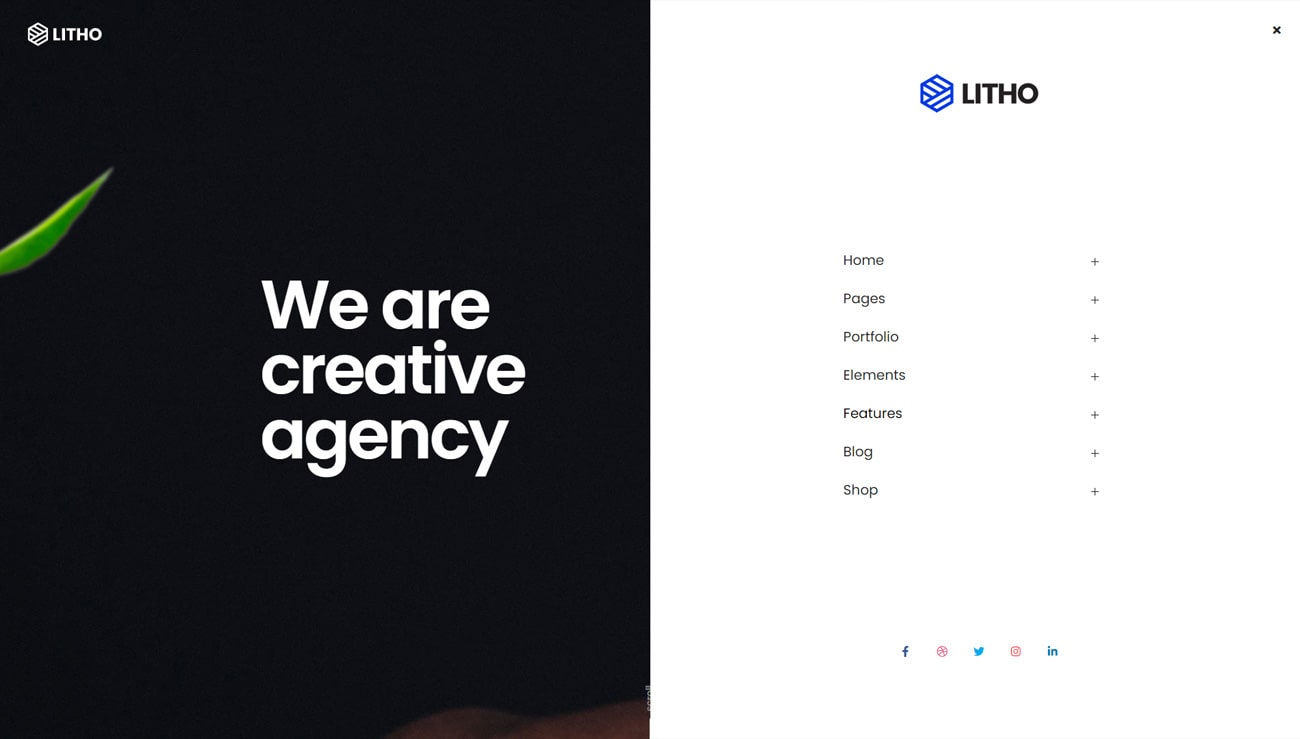
5. Header with push
Header with push sidebar which will open from right side.
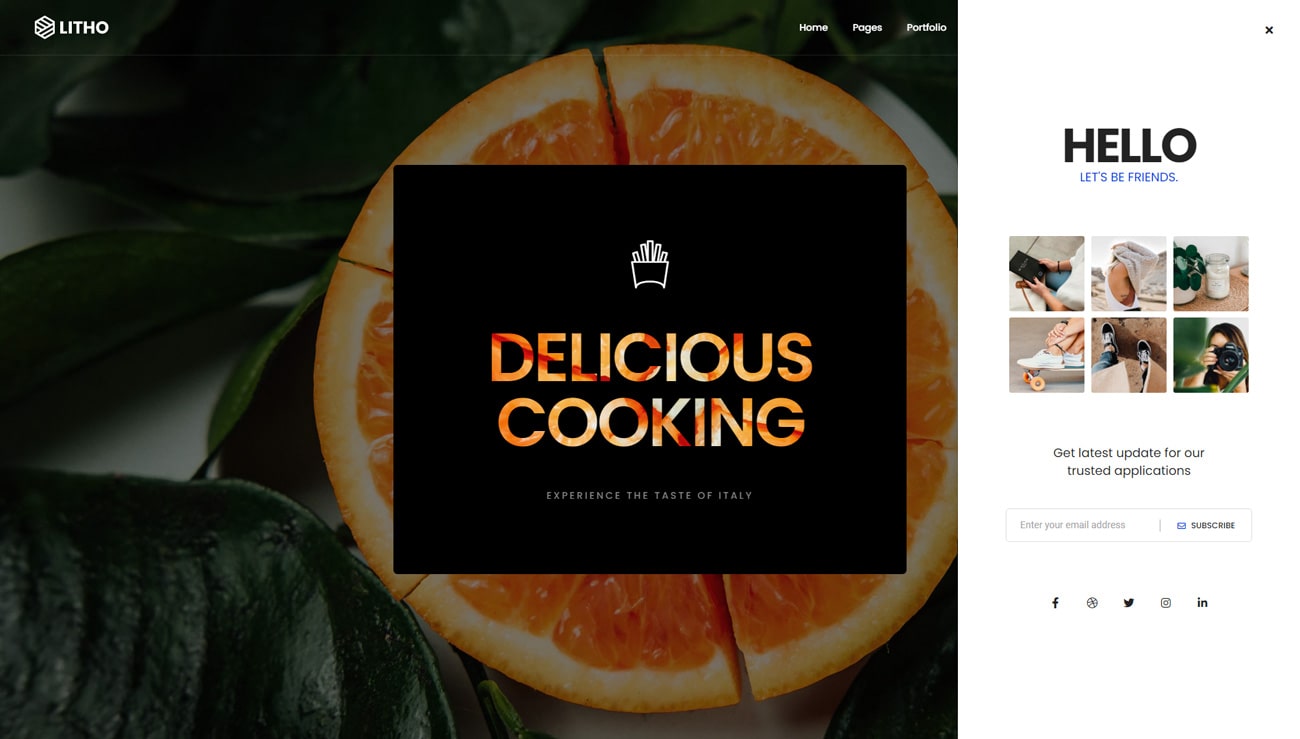
<!-- start navigation -->
<header>
    <nav class="navbar navbar-expand-lg navbar-boxed navbar-dark bg-transparent border-bottom border-color-white-transparent header-light fixed-top header-reverse-scroll">
        <div class="container-fluid nav-header-container">
            ...
            <div class="header-push-button d-none d-lg-inline-block hidden-xs">
                <a href="javascript:void(0);" class="push-button">
                    <span></span>
                    <span></span>
                    <span></span>
                    <span></span>
                </a>
            </div>
        </div>
    </nav>
    <!-- start push menu -->
    <div class="push-menu padding-50px-lr bg-white">
         ...
    </div>
    <!-- end push menu -->
</header>
<!-- end navigation -->
6. Header with center navigation
Header with center navigation provides center navigation UI to showcase your website.

<!-- start navigation -->
<header>
    <nav class="navbar navbar-expand-lg navbar-dark bg-transparent border-bottom border-color-white-transparent header-light fixed-top navbar-boxed header-reverse-scroll">
        <div class="container-fluid nav-header-container">
            ...
        </div>
    </nav>
</header>
<!-- end navigation -->
7. Header with center logo
Header with center logo provides facility to display divided menu links both side and logo will be placed between left and right menu parts.
<!-- start navigation -->
<header>
    <nav class="navbar navbar-expand-lg top-space navbar-light bg-white header-light fixed-top header-reverse-scroll menu-logo-center">
        <div class="container-lg nav-header-container">
            ...
        </div>
    </nav>
</header>
<!-- end navigation -->
8. Header with top logo
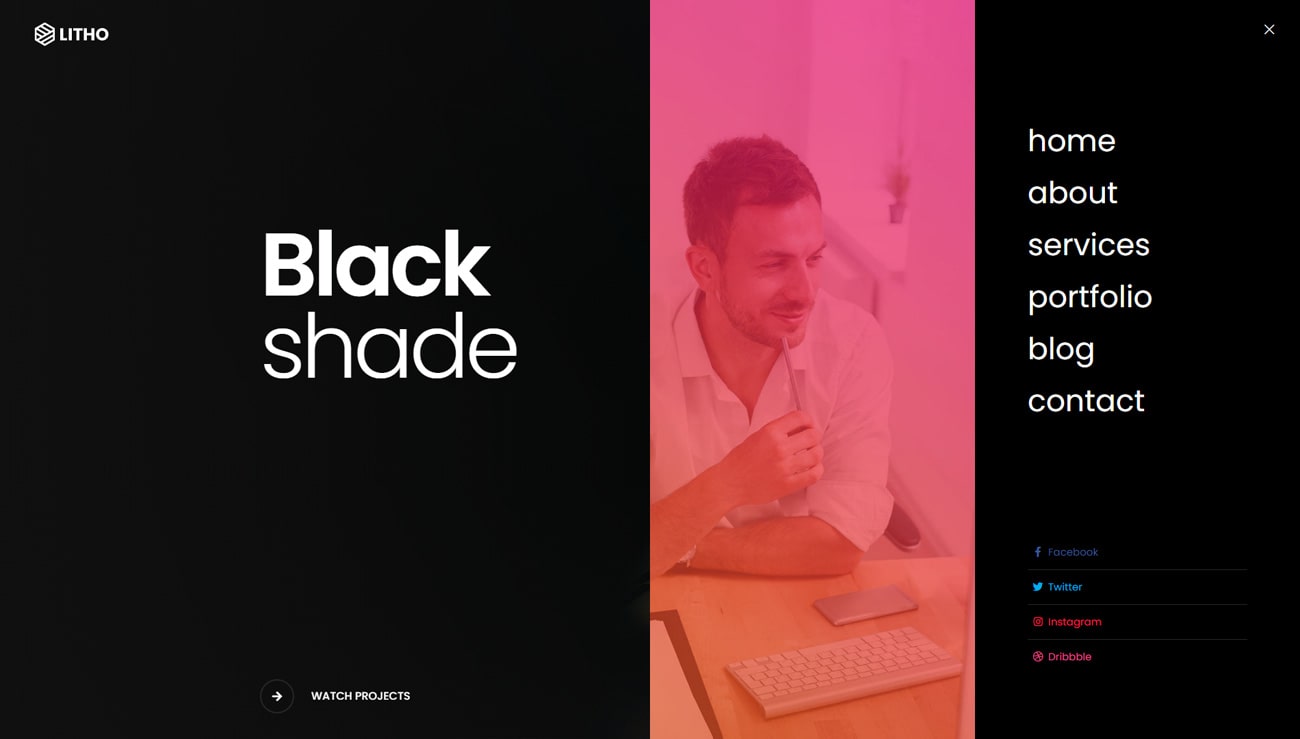
Header with top logo is beautiful view of header with center navigation menu, logo in top area in the enter and also can add social links with it.
<!-- start navigation -->
<header>
    <nav class="navbar no-sticky navbar-expand-lg navbar-light bg-white header-light header-reverse-scroll top-logo z-index-2">
        <div class="container-fluid flex-wrap nav-header-container">
            ...
        </div>
    </nav>
</header>
<!-- end navigation -->
9. One page navigation
One page navigation with menu item link to different section on the same page.

<!-- start navigation -->
<header>
    <nav class="navbar navbar-expand-lg navbar-dark bg-transparent header-dark fixed-top header-always-fixed-scroll">
        <div class="container-lg nav-header-container">
            <div class="col-auto col-sm-6 col-lg-2 me-auto ps-lg-0">
                ...
            </div>
            <div class="col-auto col-lg-8 menu-order px-lg-0">
                ...
                <div class="collapse navbar-collapse justify-content-center" id="navbarNav">
                    <ul class="navbar-nav alt-font">
                        <!-- start menu item -->
                        <li class="nav-item"><a href="#" class="inner-link nav-link">Home</a></li>
                        <!-- end menu item -->
                        <!-- start menu item -->
                        <li class="nav-item"><a href="#" class="inner-link nav-link">About</a></li>
                        <!-- end menu item -->
                    </ul>
                </div>
            </div>
        </div>
    </nav>
</header>
<!-- end navigation -->
10. Hamburger menu
Header with hamburger menu is another way to display header with navigation part for creative look.
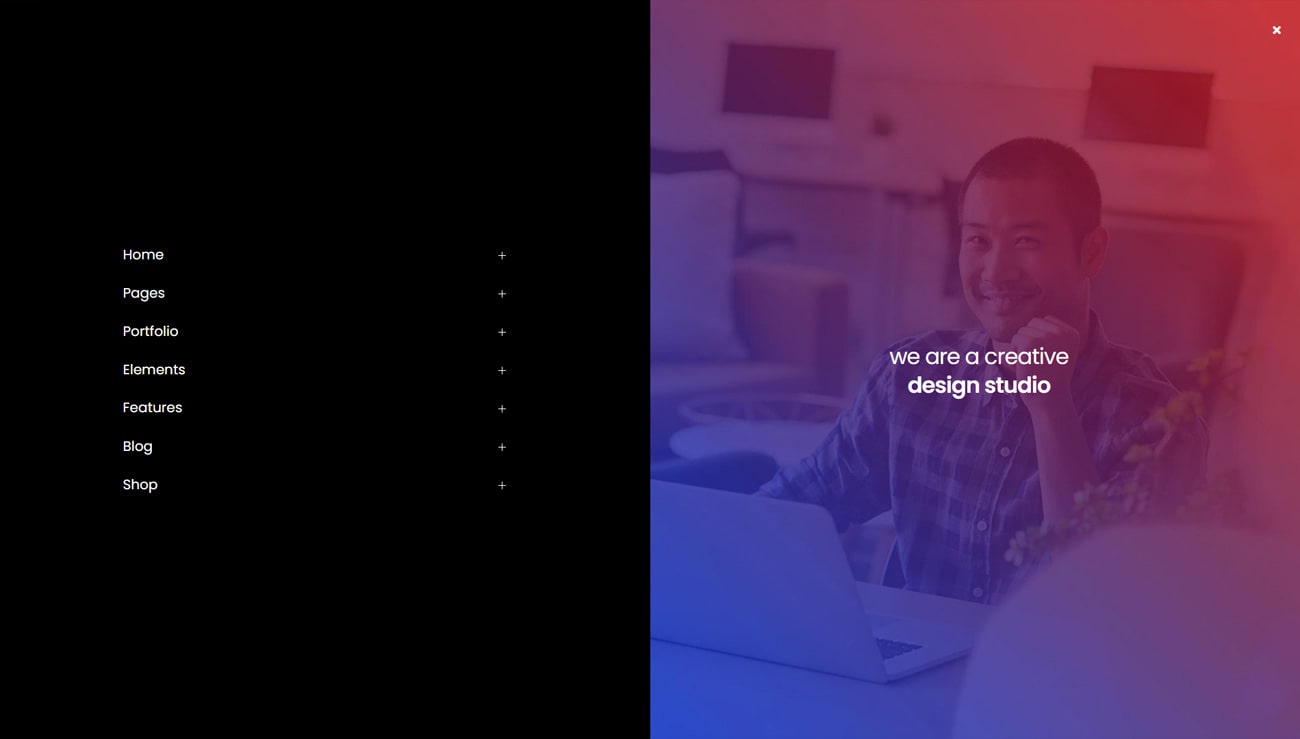
<!-- start navigation -->
<header>
    <nav class="navbar navbar-expand-lg navbar-dark bg-transparent header-dark fixed-top navbar-boxed navbar-static-overlay">
        <div class="container-fluid h-100px md-h-70px">
            ...
            <div class="col-auto text-end">
                ...
                <div class="header-push-button">
                    <a href="javascript:void(0);" class="push-button">
                        <span></span>
                        <span></span>
                        <span></span>
                        <span></span>
                    </a>
                </div>
            </div>
        </div>
    </nav>
    <!-- start hamburger popup -->
    <div class="hamburger-menu full-width bg-black">
        ...
    </div>
    <!-- end hamburger popup -->
</header>
<!-- end navigation -->
11. Hamburger menu modern
Header with hamburger menu modern is modern way to display header with navigation part for creative look.
<!-- start navigation -->
<header>
    <nav class="navbar navbar-expand-lg navbar-dark bg-transparent header-dark fixed-top navbar-boxed navbar-static-overlay">
        <div class="container-fluid h-100px md-h-70px">
            ...
            <div class="col-auto text-end">
                <div class="header-push-button">
                    <a href="javascript:void(0);" class="push-button ">
                        <span></span>
                        <span></span>
                        <span></span>
                        <span></span>
                    </a>
                </div>
            </div>
        </div>
    </nav>
    <!-- start hamburger popup -->
    <div class="hamburger-menu hamburger-menu-big-font bg-black xl-w-60 lg-w-70 md-w-50 sm-w-100">
        ...
    </div>
    <!-- end hamburger popup -->
</header>
<!-- end navigation -->
12. Hamburger menu half
Header with hamburger menu half is another way to display header with navigation part for creative look.
<!-- start navigation -->
<header>
    <nav class="navbar navbar-expand-lg navbar-dark bg-transparent header-dark fixed-top navbar-boxed navbar-static-overlay">
        <div class="container-fluid h-100px md-h-70px">
            ...
            <div class="col-auto text-end">
                ...
                <div class="header-push-button">
                    <a href="javascript:void(0);" class="push-button ">
                        <span></span>
                        <span></span>
                        <span></span>
                        <span></span>
                    </a>
                </div>
            </div>
        </div>
    </nav>
    <!-- start hamburger popup -->
    <div class="hamburger-menu hamburger-menu-half bg-white lg-w-60 md-w-60 sm-w-100">
        ...
    </div>
    <!-- end hamburger popup -->
</header>
<!-- end navigation -->
13. Left menu classic
Classic left menu provides functionality to display menu at left side in classic view.

<!-- start left menu -->
<header class="side-menu-nav bg-white">
    <div class="left-sidebar-nav sidebar-nav-menu bg-white padding-2-rem-lr padding-5-rem-tb md-padding-10-rem-top" data-sticky_column>
        <div class="side-menu-header text-center">
            ...
        </div>
        <!-- start navigation -->
        <div class="side-menu-header-bottom">
            ...
        </div>
        <!-- end navigation -->
    </div>
</header>
<!-- end left menu -->
14. Left menu modern
Modern left menu provides functionality to display menu at left side in modern view.
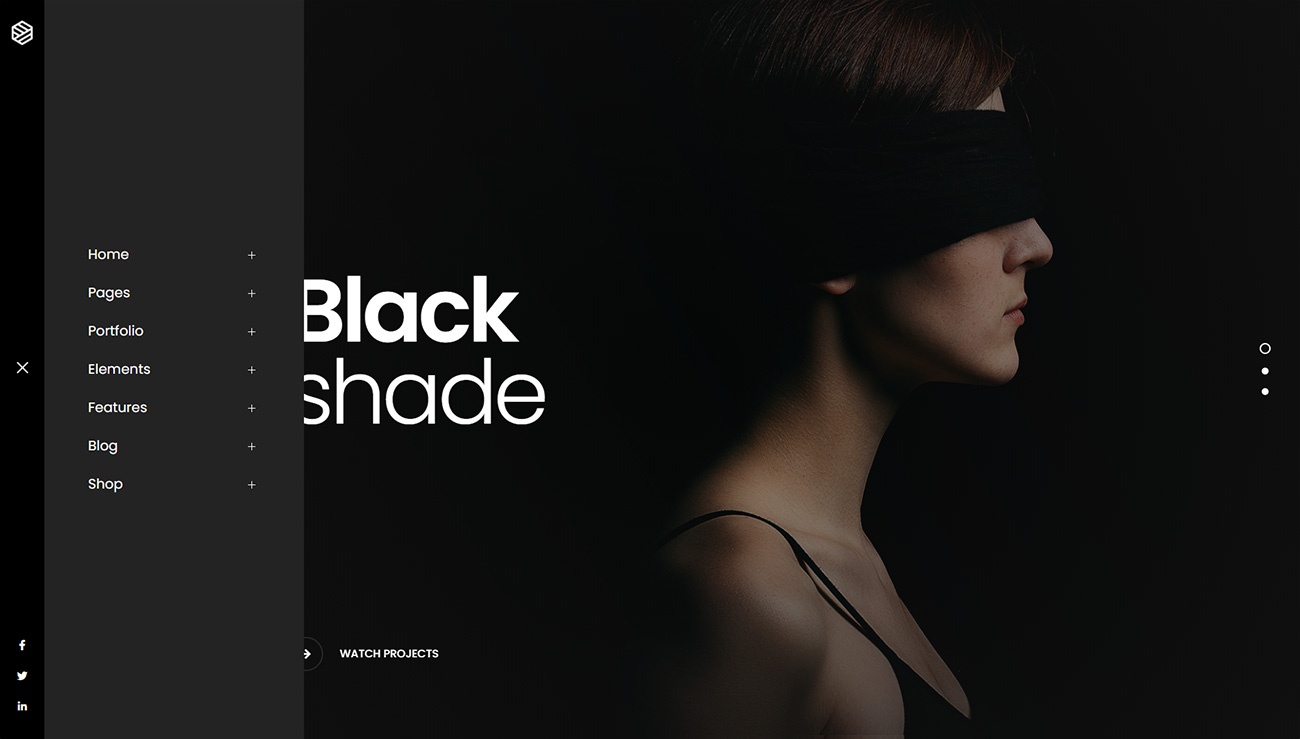
<!-- start left menu -->
<header class="side-menu menu-style-2">
    <!-- start sidebar strip -->
    <div class="bg-black sidebar-nav-action">
        ...
    </div>
    <!-- end sidebar strip -->
    <!-- start navigation -->
    <div class="bg-black sidebar-nav-menu navbar-expand-lg">
        <div class="hover-background-color bg-gradient-fast-blue-purple d-none d-lg-block"></div>
        ...
    </div>
    <!-- end navigation -->
</header>
<!-- end left menu -->
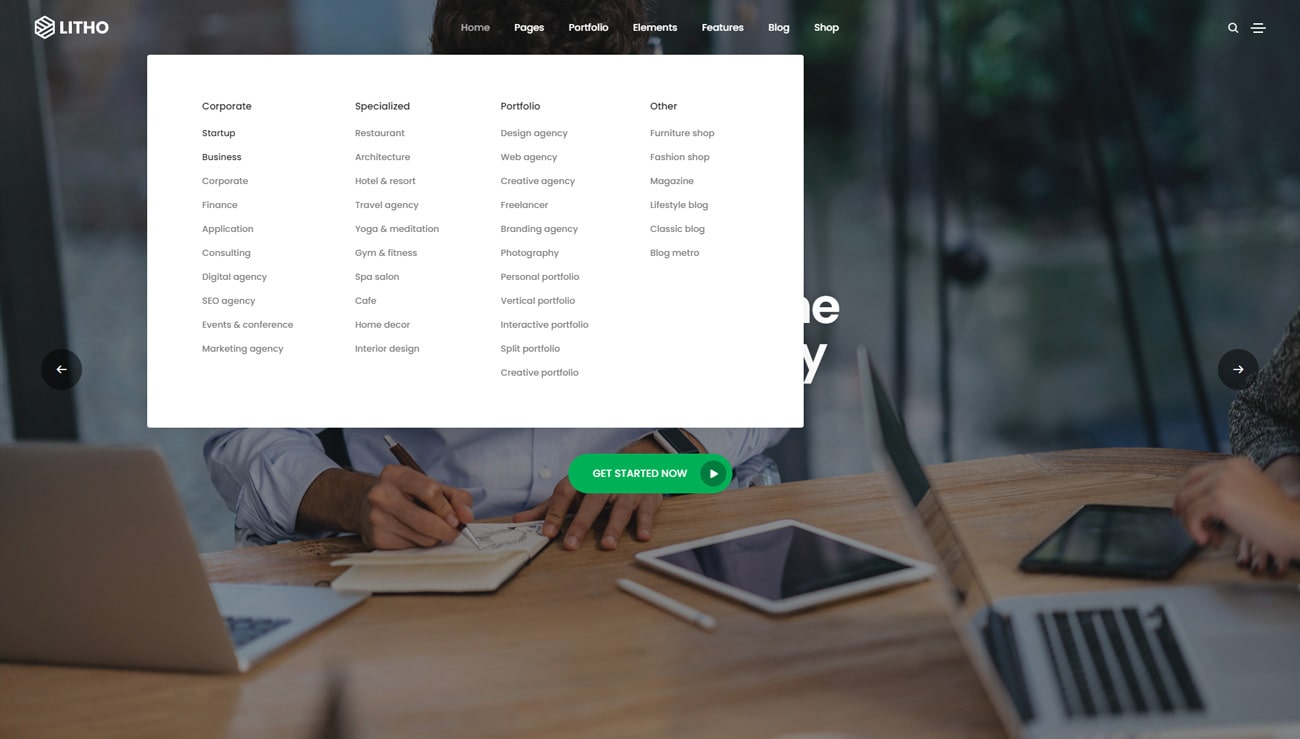
Mega menus
You can start using the mega menu in 2, 3, 4 or more columns. Try using the following code with below explanation:
- For 2 column menu there should be 2 UL items with
d-lg-inline-blockclass - For 3 column menu there should be 3 UL items with
d-lg-inline-blockclass - For 4 column menu there should be 4 UL items with
d-lg-inline-blockclass - And so on for more columns
<!-- start navigation -->
<header>
    <nav class="navbar navbar-expand-lg navbar-dark bg-transparent header-light fixed-top navbar-boxed header-reverse-scroll">
        <div class="container-fluid nav-header-container">
            <div class="col-auto col-sm-6 col-lg-2 me-auto ps-lg-0">
                ...
            </div>
            <div class="col-auto col-lg-8 menu-order px-lg-0">
                <button class="navbar-toggler float-end" type="button" data-bs-toggle="collapse" data-bs-target="#navbarNav" aria-controls="navbarNav" aria-label="Toggle navigation">
                    <span class="navbar-toggler-line"></span>
                    <span class="navbar-toggler-line"></span>
                    <span class="navbar-toggler-line"></span>
                    <span class="navbar-toggler-line"></span>
                </button>
                <div class="collapse navbar-collapse justify-content-center" id="navbarNav">
                    <ul class="navbar-nav alt-font">
                        <li class="nav-item dropdown megamenu">
                            <a href="#" class="nav-link">Home</a>
                            <i class="fa fa-angle-down dropdown-toggle" data-bs-toggle="dropdown" aria-hidden="true"></i>
                            <div class="menu-back-div dropdown-menu megamenu-content" role="menu">
                                <div class="d-lg-flex justify-content-center">
                                    <ul class="d-lg-inline-block">
                                        ...
                                    </ul>
                                    <ul class="d-lg-inline-block">
                                        ...
                                    </ul>
                                    <ul class="d-lg-inline-block">
                                        ...
                                    </ul>
                                </div>
                            </div>
                        </li>
                    </ul>
                </div>
            </div>
            <div class="col-auto col-lg-2 text-end pe-0 font-size-0">
                ...
            </div>
        </div>
    </nav>
</header>
<!-- end navigation -->
megamenu-dropdown-dark class in main menu UL, e.g. <ul class="navbar-nav alt-font">Mega menus with image
You can start using mega menu with image using below code.

<!-- start navigation -->
<header>
    <nav class="navbar navbar-expand-lg navbar-dark bg-transparent header-light fixed-top navbar-boxed header-reverse-scroll">
        <div class="container-fluid nav-header-container">
            <div class="col-auto col-sm-6 col-lg-2 me-auto ps-lg-0">
                ...
            </div>
            <div class="col-auto col-lg-8 menu-order px-lg-0">
                <button class="navbar-toggler float-end" type="button" data-bs-toggle="collapse" data-bs-target="#navbarNav" aria-controls="navbarNav" aria-label="Toggle navigation">
                    <span class="navbar-toggler-line"></span>
                    <span class="navbar-toggler-line"></span>
                    <span class="navbar-toggler-line"></span>
                    <span class="navbar-toggler-line"></span>
                </button>
                <div class="collapse navbar-collapse justify-content-center" id="navbarNav">
                    <ul class="navbar-nav alt-font">
                        <li class="nav-item dropdown megamenu">
                            <a href="javascript:void(0);" class="nav-link">Shop</a>
                            <i class="fa fa-angle-down dropdown-toggle" data-bs-toggle="dropdown" aria-hidden="true"></i>
                            <div class="menu-back-div dropdown-menu megamenu-content" role="menu">
                                <div class="d-lg-flex justify-content-center">
                                    <ul class="d-lg-inline-block md-margin-15px-bottom">
                                        ...
                                    </ul>
                                    <ul class="d-lg-inline-block d-none small-gap">
                                        <li>
                                            <a href="#" class="menu-banner-image"><img src="imagepath" alt=""/></a>
                                        </li>
                                    </ul>
                                </div>
                            </div>
                        </li>
                    </ul>
                </div>
            </div>
            <div class="col-auto col-lg-2 text-end pe-0 font-size-0">
                ...
            </div>
        </div>
    </nav>
</header>
<!-- end navigation -->
Simple dropdown menu
If you have less numbers of submenu items then you can use dropdown menu instead of mega menu.

<!-- start navigation -->
<header>
    <nav class="navbar navbar-expand-lg navbar-dark bg-transparent header-light fixed-top navbar-boxed header-reverse-scroll">
        <div class="container-fluid nav-header-container">
            <div class="col-auto col-sm-6 col-lg-2 me-auto ps-lg-0">
                ...
            </div>
            <div class="col-auto col-lg-8 menu-order px-lg-0">
                <button class="navbar-toggler float-end" type="button" data-bs-toggle="collapse" data-bs-target="#navbarNav" aria-controls="navbarNav" aria-label="Toggle navigation">
                    <span class="navbar-toggler-line"></span>
                    <span class="navbar-toggler-line"></span>
                    <span class="navbar-toggler-line"></span>
                    <span class="navbar-toggler-line"></span>
                </button>
                <div class="collapse navbar-collapse justify-content-center" id="navbarNav">
                    <ul class="navbar-nav alt-font">
                        <li class="nav-item dropdown simple-dropdown">
                            <a href="#" class="nav-link">Pages</a>
                            <i class="fa fa-angle-down dropdown-toggle" data-bs-toggle="dropdown" aria-hidden="true"></i>
                            <ul class="dropdown-menu" role="menu">
                                <!-- start sub menu column -->
                                <li class="dropdown">
                                    ...
                                </li>
                                <!-- end sub menu column -->
                                <!-- start sub menu column -->
                                <li class="dropdown">
                                    ...
                                </li>
                                <!-- end sub menu column -->
                            </ul>
                        </li>
                    </ul>
                </div>
            </div>
            <div class="col-auto col-lg-2 text-end pe-0 font-size-0">
                ...
            </div>
        </div>
    </nav>
</header>
<!-- end navigation -->
megamenu-dropdown-dark class in main menu UL, e.g. <ul class="navbar-nav alt-font">Mobile menu
You can choose between 3 Types of mobile menu while creating your Pages. The list of various mobile menu types & its descriptions are provided below for your reference:
1. Classic
Header with classic menu.
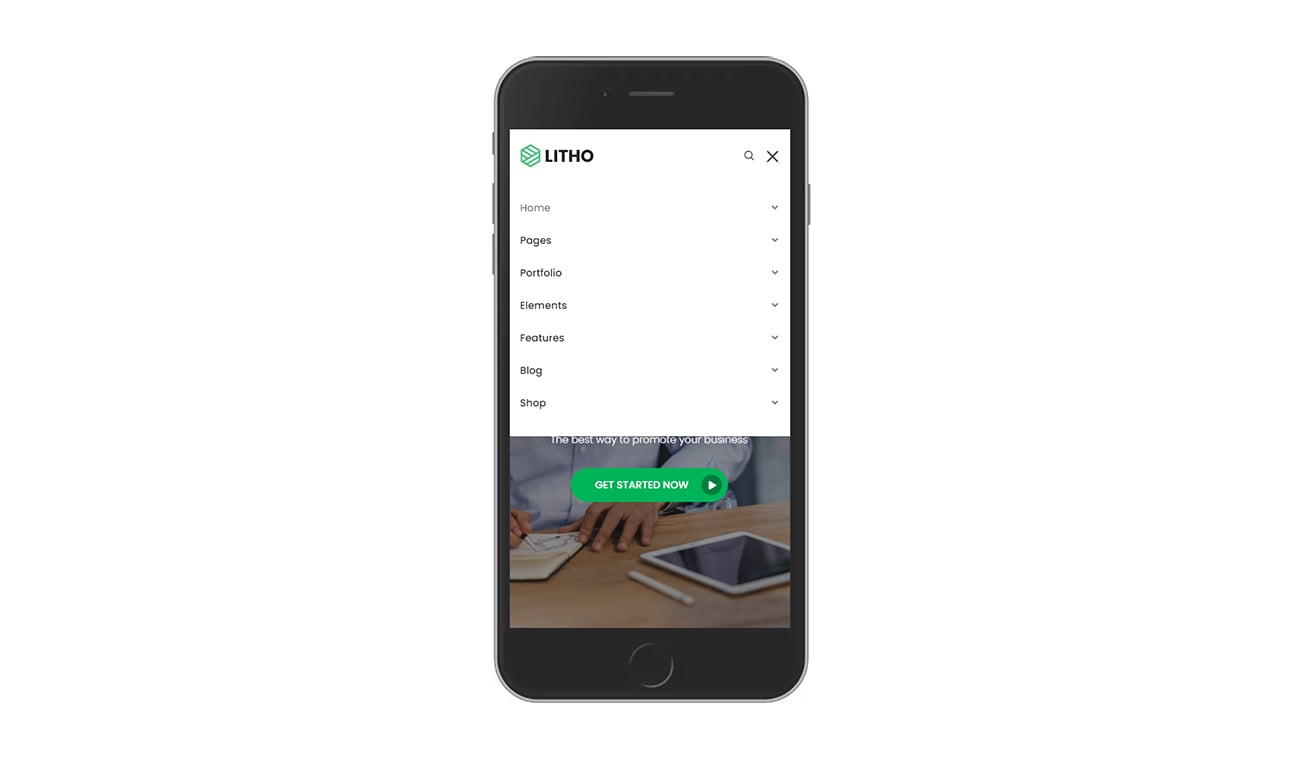
<body data-mobile-nav-style="classic">
    ...
</body>
2. Modern
Header with modern menu.
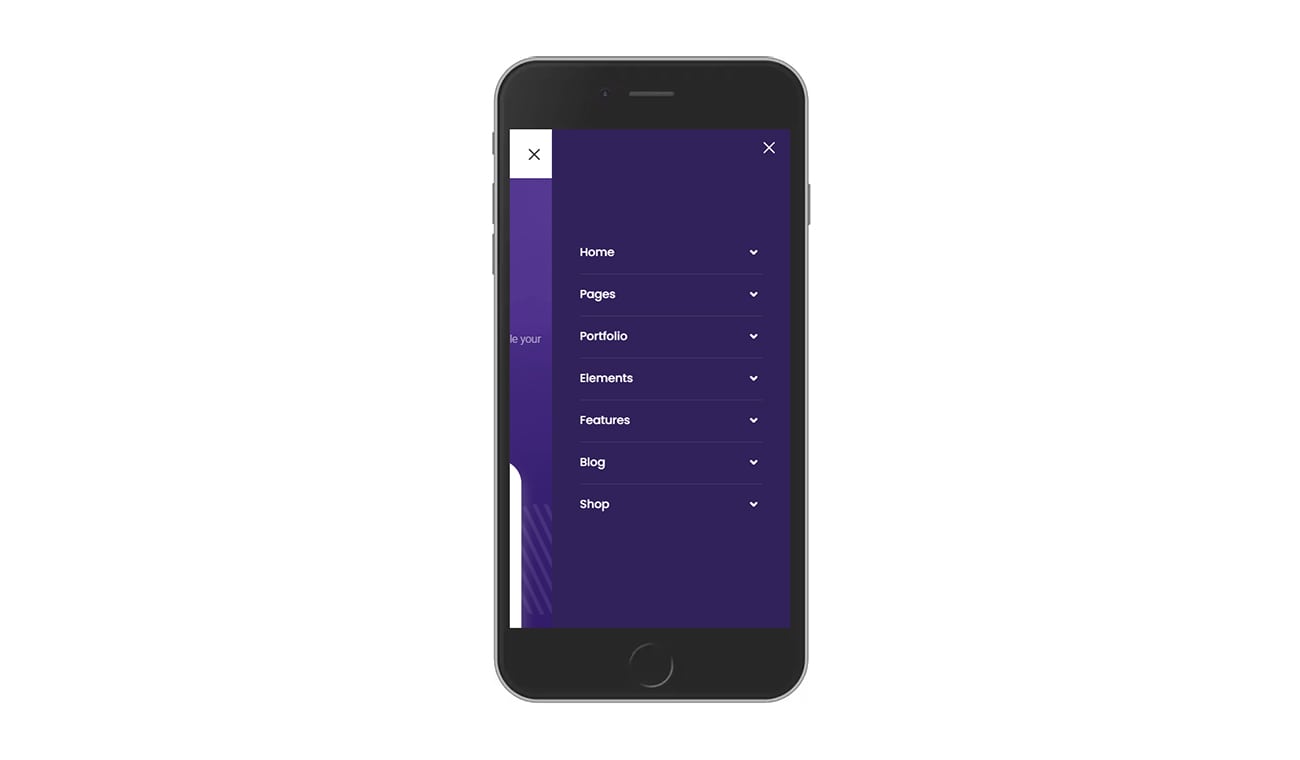
<body data-mobile-nav-trigger-alignment="right" data-mobile-nav-style="modern" data-mobile-nav-bg-color="#302158">
    ...
</body>
data-mobile-nav-trigger-alignment- Values can be here left or right and menu will display from the mentioned direction here either left or right.data-mobile-nav-style- Value should be modern here.data-mobile-nav-bg-color- Value should be your desired color code
3. Full
Header with full menu.
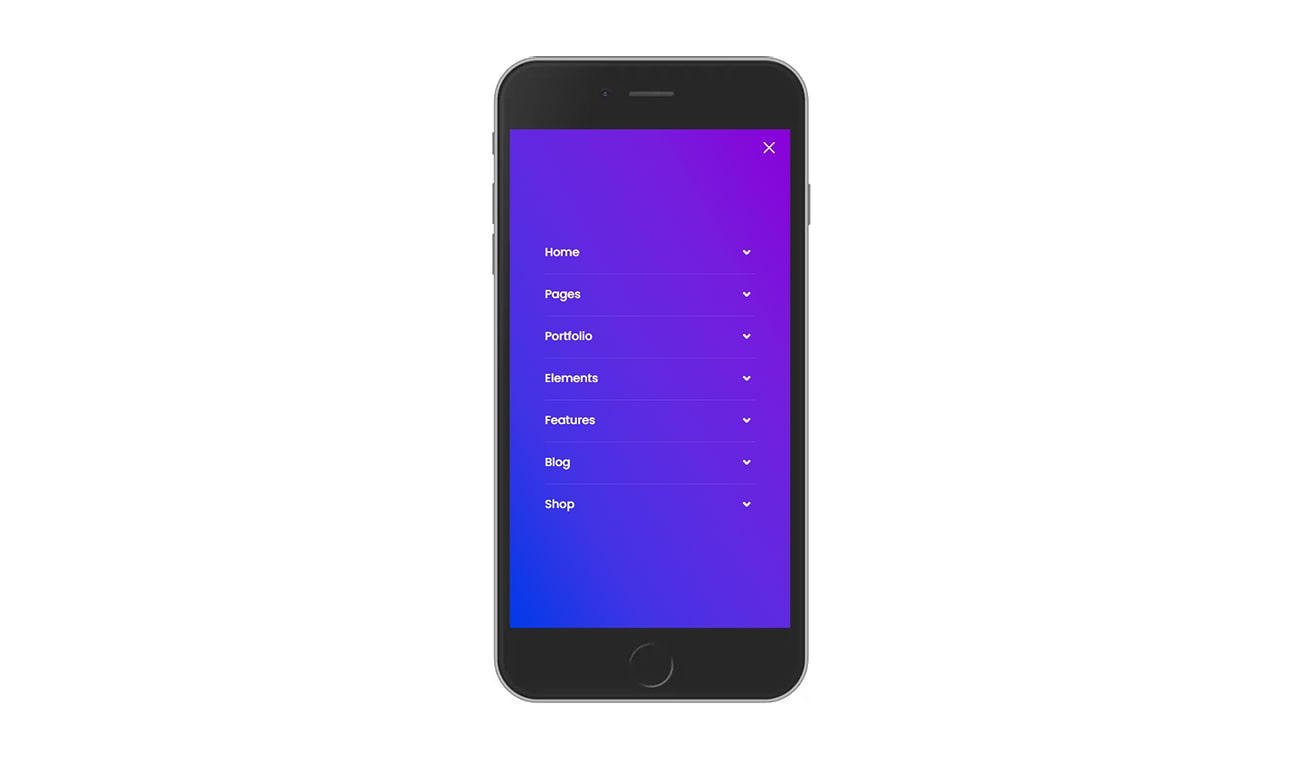
<body data-mobile-nav-style="full-screen-menu" data-mobile-nav-bg-color="">
    ...
</body>
data-mobile-nav-style- Value should be fullmenu here.data-mobile-nav-bg-color- Value should be your desired color code
Change header settings
You can easily make changes in NAV tag with changes of css classes.
CHANGE BACKGROUND COLOUR: You can easily add your favorite color to your navigation bar by adding color class like .bg-sky-blue , .bg-white or whatever you want, please make sure that same css class should be there in style.css file.
NAVBAR EFFECTS:
.always-fixed- Top header navigation will remain fixed and visible at top upon scroll..no-sticky- Top header navigation will disappear upon scroll..header-reverse-scroll- Top header navigation will appear at top upon upward scroll..responsive-sticky- Top header navigation will remain fixed and visible at top upon scroll, but with less height than standard header.
AFTER SCROLL - NAVBAR COLOR:
.navbar-light- Apply this css class in NAV tag, using this class menu will display with light background and dark text..navbar-dark- Apply this css class in NAV tag, using this class menu will display with dark background and light text.
Note You can find various scrolled version header demos below:
Always fixed - header-always-fixed.html
Non-sticky or Disable fixed - header-disable-fixed.html
Sticky on Reverse scroll - header-reverse-scroll.html
Responsive sticky - header-responsive-sticky.html
Page titles
You can choose between 10 types of page titles while creating your pages. The list of page title options & its descriptions are provided below for your reference:
1. Left alignment
It includes page title with alligned left, sub title along side page title and breadcrumb in right part. See below image and code for more inforamtion.
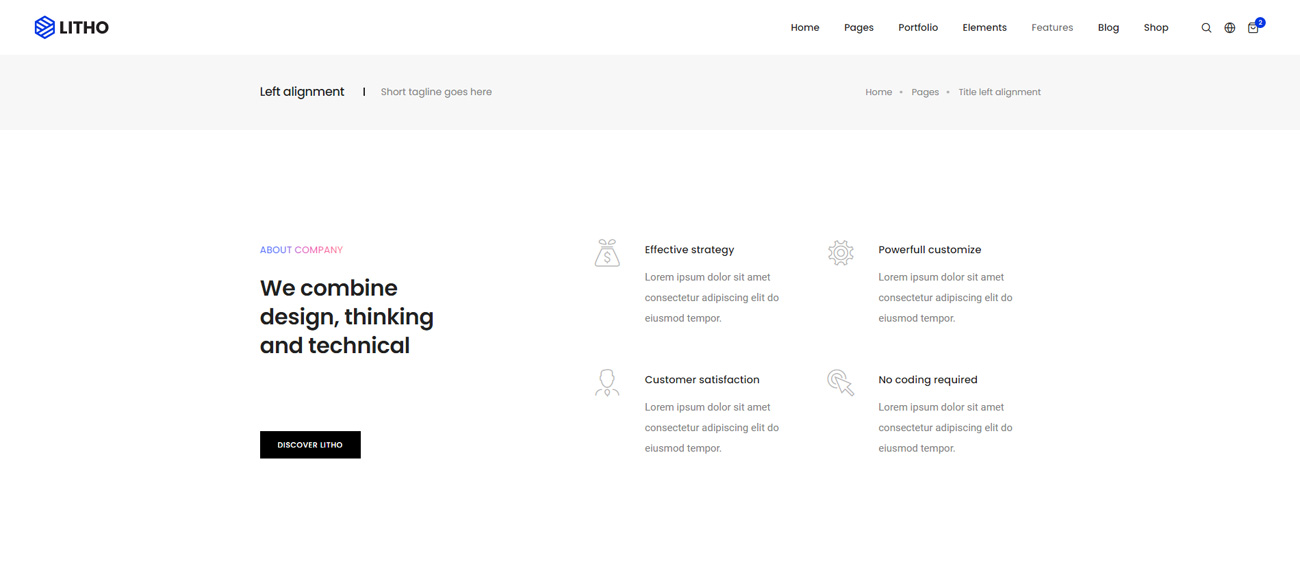
<!-- start page title -->
<section class="wow animate__fadeIn bg-light-gray padding-40px-tb sm-padding-30px-tb page-title-small">
    <div class="container">
        <div class="row align-items-center justify-content-center">
            <div class="col-xl-8 col-lg-6 text-center text-lg-start">
                <h1 class="alt-font text-extra-dark-gray font-weight-500 no-margin-bottom d-inline-block">Left alignment</h1>
                <span class="alt-font text-medium d-block d-md-inline-block sm-margin-5px-top">Short tagline goes here</span>
            </div>
            <div class="col-xl-4 col-lg-6 text-center text-lg-end breadcrumb justify-content-center justify-content-lg-end text-small alt-font md-margin-15px-top">
                <ul>
                    <li><a href="#">Home</a></li>
                    <li><a href="#">Pages</a></li>
                    <li>Title left alignment</li>
                </ul>
            </div>
        </div>
    </div>
</section>
<!-- end page title -->
2. Right alignment
It includes page title with alligned right, sub title along side page title and breadcrumb in left part. See below image and code for more inforamtion.
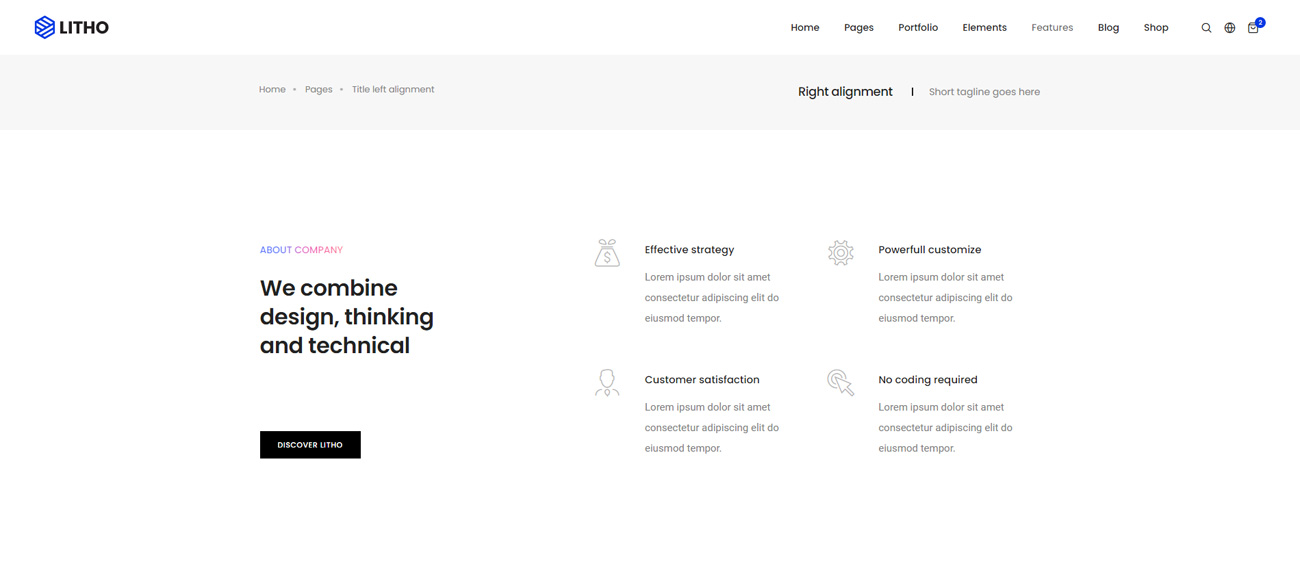
<!-- start page title -->
<section class="wow animate__fadeIn bg-light-gray padding-40px-tb xs-padding-30px-tb page-title-small">
    <div class="container">
        <div class="row align-items-center justify-content-center">
            <div class="col-xl-4 col-lg-6 breadcrumb justify-content-center justify-content-lg-start text-small alt-font md-margin-15px-bottom">
                <ul class="xs-text-center">
                    <li><a href="#">Home</a></li>
                    <li><a href="#">Pages</a></li>
                    <li>Title left alignment</li>
                </ul>
            </div>
            <div class="col-xl-8 col-lg-6 text-center text-lg-end">
                <h1 class="alt-font text-extra-dark-gray font-weight-500 no-margin-bottom d-inline-block">Right alignment</h1>
                <span class="alt-font text-medium d-block d-md-inline-block sm-margin-5px-top">Short tagline goes here</span>
            </div>
        </div>
    </div>
</section>
<!-- end page title -->
3. Center alignment
It includes page title and sub title alligned center. See below image and code for more inforamtion.
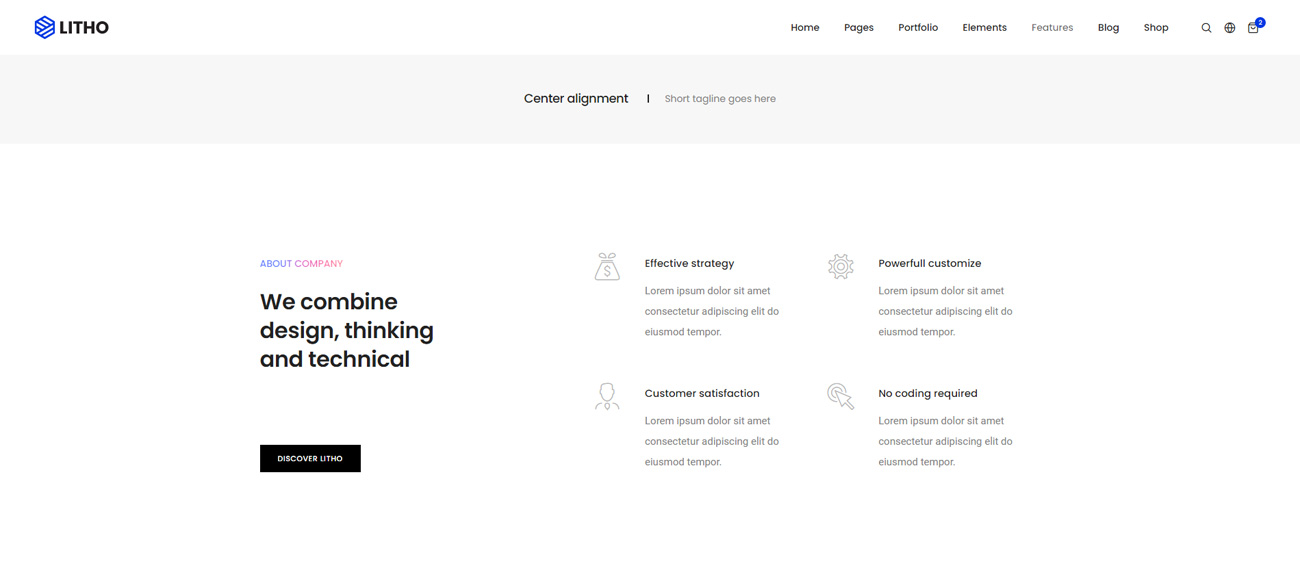
<!-- start page title -->
<section class="wow animate__fadeIn bg-light-gray padding-50px-tb sm-padding-30px-tb page-title-small">
    <div class="container">
        <div class="row align-items-center justify-content-center">
            <div class="col-12 text-center">
                <h1 class="alt-font text-extra-dark-gray font-weight-500 no-margin-bottom d-inline-block">Center alignment</h1>
                <span class="alt-font text-medium d-block d-md-inline-block sm-margin-5px-top">Short tagline goes here</span>
            </div>
        </div>
    </div>
</section>
<!-- end page title -->
4. Colorful style
This style have different background color display with fadein effect and you can add your desired color codes comma separated in data-backgroundColor attribute.

<!-- start page title -->
<section class="half-section wow animate__fadeIn page-title-colorful" data-backgroundColor="#0038e3,#ff6737,#25b15f,#cc2d92">
    <div class="container">
        <div class="d-flex flex-column flex-md-row justify-content-end extra-small-screen">
            <div class="w-100 w-md-50 align-self-end page-title-extra-small">
                <h1 class="alt-font text-white position-relative padding-85px-left padding-15px-right sm-padding-55px-left margin-30px-bottom sm-margin-20px-bottom"><span class="page-title-separator-line bg-white w-70px sm-w-40px"></span>Page title colorful style</h1>
            </div>
            <div class="w-100 w-md-50 align-self-end">
                <h4 class="alt-font text-white font-weight-500 margin-30px-bottom">We create brand new corporate identities</h4>
            </div>
        </div>
    </div>
</section>
<!-- end page title -->
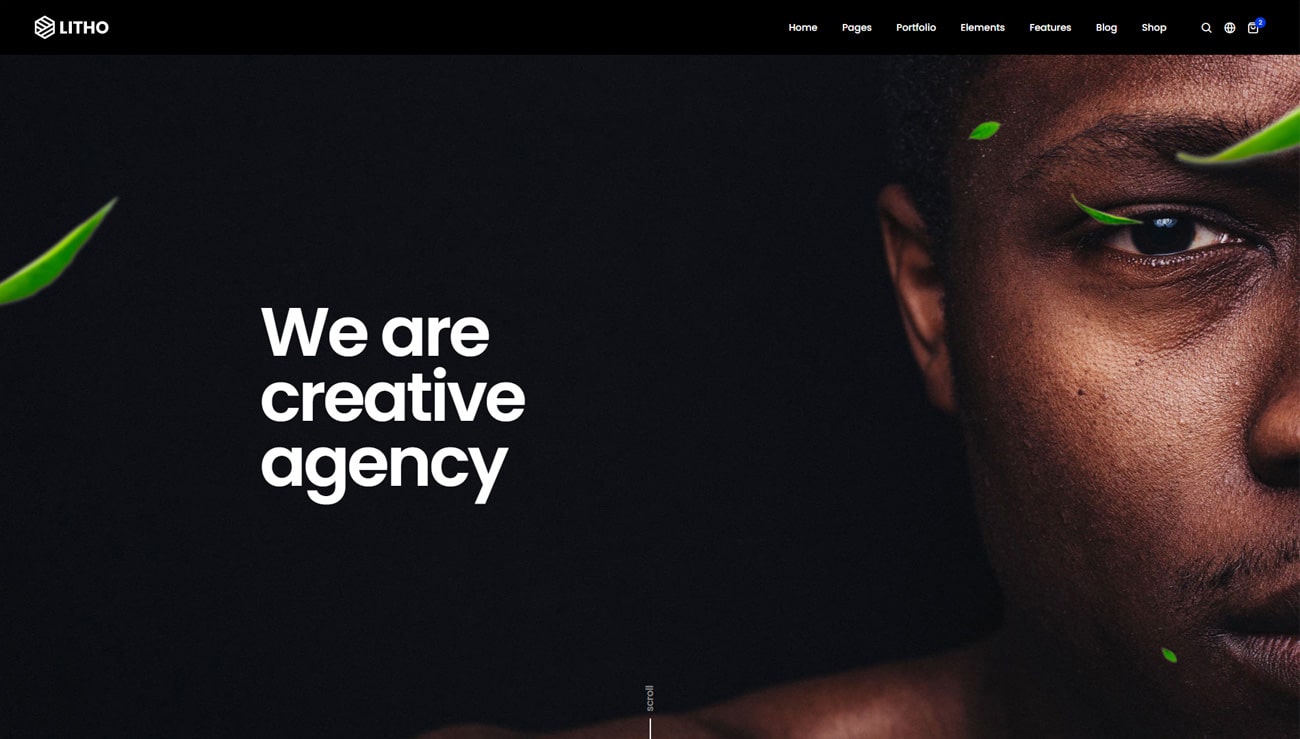
5. Big typography
It includes page title and sub title alligned center with small title and big sub title. See below image and code for more inforamtion.

<!-- start page title -->
<section class="parallax bg-extra-dark-gray" data-parallax-background-ratio="0.5" style="background-image:url('image path');">
    <div class="opacity-medium bg-extra-dark-gray"></div>
    <div class="container">
        <div class="row align-items-stretch justify-content-center small-screen">
            <div class="col-12 col-xl-6 col-lg-7 col-md-8 position-relative page-title-extra-small text-center d-flex justify-content-center flex-column">
                <h1 class="alt-font text-white opacity-6 margin-20px-bottom">Page title big typography</h1>
                <h2 class="text-white alt-font font-weight-500 letter-spacing-minus-1px line-height-50 sm-line-height-45 xs-line-height-30 no-margin-bottom">we are a creative design studio</h2>
            </div>
            <div class="down-section text-center"><a href="#down-section" class="section-link"><i class="ti-arrow-down icon-extra-small text-white bg-transparent-black padding-15px-all xs-padding-10px-all border-radius-100"></i></a></div>
        </div>
    </div>
</section>
<!-- end page title -->
6. Parallax background
It includes page title and sub title alligned center with background image and parallax effect. See below image and code for more inforamtion.

<!-- start page title -->
<section class="parallax half-section" data-parallax-background-ratio="0.5" style="background-image:url('image path');">
    <div class="opacity-medium bg-extra-dark-gray"></div>
    <div class="container">
        <div class="row justify-content-center">
            <div class="col-12 col-xl-6 col-lg-7 col-md-10">
                <div class="d-flex flex-column small-screen position-relative z-index-1">
                    <div class="page-title-large text-center mt-auto">
                        <span class="text-white opacity-6 alt-font margin-5px-bottom d-block xs-line-height-20px">Unlimited power and customization possibilities</span>
                        <h1 class="text-white alt-font font-weight-500 letter-spacing-minus-1 margin-10px-bottom">Parallax background</h1>
                    </div>
                    <div class="text-center mt-auto">
                        <div class="breadcrumb justify-content-center alt-font text-small no-margin-bottom">
                            <ul>
                                <li><a href="#" class="text-extra-light-gray text-white-hover">Home</a></li>
                                <li><a href="#" class="text-extra-light-gray text-white-hover">Pages</a></li>
                                <li class="text-extra-light-gray">Breadcrumbs</li>
                            </ul>
                        </div>
                    </div>
                </div>
            </div>
        </div>
    </div>
</section>
<!-- end page title -->
7. Separate breadcrumbs
It includes page title and sub title alligned center with breadcrumbs at the bottom of page title. See below image and code for more inforamtion.

<!-- start page title -->
<section class="cover-background background-position-top wow animate__fadeIn" style="background-image:url('image path');">
    <div class="opacity-medium bg-extra-dark-gray"></div>
    <div class="container">
        <div class="row align-items-center justify-content-center">
            <div class="col-12 col-xl-6 col-lg-7 col-md-10 position-relative page-title-large text-center">
                <span class="d-block text-white opacity-6 alt-font margin-5px-bottom xs-line-height-20px">We provide innovative solutions to expand business</span>
                <h1 class="alt-font text-white font-weight-500 no-margin-bottom">Image after breadcrumbs</h1>
            </div>
        </div>
    </div>
</section>
<!-- end page title -->
<!-- start breadcrumb section -->
<section class="wow animate__fadeIn padding-15px-tb border-bottom border-color-extra-light-gray">
    <div class="container">
        <div class="row align-items-center justify-content-center">
            <div class="col-12">
                <div class="breadcrumb justify-content-center justify-content-lg-start alt-font text-small no-margin-bottom">
                    <!-- start breadcrumb -->
                    <ul>
                        <li><a href="#">Home</a></li>
                        <li><a href="#">Pages</a></li>
                        <li>Breadcrumbs</li>
                    </ul>
                    <!-- end breadcrumb -->
                </div>
            </div>
        </div>
    </div>
</section>
<!-- end breadcrumb section -->
8. Gallery background
It includes page title and sub title alligned center with image gallery in background. See below image and code for more inforamtion.

<!-- start page title -->
<section class="no-padding one-third-screen position-relative wow animate__fadeIn">
    <div class="opacity-medium bg-extra-dark-gray z-index-0"></div>
    <div class="container">
        <div class="row align-items-center justify-content-center one-third-screen">
            <div class="col-12 col-xl-6 col-lg-7 col-md-10 position-relative page-title-large text-center">
                <span class="d-block text-white opacity-6 margin-5px-bottom alt-font text-extra-medium font-weight-300">we provide innovative solutions</span>
                <h1 class="alt-font text-white letter-spacing-minus-1px font-weight-500 no-margin-bottom">Page title gallery background</h1>
            </div>
            <div class="down-section text-center"><a href="#down-section" class="section-link"><i class="feather icon-feather-arrow-down icon-extra-small text-white bg-fast-blue padding-15px-all xs-padding-10px-all border-radius-100"></i></a></div>
        </div>
    </div>
    <div class="swiper-container z-index-minus-2 position-absolute top-0px" data-slider-options='{ "loop": true, "slidesPerView": 1, "effect": "fade", "navigation": { "nextEl": ".swiper-auto-next", "prevEl": ".swiper-auto-prev" }, "keyboard": { "enabled": true, "onlyInViewport": true }, "autoplay": { "delay": 5000, "disableOnInteraction": false }, "fadeEffect": { "crossFade": true } }'>
        <div class="swiper-wrapper">
            <!-- start slider item -->
            <div class="swiper-slide cover-background one-third-screen" style="background-image:url('image path');"></div>
            <!-- end slider item -->
            <!-- start slider item -->
            <div class="swiper-slide cover-background one-third-screen" style="background-image:url('image path');"></div>
            <!-- end slider item -->
            <!-- start slider item -->
            <div class="swiper-slide cover-background one-third-screen" style="background-image:url('image path');"></div>
            <!-- end slider item -->
        </div>
    </div>
</section>
<!-- end page title -->
9. Background video
It includes page title and sub title alligned center with image video in background. See below image and code for more inforamtion.

<!-- start page title -->
<section class="no-padding one-third-screen position-relative wow animate__fadeIn">
    <div class="opacity-full bg-gradient-fast-blue-purple z-index-0"></div>
    <div class="container">
        <div class="row align-items-end justify-content-center one-third-screen">
            <div class="col-12 col-xl-6 col-lg-7 col-md-10 position-relative page-title-large text-center">
                <span class="margin-5px-bottom alt-font text-white opacity-6 d-block">Intuitive custom made shortcodes</span>
                <h1 class="text-white alt-font font-weight-500 letter-spacing-minus-1 margin-5-rem-bottom sm-margin-3-rem-bottom">Background video</h1>
                <span class="w-1px h-80px d-inline-block bg-white margin-5-rem-bottom sm-margin-3-rem-bottom sm-h-50px"></span>
            </div>
        </div>
    </div>
    <video loop="" autoplay="" controls="" muted class="html-video" poster="image path">
        <source type="video/mp4" src="video path" />
        <source type="video/webm" src="video path" />
    </video>
</section>
<!-- end page title -->
10. Mini version
It includes page title alligned left and breadcrumb in right part.
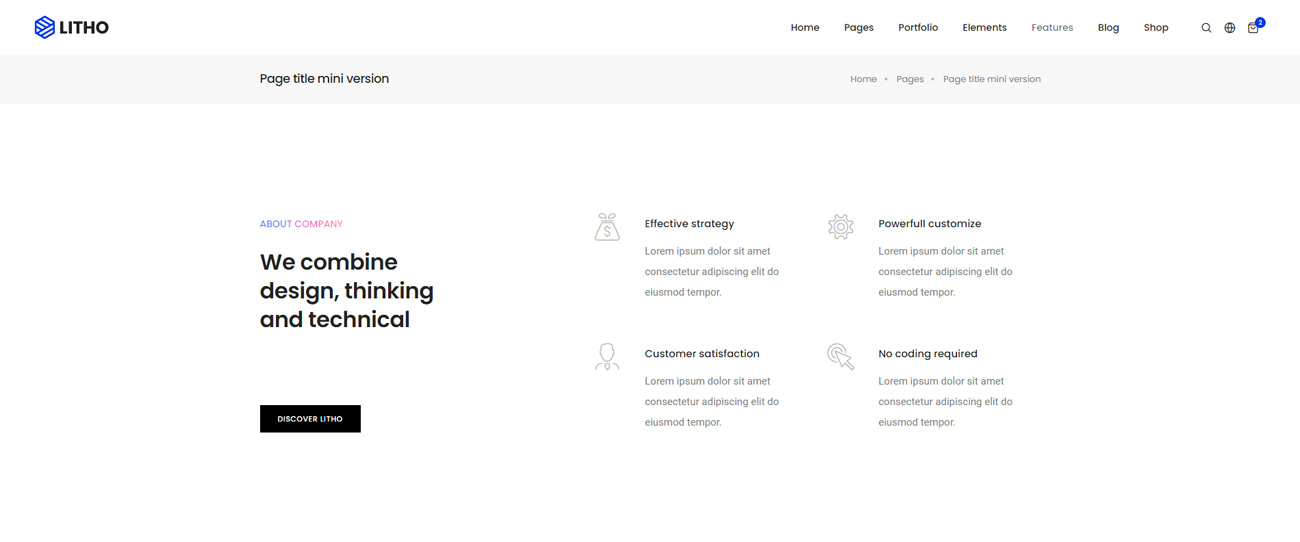
<!-- start page title -->
<section class="wow animate__fadeIn bg-light-gray padding-25px-tb page-title-small">
    <div class="container">
        <div class="row align-items-center justify-content-center">
            <div class="col-12 col-xl-8 col-lg-6">
                <h1 class="alt-font text-extra-dark-gray font-weight-500 no-margin-bottom text-center text-lg-start">Page title mini version</h1>
            </div>
            <div class="col-12 col-xl-4 col-lg-6 breadcrumb justify-content-center justify-content-lg-end text-small alt-font md-margin-10px-top">
                <ul class="xs-text-center">
                    <li><a href="#">Home</a></li>
                    <li><a href="#">Pages</a></li>
                    <li>Page title mini version</li>
                </ul>
            </div>
        </div>
    </div>
</section>
<!-- end page title -->
Page layout
You can choose between 3 Types of page layout while creating your page. The list of page layout options & its descriptions are provided below for your reference:
Full width
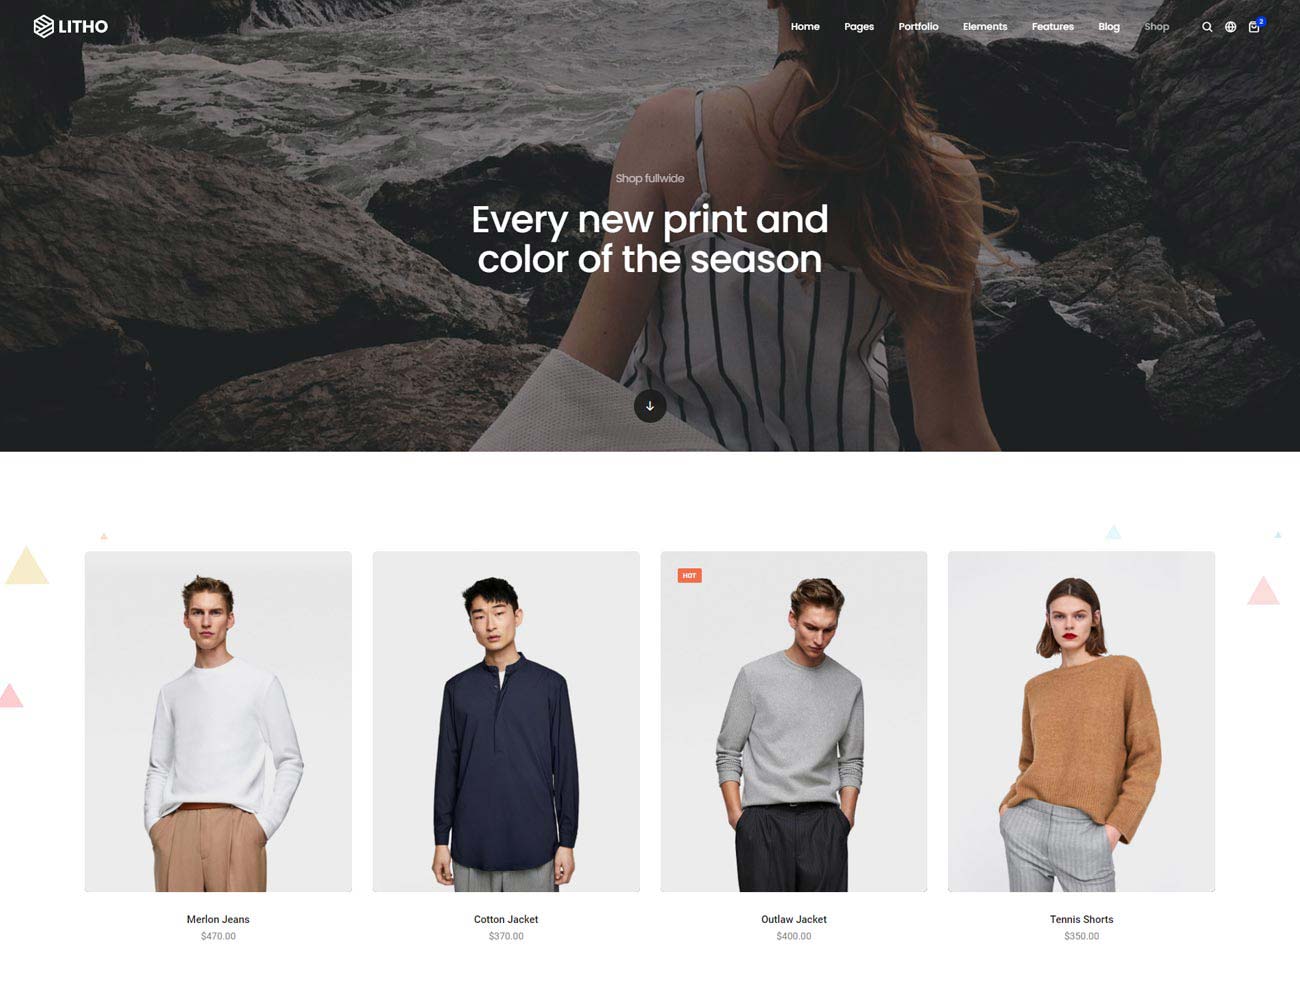
<!-- start header -->
<header>
    <nav class="navbar navbar-expand-lg navbar-light bg-transparent header-light fixed-top header-reverse-scroll">
        ...
    </nav>
</header>
<!-- end header -->
<!-- start section -->
<section class="pt-0 padding-five-lr xs-no-padding-lr">
    <div class="container-fluid">
        <div class="row">
            <div class="col-12 shopping-content">
                ...
            </div>
        </div>
    </div>
</section>
<!-- end section -->
<!-- start footer -->
<footer class="footer-dark bg-slate-blue">
    ...
</footer>
<!-- end footer -->
Note You can find code in shop-wide.html page for your reference.
Left sidebar
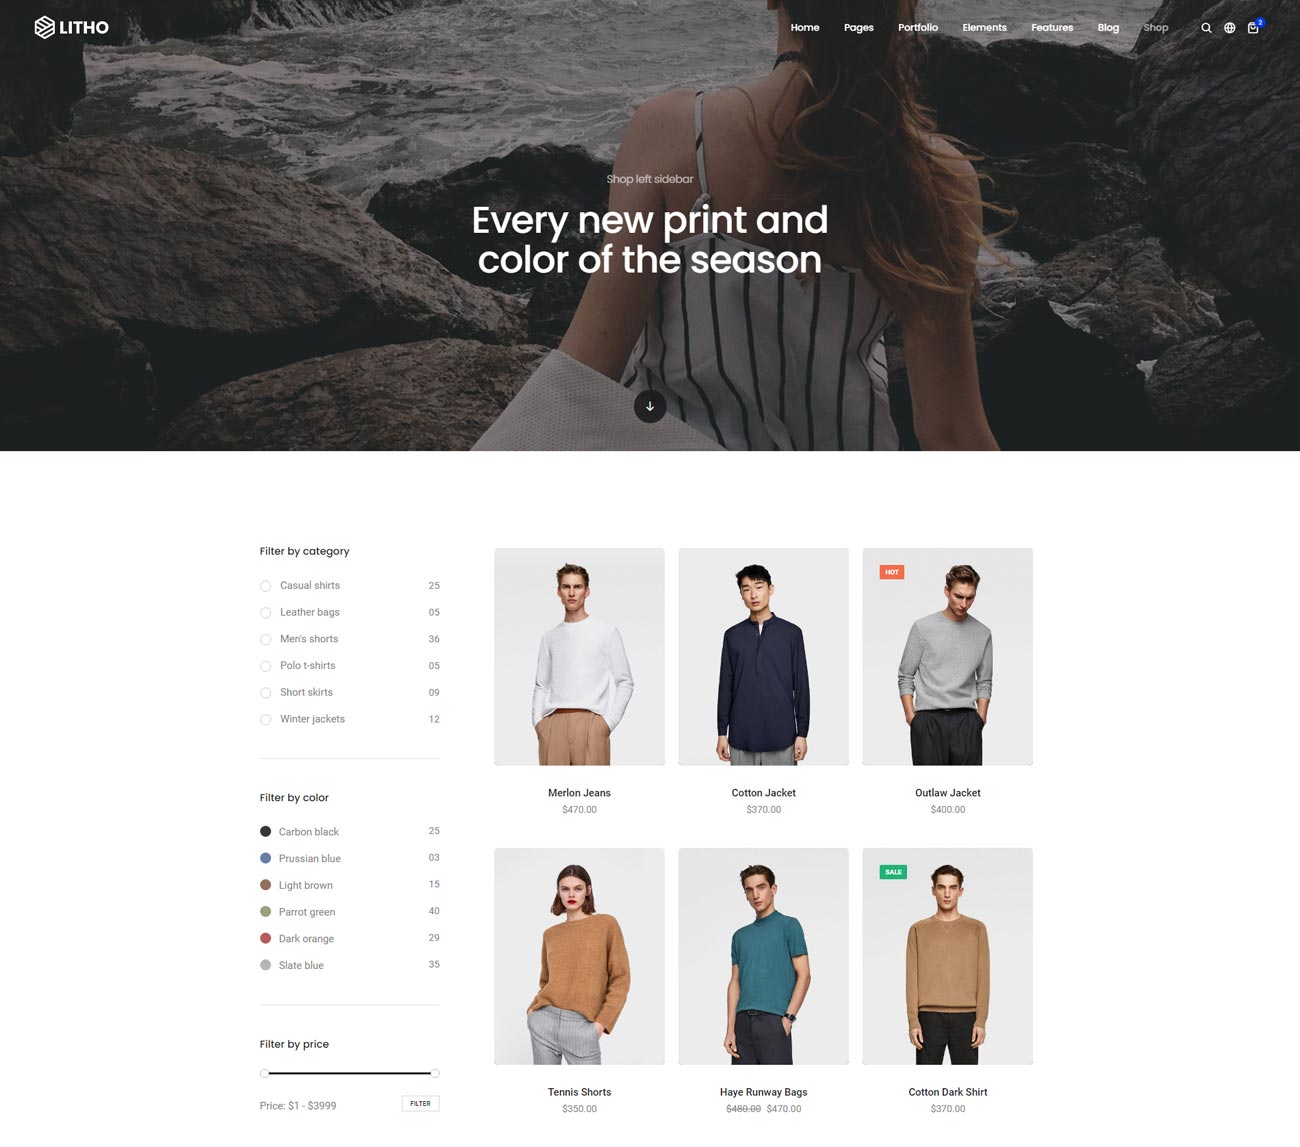
<!-- start header -->
<header>
    <!-- start navigation -->
    <nav class="navbar navbar-expand-lg navbar-light bg-transparent header-light fixed-top header-reverse-scroll">
        ...
    </nav>
    <!-- end navigation -->
</header>
<!-- end header -->
<!-- start page title -->
<section class="half-section parallax" data-parallax-background-ratio="0.5" style="background-image:url('image path');">
    ...
</section>
<!-- end page title -->
<!-- start section -->
<section id="down-section" class="shopping-left-side-bar pt-0">
    <div class="container">
        <div class="row">
            <div class="col-12 col-lg-9 col-md-8 shopping-content padding-55px-left md-padding-15px-left sm-margin-30px-bottom">
                ...
            </div>
            <!-- start sidebar -->
            <aside class="col-12 col-lg-3 col-md-4 shopping-sidebar">
                ...
            </aside>
            <!-- end sidebar -->
        </div>
    </div>
</section>
<!-- end section -->
<!-- start footer -->
<footer class="footer-dark bg-slate-blue">
    ...
</footer>
<!-- end footer -->
Note You can find code in shop-left-sidebar.html page for your reference.
Right sidebar
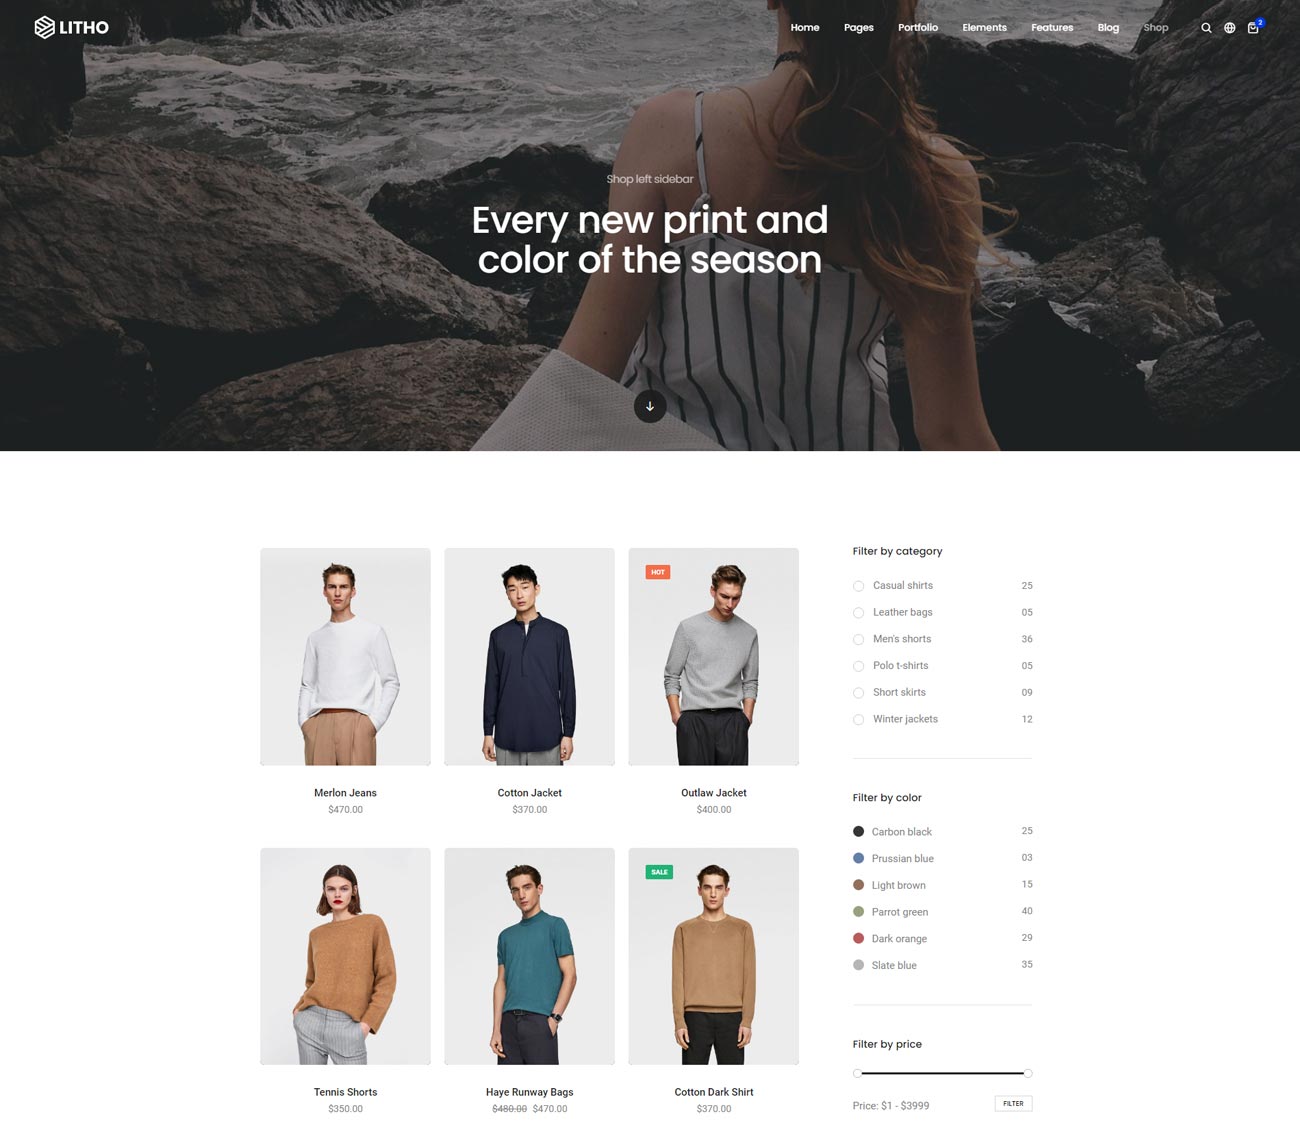
<!-- start header -->
<header>
    ...
</header>
<!-- end header -->
<!-- start page title -->
<section class="half-section parallax" data-parallax-background-ratio="0.5" style="background-image:url('image path');">
    ...
</section>
<!-- end page title -->
<!-- start section -->
<section class="shopping-right-side-bar pt-0">
    <div class="container">
        <div class="row">
            <div class="col-12 col-lg-9 col-md-8 shopping-content padding-55px-right md-padding-15px-right sm-margin-30px-bottom">
                ...
            </div>
            <!-- start sidebar -->
            <aside class="col-12 col-lg-3 col-md-4 shopping-sidebar">
                ...
            </aside>
            <!-- end sidebar -->
        </div>
    </div>
</section>
<!-- end section -->
<!-- start footer -->
<footer class="footer-dark bg-slate-blue">
    ...
</footer>
<!-- end footer -->
Note You can find code in shop-right-sidebar.html page for your reference.
Columns & grid
Basic grid layouts to get you familiar with building within the Bootstrap grid system. We have designed entire template in BootStrap 5, so you can find detaild documentation on grid here https://getbootstrap.com/docs/5.0/layout/grid/
Three equal columns
Get three equal-width columns starting at desktops and scaling to large desktops. On mobile devices, tablets and below, the columns will automatically stack.
ColumnColumnColumn<div class="container">
<div class="row">
<div class="col">
Column
</div>
<div class="col">
Column
</div>
<div class="col">
Column
</div>
</div>
</div>
The above example creates three equal-width columns on small, medium, large, and extra large devices using our predefined grid classes. Those columns are centered in the page with the parent .container.
Grid options
Bootstrap’s grid system can adapt across all six default breakpoints, and any breakpoints you customize. The six default grid tiers are as follow:
- Extra small (xs)
- Small (sm)
- Medium (md)
- Large (lg)
- Extra large (xl)
- Extra extra large (xxl)
As noted above, each of these breakpoints have their own container, unique class prefix, and modifiers. Here’s how the grid changes across these breakpoints:
|
xs <576px |
sm ≥576px |
md ≥768px |
lg ≥992px |
xl ≥1200px |
xxl ≥1400px |
|
|---|---|---|---|---|---|---|
Container max-width |
None (auto) | 540px | 720px | 960px | 1140px | 1320px |
| Class prefix | .col- |
.col-sm- |
.col-md- |
.col-lg- |
.col-xl- |
.col-xxl- |
| # of columns | 12 | |||||
| Gutter width | 1.5rem (.75rem on left and right) | |||||
| Custom gutters | Yes | |||||
| Nestable | Yes | |||||
| Column ordering | Yes | |||||
Auto-layout columns
Utilize breakpoint-specific column classes for easy column sizing without an explicit numbered class like .col-sm-6.
Equal-width
For example, here are two grid layouts that apply to every device and viewport, from xs to xxl. Add any number of unit-less classes for each breakpoint you need and every column will be the same width.
1 of 22 of 21 of 32 of 33 of 3<div class="container">
<div class="row">
<div class="col">
1 of 2
</div>
<div class="col">
2 of 2
</div>
</div>
<div class="row">
<div class="col">
1 of 3
</div>
<div class="col">
2 of 3
</div>
<div class="col">
3 of 3
</div>
</div>
</div>
Variable width content
Use col-{breakpoint}-auto classes to size columns based on the natural width of their content.
1 of 3Variable width content3 of 31 of 3Variable width content3 of 3<div class="container">
<div class="row justify-content-md-center">
<div class="col col-lg-2">
1 of 3
</div>
<div class="col-md-auto">
Variable width content
</div>
<div class="col col-lg-2">
3 of 3
</div>
</div>
<div class="row">
<div class="col">
1 of 3
</div>
<div class="col-md-auto">
Variable width content
</div>
<div class="col col-lg-2">
3 of 3
</div>
</div>
</div>
Responsive classes
Bootstrap’s grid includes six tiers of predefined classes for building complex responsive layouts. Customize the size of your columns on extra small, small, medium, large, or extra large devices however you see fit.
All breakpoints
For grids that are the same from the smallest of devices to the largest, use the .col and .col-* classes. Specify a numbered class when you need a particularly sized column; otherwise, feel free to stick to .col.
colcolcolcolcol-8col-4<div class="container">
<div class="row">
<div class="col">col</div>
<div class="col">col</div>
<div class="col">col</div>
<div class="col">col</div>
</div>
<div class="row">
<div class="col-8">col-8</div>
<div class="col-4">col-4</div>
</div>
</div>
Stacked to horizontal
Using a single set of .col-sm-* classes, you can create a basic grid system that starts out stacked and becomes horizontal at the small breakpoint (sm).
col-sm-8col-sm-4col-smcol-smcol-sm<div class="container">
<div class="row">
<div class="col-sm-8">col-sm-8</div>
<div class="col-sm-4">col-sm-4</div>
</div>
<div class="row">
<div class="col-sm">col-sm</div>
<div class="col-sm">col-sm</div>
<div class="col-sm">col-sm</div>
</div>
</div>
Mix and match
Don’t want your columns to simply stack in some grid tiers? Use a combination of different classes for each tier as needed. See the example below for a better idea of how it all works.
.col-md-8.col-6 .col-md-4.col-6 .col-md-4.col-6 .col-md-4.col-6 .col-md-4.col-6.col-6<div class="container"> <!-- Stack the columns on mobile by making one full-width and the other half-width --> <div class="row"> <div class="col-md-8">.col-md-8</div> <div class="col-6 col-md-4">.col-6 .col-md-4</div> </div> <!-- Columns start at 50% wide on mobile and bump up to 33.3% wide on desktop --> <div class="row"> <div class="col-6 col-md-4">.col-6 .col-md-4</div> <div class="col-6 col-md-4">.col-6 .col-md-4</div> <div class="col-6 col-md-4">.col-6 .col-md-4</div> </div> <!-- Columns are always 50% wide, on mobile and desktop --> <div class="row"> <div class="col-6">.col-6</div> <div class="col-6">.col-6</div> </div> </div>
Row columns
Use the responsive .row-cols-* classes to quickly set the number of columns that best render your content and layout. Whereas normal .col-* classes apply to the individual columns (e.g., .col-md-4), the row columns classes are set on the parent .row as a default for contained columns. With .row-cols-auto you can give the columns their natural width.
Use these row columns classes to quickly create basic grid layouts or to control your card layouts and override when needed at the column level.
ColumnColumnColumnColumn<div class="container">
<div class="row row-cols-2">
<div class="col">Column</div>
<div class="col">Column</div>
<div class="col">Column</div>
<div class="col">Column</div>
</div>
</div>
ColumnColumnColumnColumn<div class="container">
<div class="row row-cols-3">
<div class="col">Column</div>
<div class="col">Column</div>
<div class="col">Column</div>
<div class="col">Column</div>
</div>
</div>
ColumnColumnColumnColumn<div class="container">
<div class="row row-cols-auto">
<div class="col">Column</div>
<div class="col">Column</div>
<div class="col">Column</div>
<div class="col">Column</div>
</div>
</div>
ColumnColumnColumnColumn<div class="container">
<div class="row row-cols-4">
<div class="col">Column</div>
<div class="col">Column</div>
<div class="col">Column</div>
<div class="col">Column</div>
</div>
</div>
ColumnColumnColumnColumn<div class="container">
<div class="row row-cols-4">
<div class="col">Column</div>
<div class="col">Column</div>
<div class="col-6">Column</div>
<div class="col">Column</div>
</div>
</div>
ColumnColumnColumnColumn<div class="container">
<div class="row row-cols-1 row-cols-sm-2 row-cols-md-4">
<div class="col">Column</div>
<div class="col">Column</div>
<div class="col">Column</div>
<div class="col">Column</div>
</div>
</div>
ColumnColumnColumnColumnColumnColumnColumnColumnColumnColumnColumnColumn<div class="container">
<div class="row row-cols-2 row-cols-lg-3">
<div class="col">Column</div>
<div class="col">Column</div>
<div class="col">Column</div>
<div class="col">Column</div>
<div class="col">Column</div>
<div class="col">Column</div>
<div class="col-4 col-lg-2">Column</div>
<div class="col-4 col-lg-2">Column</div>
<div class="col-4 col-lg-2">Column</div>
<div class="col-4 col-lg-2">Column</div>
<div class="col-4 col-lg-2">Column</div>
<div class="col-4 col-lg-2">Column</div>
</div>
</div>
You can also use the accompanying Sass mixin, row-cols():
.element {
  // Three columns to start
  @include row-cols(3);

  // Five columns from medium breakpoint up
  @include media-breakpoint-up(md) {
    @include row-cols(5);
  }
}
Nesting
To nest your content with the default grid, add a new .row and set of .col-sm-* columns within an existing .col-sm-* column. Nested rows should include a set of columns that add up to 12 or fewer (it is not required that you use all 12 available columns).
Level 1: .col-sm-3Level 2: .col-8 .col-sm-6Level 2: .col-4 .col-sm-6<div class="container">
<div class="row">
<div class="col-sm-3">
Level 1: .col-sm-3
</div>
<div class="col-sm-9">
<div class="row">
<div class="col-8 col-sm-6">
Level 2: .col-8 .col-sm-6
</div>
<div class="col-4 col-sm-6">
Level 2: .col-4 .col-sm-6
</div>
</div>
</div>
</div>
</div>
Alignment
Use flexbox alignment utilities to vertically and horizontally align columns.
Vertical alignment
One of three columnsOne of three columnsOne of three columnsOne of three columnsOne of three columnsOne of three columnsOne of three columnsOne of three columnsOne of three columns<div class="container">
<div class="row align-items-start">
<div class="col">
One of three columns
</div>
<div class="col">
One of three columns
</div>
<div class="col">
One of three columns
</div>
</div>
<div class="row align-items-center">
<div class="col">
One of three columns
</div>
<div class="col">
One of three columns
</div>
<div class="col">
One of three columns
</div>
</div>
<div class="row align-items-end">
<div class="col">
One of three columns
</div>
<div class="col">
One of three columns
</div>
<div class="col">
One of three columns
</div>
</div>
</div>
One of three columnsOne of three columnsOne of three columns<div class="container">
<div class="row">
<div class="col align-self-start">
One of three columns
</div>
<div class="col align-self-center">
One of three columns
</div>
<div class="col align-self-end">
One of three columns
</div>
</div>
</div>
Horizontal alignment
One of two columnsOne of two columnsOne of two columnsOne of two columnsOne of two columnsOne of two columnsOne of two columnsOne of two columnsOne of two columnsOne of two columns<div class="container">
<div class="row justify-content-start">
<div class="col-4">
One of two columns
</div>
<div class="col-4">
One of two columns
</div>
</div>
<div class="row justify-content-center">
<div class="col-4">
One of two columns
</div>
<div class="col-4">
One of two columns
</div>
</div>
<div class="row justify-content-end">
<div class="col-4">
One of two columns
</div>
<div class="col-4">
One of two columns
</div>
</div>
<div class="row justify-content-around">
<div class="col-4">
One of two columns
</div>
<div class="col-4">
One of two columns
</div>
</div>
<div class="row justify-content-between">
<div class="col-4">
One of two columns
</div>
<div class="col-4">
One of two columns
</div>
</div>
<div class="row justify-content-evenly">
<div class="col-4">
One of two columns
</div>
<div class="col-4">
One of two columns
</div>
</div>
</div>
Column wrapping
If more than 12 columns are placed within a single row, each group of extra columns will, as one unit, wrap onto a new line.
.col-9.col-4
Since 9 + 4 = 13 > 12, this 4-column-wide div gets wrapped onto a new line as one contiguous unit..col-6
Subsequent columns continue along the new line.<div class="container">
<div class="row">
<div class="col-9">.col-9</div>
<div class="col-4">.col-4<br>Since 9 + 4 = 13 > 12, this 4-column-wide div gets wrapped onto a new line as one contiguous unit.</div>
<div class="col-6">.col-6<br>Subsequent columns continue along the new line.</div>
</div>
</div>
Column breaks
Breaking columns to a new line in flexbox requires a small hack: add an element with width: 100% wherever you want to wrap your columns to a new line. Normally this is accomplished with multiple .rows, but not every but not every implementation method can account for this.
.col-6 .col-sm-3.col-6 .col-sm-3.col-6 .col-sm-3.col-6 .col-sm-3<div class="container">
<div class="row">
<div class="col-6 col-sm-3">.col-6 .col-sm-3</div>
<div class="col-6 col-sm-3">.col-6 .col-sm-3</div>
<!-- Force next columns to break to new line -->
<div class="w-100"></div>
<div class="col-6 col-sm-3">.col-6 .col-sm-3</div>
<div class="col-6 col-sm-3">.col-6 .col-sm-3</div>
</div>
</div>
You may also apply this break at specific breakpoints with our responsive display utilities
.col-6 .col-sm-4.col-6 .col-sm-4.col-6 .col-sm-4.col-6 .col-sm-4<div class="container">
<div class="row">
<div class="col-6 col-sm-4">.col-6 .col-sm-4</div>
<div class="col-6 col-sm-4">.col-6 .col-sm-4</div>
<!-- Force next columns to break to new line at md breakpoint and up -->
<div class="w-100 d-none d-md-block"></div>
<div class="col-6 col-sm-4">.col-6 .col-sm-4</div>
<div class="col-6 col-sm-4">.col-6 .col-sm-4</div>
</div>
</div>
Order classes
Use .order- classes for controlling the visual order of your content. These classes are responsive, so you can set the order by breakpoint (e.g., .order-1.order-md-2). Includes support for 1 through 5 across all six grid tiers.
First in DOM, no order appliedThird in DOM, with an order of 1Second in DOM, with a larger order<div class="container">
<div class="row">
<div class="col">
First in DOM, no order applied
</div>
<div class="col order-5">
Second in DOM, with a larger order
</div>
<div class="col order-1">
Third in DOM, with an order of 1
</div>
</div>
</div>
There are also responsive .order-first and .order-last classes that change the order of an element by applying order: -1 and order: 6, respectively. These classes can also be intermixed with the numbered .order-* classes as needed.
Third in DOM, ordered firstSecond in DOM, unorderedFirst in DOM, ordered last<div class="container">
<div class="row">
<div class="col order-last">
First in DOM, ordered last
</div>
<div class="col">
Second in DOM, unordered
</div>
<div class="col order-first">
Third in DOM, ordered first
</div>
</div>
</div>
Offset classes
Move columns to the right using .offset-md-* classes. These classes increase the left margin of a column by * columns. For example, .offset-md-4 moves .col-md-4 over four columns.
.col-md-4.col-md-4 .offset-md-4.col-md-3 .offset-md-3.col-md-3 .offset-md-3.col-md-6 .offset-md-3<div class="container">
<div class="row">
<div class="col-md-4">.col-md-4</div>
<div class="col-md-4 offset-md-4">.col-md-4 .offset-md-4</div>
</div>
<div class="row">
<div class="col-md-3 offset-md-3">.col-md-3 .offset-md-3</div>
<div class="col-md-3 offset-md-3">.col-md-3 .offset-md-3</div>
</div>
<div class="row">
<div class="col-md-6 offset-md-3">.col-md-6 .offset-md-3</div>
</div>
</div>
Margin utilities
With the move to flexbox in v4, you can use margin utilities like .me-auto to force sibling columns away from one another.
.col-md-4.col-md-4 .ms-auto.col-md-3 .ms-md-auto.col-md-3 .ms-md-auto.col-auto .me-auto.col-auto<div class="container">
<div class="row">
<div class="col-md-4">.col-md-4</div>
<div class="col-md-4 ms-auto">.col-md-4 .ms-auto</div>
</div>
<div class="row">
<div class="col-md-3 ms-md-auto">.col-md-3 .ms-md-auto</div>
<div class="col-md-3 ms-md-auto">.col-md-3 .ms-md-auto</div>
</div>
<div class="row">
<div class="col-auto me-auto">.col-auto .me-auto</div>
<div class="col-auto">.col-auto</div>
</div>
</div>
Standalone column classes
The .col-* classes can also be used outside a .row to give an element a specific width. Whenever column classes are used as non direct children of a row, the paddings are omitted.
.col-3: width of 25%.col-sm-9: width of 75% above sm breakpoint<div class="col-3 bg-light p-3 border"> .col-3: width of 25% </div> <div class="col-sm-9 bg-light p-3 border"> .col-sm-9: width of 75% above sm breakpoint </div>
No gutters
The gutters between columns in our predefined grid classes can be removed with .g-0. This removes the negative margins from .row and the horizontal padding from all immediate children columns.
Need an edge-to-edge design? Drop the parent .container or .container-fluid.
In practice, here’s how it looks. Note you can continue to use this with all other predefined grid classes (including column widths, responsive tiers, reorders, and more).
.col-12 .col-sm-6 .col-md-8.col-12 .col-sm-6 .col-md-8<div class="row g-0"> <div class="col-sm-6 col-md-8">.col-sm-6 .col-md-8</div> <div class="col-6 col-md-4">.col-6 .col-md-4</div> </div>
Helper classes
We have created some really useful helper classes for you. Here are a few of them:
Text size
.text-very-small- For very small size of text.text-extra-small- For extra small size of text.text-small- For small size of text.text-medium- For medium size of text.text-extra-medium- For extra medium size of text.text-large- For large size of text.text-extra-large- For extra large size of text.title-extra-small- For extra small size of title.title-small- For small size of title.title-large- For large size of title.title-large-2- For large size of title.title-large-3- For large size of title.title-extra-large- For extra large size of title.title-extra-large-heavy- For extra large heavy size of title.text-big- For big size of text.text-extra-big- For extra big size of text.text-extra-big-2- For extra big size of text.parallax-title- For parallax title
Text color
.text-white- For white color text.text-black- For black color text.text-extra-dark-gray- For extra dark gray color text.text-dark-gray- For dark gray color text.text-extra-medium-gray- For extra medium gray color text.text-medium-gray- For medium gray color text.text-extra-light-gray- For deep light gray color text.text-light-gray- For light gray color text.text-very-light-gray- For very light gray color text.text-fast-blue- For fast blue color text.text-neon-blue- For neon blue color text.text-light-pink- For light pink color text.text-red- For red color text.text-dark-red- For dark red color text.text-parrot-green- For parrot green color text.text-green- For green color text.text-olivine-green- For olivine green color text.text-dark-charcoal- For dark charcoal color text.text-penguin-white- For penguin white color text.text-orange- For orange color text.text-dark-orange- For dark orange color text.text-neon-orange- For neon orange color text.text-light-orange- For light orange color text.text-radical-red- For redical red color text.text-golden- For golden color text.text-golden-yellow- For golden yellow color text.text-dark-golden-yellow- For dark golden yellow color text.text-golden-brown- For golden brown color text.text-slate-blue- For slate blue color text.text-slate-blue-light- For light slate blue color text.text-medium-slate-blue- For medium slate blue color text.text-dark-slate-blue- For dark slate blue color text.text-brown- For brown color text.text-blue-wood- For blue wood color text.text-purple- For purple color text.text-medium-purple- For medium purple color text.text-dark-purple- For dark purple color text.text-very-light-desert-storm- For very light desert storm color text.text-yellow-ochre- For yellow ochre color text.text-yellow-ochre-light- For yellow ochre light color text.text-fast-yellow- For fast yellow color text.text-yellow- For yellow color text.text-salmon-rose- For salmon rose color text.text-tussock- For tussock color text.text-greenish-slate- For greenish slate color text.text-seashell- For seashell color text.text-shamrock-green- For shamrock-green color text.text-light-brownish-orange- For light-brownish-orange color text.text-greenish-gray- For greenish gray color text.text-light-greenish-gray- For light greenish gray color text.text-yellowish-green- For yellowish green color text.text-copper-red- For copper red color text.text-sunglow- For sunglow color text.text-orange-zest- For orange zest color text.text-dark-tussock- For dark tussock color text.text-echo-blue- For echo blue color text.text-violet- For violet color text.text-very-light-gray-transparent- For very light gray transparent color text.text-extra-dark-gray-transparent- For extra dark gray transparent color text.text-dark-gray-transparent- For dark gray transparent color text.text-white-transparent- For white transparent color text.text-medium-white-transparent- For medium white transparent color text.text-very-light-white-transparent- For very light white transparent color text
Text gradient color
.text-gradient-magenta-orange- For magenta orange gradient color text.text-gradient-magenta-orange-2- For magenta orange gradient color text.text-gradient-light-purple-light-orange- For light purple light orange gradient color text.text-gradient-sky-blue-pink- For sky blue pink gradient color text.text-gradient-sky-blue-dark-pink- For sky blue dark pink gradient color text.text-gradient-sky-blue-pink-2- For sky blue pink gradient color text.text-gradient-peacock-blue-crome-yellow- For peacock blue crome yellow gradient color text.text-gradient-peacock-blue-crome-yellow-2- For peacock blue crome yellow gradient color text.text-gradient-fast-blue-purple- For fast blue purple gradient color text.text-gradient-tan-geraldine- For tan geraldine gradient color text.text-gradient-tussock-greenish-slate- For tussock greenish slate gradient color text.text-gradient-light-purple-light-red- For light purple light red gradient color text.text-gradient-light-brownish-orange-black- For light brownish orange black gradient color text.text-gradient-turquoise-green-yellowish- For turquoise green yellowish gradient color text.text-gradient-red-violet-purple- For red violet purple gradient color text.text-gradient-orange-pink- For orange pink gradient color text.text-gradient-fuego-turquoise- For fuego turquoise gradient color text
Text align
.text-start- For text align left.text-center- For text align right.text-end- For text align center
Text transform
.text-lowercase- For text to lowercase.text-uppercase- For text to uppercase.text-capitalize- For text to capitalize
Letter spacing
.letter-spacing-1-half- For letter spacing of 0.50 pixel.letter-spacing-1px- For letter spacing of 1 pixel.letter-spacing-2px- For letter spacing of 2 pixel.letter-spacing-3px- For letter spacing of 3 pixel.letter-spacing-4px- For letter spacing of 4 pixel.letter-spacing-5px- For letter spacing of 5 pixel.letter-spacing-8px- For letter spacing of 8 pixel.letter-spacing-10px- For letter spacing of 10 pixel.letter-spacing-15px- For letter spacing of 15 pixel.letter-spacing-20px- For letter spacing of 20 pixel.letter-spacing-22px- For letter spacing of 22 pixel.letter-spacing-25px- For letter spacing of 25 pixel.letter-spacing-minus-1-half- For letter spacing of -0.50 pixel.letter-spacing-minus-1px- For letter spacing of -1 pixel.letter-spacing-minus-2px- For letter spacing of -2 pixel.letter-spacing-minus-3px- For letter spacing of -3 pixel.letter-spacing-minus-4px- For letter spacing of -4 pixel.letter-spacing-minus-5px- For letter spacing of -5 pixel.letter-spacing-minus-6px- For letter spacing of -6 pixel.letter-spacing-minus-7px- For letter spacing of -7 pixel.letter-spacing-minus-8px- For letter spacing of -8 pixel.letter-spacing-minus-9px- For letter spacing of -9 pixel.letter-spacing-minus-10px- For letter spacing of -10 pixel.letter-spacing-inherit- For letter spacing of inherit.white-space-normal- For normal white space
Font weight
.font-weight-100- For font weight of 100.font-weight-200- For font weight of 200.font-weight-300- For font weight of 300.font-weight-400- For font weight of 400.font-weight-500- For font weight of 500.font-weight-600- For font weight of 600.font-weight-700- For font weight of 700.font-weight-800- For font weight of 800.font-weight-900- For font weight of 900
Icon size
.icon-small- For small icon size.icon-extra-small- For extra small icon size.icon-very-small- For very small icon size.icon-medium- For medium icon size.icon-very-medium- For very medium icon size.icon-extra-medium- For extra medium icon size.icon-large- For large icon size.icon-extra-large- For extra large icon size.icon-country- For country icon
Background color
.bg-white- For background color of white.bg-black- For background color of black.bg-smoky-black- For background color of smoky black.bg-dark-gray- For background color of dark gray.bg-extra-dark-gray- For background color of extra dark gray.bg-extra-dark-gray-2- For background color of extra dark gray.bg-medium-gray- For background color of medium gray.bg-extra-light-gray- For background color of extra light gray.bg-medium-light-gray- For background color of medium light gray.bg-very-light-gray- For background color of very light gray.bg-nero-gray- For background color of nero gray.bg-light-gray- For background color of light gray.bg-bright-red- For background color of bright red.bg-fast-blue- For background color of fast blue.bg-neon-blue- For background color of neon blue.bg-transparent- For transparent background color.bg-sky-blue- For background color of sky blue.bg-green- For background color of green.bg-olivine-green- For background color of olivine green.bg-orange- For background color of orange.bg-dark-orange- For background color of dark orange.bg-neon-orange- For background color of neon orange.bg-very-light-orange- For background color of very light orange.bg-dark-red- For background color of dark red.bg-red- For background color of red.bg-light-pink- For background color of light pink.bg-very-light-pink- For background color of very light pink.bg-parrot-green- For background color of parrot green.bg-slate-blue- For background color of slate blue.bg-medium-slate-blue- For background color of medium slate blue.bg-extra-medium-slate-blue- For background color of extra medium slate blue.bg-dark-slate-blue- For background color of dark slate blue.bg-light-peach- For background color of light peach.bg-brown- For background color of brown.bg-blue-wood- For background color of blue wood.bg-purple- For background color of purple.bg-medium-purple- For background color of medium purple.bg-dark-purple- For background color of dark purple.bg-dark-purple-2- For background color of dark purple.bg-yellow-ochre- For background color of yellow ochre.bg-light-desert-storm- For background color of light desert storm.bg-medium-desert-storm- For background color of medium desert storm.bg-yellow-ochre-light- For background color of yellow ochre light.bg-yellow- For background color of yellow.bg-very-light-desert-storm- For background color of very light desert storm.bg-light-blue- For background color of light blue.bg-penguin-white- For background color of penguin white.bg-tussock- For background color of tussock.bg-greenish-slate- For background color of greenish slate.bg-seashell- For background color of seashell.bg-shamrock-green- For background color of shamrock green.bg-light-orange- For background color of light orange.bg-light-cream- For background color of light cream.bg-golden- For background color of golden.bg-light-brownish-orange- For background color of light brownish orange.bg-greenish-gray- For background color of greenish gray.bg-fast-yellow- For background color of fast yellow.bg-light-greenish-gray- For background color of light greenish gray.bg-cod-gray- For background color of cod gray.bg-yellowish-green- For background color of yellowish green.bg-copper-red- For background color of copper red.bg-sunglow- For background color of sunglow.bg-orange-zest- For background color of orange zest.bg-dark-tussock- For background color of dark tussock.bg-golden-brown- For background color of golden brown.bg-solitude- For background color of solitude.bg-east-bay- For background color of east bay.bg-quartz- For background color of quartz.bg-transparent-black- For background color of transparent black.bg-transparent-black-light- For background color of light transparent black.bg-transparent-black-very-light- For background color of transparent black very light.bg-transparent-deep-green- For background color of transparent deep green.bg-transparent-dark-gray- For background color of transparent dark gray.bg-transparent-mengo-yellow- For background color of transparent mengo yellow.bg-transparent-chocolate- For background color of transparent chocolate.bg-transparent-extra-dark-gray- For background color of transparent extra dark gray.bg-transparent-extra-dark-gray2- For background color of transparent extra dark gray.bg-transparent-white- For background color of transparent white.bg-transparent-white2- For background color of transparent white.bg-transparent-white3- For background color of transparent white.bg-transparent-dark-purple- For background color of transparent dark purple.bg-transparent-dark-purple-2- For background color of transparent dark purple.bg-transparent-red- For background color of transparent red.bg-transparent-light-red- For background color of transparent light red.bg-transparent-sky-blue- For background color of transparent sky blue.bg-transparent-fast-blue- For background color of transparent fast blue.bg-transparent-fast-blue2- For background color of transparent fast blue.bg-transparent-yellow-ochre- For background color of transparent yellow ochre.bg-transparent-golden-brown- For background color of transparent golden brown
Background gradient color
.bg-gradient-magenta-orange- For background color of gradient magenta orange.bg-gradient-magenta-orange-2- For background color of gradient magenta orange.bg-gradient-purple-magenta- For background color of gradient purple magenta.bg-gradient-light-purple-light-orange- For background color of gradient light purple light orange.bg-gradient-sky-blue-pink- For background color of gradient sky blue pink.bg-gradient-peacock-blue-crome-yellow- For background color of gradient peacock blue crome yellow.bg-gradient-fast-blue-purple- For background color of gradient fast blue purple.bg-gradient-orange-pink- For background color of gradient orange pink.bg-gradient-light-orange-light-pink- For background color of gradient light orange light pink.bg-gradient-white-light-gray- For background color of gradient white light gray.bg-gradient-solitude-white- For background color of gradient solitude white.bg-gradient-light-gray-white- For background color of gradient light gray white.bg-gradient-tan-geraldine- For background color of gradient tan geraldine.bg-gradient-white-light- For background color of gradient white light.bg-gradient-black-transparent- For background color of gradient black transparent.bg-gradient-tan-geraldine-2- For background color of gradient tan geraldine.bg-gradient-dark-slate-blue- For background color of gradient dark slate blue.bg-gradient-light-violet-light-orange- For background color of gradient light violet light orange.bg-gradient-tussock-greenish-slate- For background color of gradient tussock greenish slate.bg-gradient-black-blue- For background color of gradient black blue.bg-gradient-shamrock-green-light-orange- For background color of gradient shamrock green light orange.bg-gradient-dark-slate-blue-transparent- For background color of gradient dark slate blue transparent.bg-gradient-light-purple-light-red- For background color of gradient light purple light red.bg-gradient-white-light-greenish-gray- For background color of gradient white light greenish gray.bg-gradient-yellowish-green-turquoise- For background color of gradient yellowish green turquoise.bg-gradient-extra-dark-gray-transparent- For background color of gradient extra dark gray transparent.bg-gradient-peacock-blue-crome-yellow-2- For background color of gradient peacock blue crome yellow.bg-gradient-midium-dark-gray-transparent- For background color of gradient midium dark gray transparent.bg-gradient-midium-gray-transparent- For background color of gradient midium gray transparent.bg-gradient-red-violet-purple- For background color of gradient red violet purple.bg-gradient-turquoise-green-yellowish- For background color of gradient turquoise green yellowish.bg-transparent-gradient-magenta-orange- For background color of transparent gradient magenta orange.bg-transparent-gradient-purple-magenta- For background color of transparent gradient purple magenta.bg-transparent-gradient-light-purple-light-orange- For background color of transparent gradient light purple light orange.bg-transparent-gradient-sky-blue-pink- For background color of transparent gradient sky blue pink.bg-transparent-gradient-peacock-blue-crome-yellow- For background color of transparent gradient peacock blue crome yellow.bg-transparent-gradient-fast-blue-purple- For background color of transparent gradient fast blue purple.bg-transparent-gradient-light-red-orange- For background color of transparent gradient light red orange.bg-transparent-gradiant-black- For background color of transparent gradiant black.bg-transparent-gradiant-white-black- For background color of transparent gradiant white black.bg-transparent-gradient-light-violet-light-orange- For background color of transparent gradient light violet light orange.bg-transparent-gradient-tussock-greenish-slate- For background color of transparent gradient tussock greenish slate.bg-transparent-gradient-shamrock-green-light-orange- For background color of transparent gradient shamrock green light orange.bg-transparent-gradient-smoky-black- For background color of transparent gradient smoky black
Opacity
.opacity-very-light- For very light opacity.opacity-light- For light opacity.opacity-extra-medium- For extra medium opacity.opacity-extra-medium-2- For extra medium 2 opacity.opacity-medium- For medium opacity.opacity-medium-2- For medium 2 opacity.opacity-full- For full opacity.opacity-full-dark- For full dark opacity.opacity-0- For 0 opacity.opacity-0-half- For 0.05 opacity.opacity-1- For 0.1 opacity.opacity-1-half- For 0.15 opacity.opacity-2- For 0.2 opacity.opacity-2-half- For 0.25 opacity.opacity-3- For 0.3 opacity.opacity-3-half- For 0.35 opacity.opacity-4- For 0.4 opacity.opacity-4-half- For 0.45 opacity.opacity-5- For 0.5 opacity.opacity-5-half- For 0.55 opacity.opacity-6- For 0.6 opacity.opacity-6-half- For 0.65 opacity.opacity-7- For 0.7 opacity.opacity-7-half- For 0.75 opacity.opacity-8- For 0.8 opacity.opacity-8-half- For 0.85 opacity.opacity-9- For 0.9 opacity.opacity-9-half- For 0.95 opacity
Margin all side
.margin-one-all- Margin of 1% each side.margin-two-all- Margin of 2% each side.margin-three-all- Margin of 3% each side.margin-four-all- Margin of 4% each side.margin-five-all- Margin of 5% each side.margin-six-all- Margin of 6% each side.margin-seven-all- Margin of 7% each side.margin-eight-all- Margin of 8% each side.margin-nine-all- Margin of 9% each side.margin-ten-all- Margin of 10% each side.margin-eleven-all- Margin of 11% each side.margin-twelve-all- Margin of 12% each side.margin-thirteen-all- Margin of 13% each side.margin-fourteen-all- Margin of 14% each side.margin-fifteen-all- Margin of 15% each side.margin-sixteen-all- Margin of 16% each side.margin-seventeen-all- Margin of 17% each side.margin-eighteen-all- Margin of 18% each side.margin-nineteen-all- Margin of 19% each side.margin-twenty-all- Margin of 20% each side.margin-5px-all- Margin of 5px each side.margin-10px-all- Margin of 10px each side.margin-15px-all- Margin of 15px each side.margin-20px-all- Margin of 20px each side.margin-25px-all- Margin of 25px each side.margin-30px-all- Margin of 30px each side.margin-35px-all- Margin of 35px each side.margin-40px-all- Margin of 40px each side.margin-45px-all- Margin of 45px each side.margin-50px-all- Margin of 50px each side.margin-55px-all- Margin of 55px each side.margin-60px-all- Margin of 60px each side.margin-65px-all- Margin of 65px each side.margin-70px-all- Margin of 70px each side.margin-75px-all- Margin of 75px each side.margin-80px-all- Margin of 80px each side.margin-85px-all- Margin of 85px each side.margin-90px-all- Margin of 90px each side.margin-95px-all- Margin of 95px each side.margin-100px-all- Margin of 100px each side.margin-1-rem-all- Margin of 1rem each side.margin-1-half-rem-all- Margin of 1.5rem each side.margin-2-rem-all- Margin of 2rem each side.margin-2-half-rem-all- Margin of 2.5rem each side.margin-3-rem-all- Margin of 3rem each side.margin-3-half-rem-all- Margin of 3.5rem each side.margin-4-rem-all- Margin of 4rem each side.margin-4-half-rem-all- Margin of 4.5rem each side.margin-5-rem-all- Margin of 5rem each side.margin-5-half-rem-all- Margin of 5.5rem each side.margin-6-rem-all- Margin of 6rem each side.margin-6-half-rem-all- Margin of 6.5rem each side.margin-7-rem-all- Margin of 7rem each side.margin-7-half-rem-all- Margin of 7.5rem each side.margin-8-rem-all- Margin of 8rem each side.margin-8-half-rem-all- Margin of 8.5rem each side.margin-9-rem-all- Margin of 9rem each side.margin-9-half-rem-all- Margin of 9.5rem each side.margin-10-rem-all- Margin of 10rem each side.margin-10-half-rem-all- Margin of 10.5rem each side
Margin top side
.margin-one-top- Margin of 1% top side.margin-two-top- Margin of 2% top side.margin-three-top- Margin of 3% top side.margin-four-top- Margin of 4% top side.margin-five-top- Margin of 5% top side.margin-six-top- Margin of 6% top side.margin-seven-top- Margin of 7% top side.margin-eight-top- Margin of 8% top side.margin-nine-top- Margin of 9% top side.margin-ten-top- Margin of 10% top side.margin-eleven-top- Margin of 11% top side.margin-twelve-top- Margin of 12% top side.margin-thirteen-top- Margin of 13% top side.margin-fourteen-top- Margin of 14% top side.margin-fifteen-top- Margin of 15% top side.margin-sixteen-top- Margin of 16% top side.margin-seventeen-top- Margin of 17% top side.margin-eighteen-top- Margin of 18% top side.margin-nineteen-top- Margin of 19% top side.margin-twenty-top- Margin of 20% top side.margin-twenty-five-top- Margin of 25% top side.margin-5px-top- Margin of 5px top side.margin-10px-top- Margin of 10px top side.margin-15px-top- Margin of 15px top side.margin-20px-top- Margin of 20px top side.margin-25px-top- Margin of 25px top side.margin-30px-top- Margin of 30px top side.margin-35px-top- Margin of 35px top side.margin-40px-top- Margin of 40px top side.margin-45px-top- Margin of 45px top side.margin-50px-top- Margin of 50px top side.margin-55px-top- Margin of 55px top side.margin-60px-top- Margin of 60px top side.margin-65px-top- Margin of 65px top side.margin-70px-top- Margin of 70px top side.margin-75px-top- Margin of 75px top side.margin-80px-top- Margin of 80px top side.margin-85px-top- Margin of 85px top side.margin-90px-top- Margin of 90px top side.margin-95px-top- Margin of 95px top side.margin-100px-top- Margin of 100px top side.margin-1-rem-top- Margin of 1rem top side.margin-1-half-rem-top- Margin of 1.5rem top side.margin-2-rem-top- Margin of 2rem top side.margin-2-half-rem-top- Margin of 2.5rem top side.margin-3-rem-top- Margin of 3rem top side.margin-3-half-rem-top- Margin of 3.5rem top side.margin-4-rem-top- Margin of 4rem top side.margin-4-half-rem-top- Margin of 4.5rem top side.margin-5-rem-top- Margin of 5rem top side.margin-5-half-rem-top- Margin of 5.5rem top side.margin-6-rem-top- Margin of 6rem top side.margin-6-half-rem-top- Margin of 6.5rem top side.margin-7-rem-top- Margin of 7rem top side.margin-7-half-rem-top- Margin of 7.5rem top side.margin-8-rem-top- Margin of 8rem top side.margin-8-half-rem-top- Margin of 8.5rem top side.margin-9-rem-top- Margin of 9rem top side.margin-9-half-rem-top- Margin of 9.5rem top side.margin-10-rem-top- Margin of 10rem top side.margin-10-half-rem-top- Margin of 10.5rem top side
Margin bottom side
.margin-one-bottom- Margin of 1% bottom side.margin-two-bottom- Margin of 2% bottom side.margin-three-bottom- Margin of 3% bottom side.margin-four-bottom- Margin of 4% bottom side.margin-five-bottom- Margin of 5% bottom side.margin-six-bottom- Margin of 6% bottom side.margin-seven-bottom- Margin of 7% bottom side.margin-eight-bottom- Margin of 8% bottom side.margin-nine-bottom- Margin of 9% bottom side.margin-ten-bottom- Margin of 10% bottom side.margin-eleven-bottom- Margin of 11% bottom side.margin-twelve-bottom- Margin of 12% bottom side.margin-thirteen-bottom- Margin of 13% bottom side.margin-fourteen-bottom- Margin of 14% bottom side.margin-fifteen-bottom- Margin of 15% bottom side.margin-sixteen-bottom- Margin of 16% bottom side.margin-seventeen-bottom- Margin of 17% bottom side.margin-eighteen-bottom- Margin of 18% bottom side.margin-nineteen-bottom- Margin of 19% bottom side.margin-twenty-bottom- Margin of 20% bottom side.margin-5px-bottom- Margin of 5px bottom side.margin-10px-bottom- Margin of 10px bottom side.margin-15px-bottom- Margin of 15px bottom side.margin-20px-bottom- Margin of 20px bottom side.margin-25px-bottom- Margin of 25px bottom side.margin-30px-bottom- Margin of 30px bottom side.margin-35px-bottom- Margin of 35px bottom side.margin-40px-bottom- Margin of 40px bottom side.margin-45px-bottom- Margin of 45px bottom side.margin-50px-bottom- Margin of 50px bottom side.margin-55px-bottom- Margin of 55px bottom side.margin-60px-bottom- Margin of 60px bottom side.margin-65px-bottom- Margin of 65px bottom side.margin-70px-bottom- Margin of 70px bottom side.margin-75px-bottom- Margin of 75px bottom side.margin-80px-bottom- Margin of 80px bottom side.margin-85px-bottom- Margin of 85px bottom side.margin-90px-bottom- Margin of 90px bottom side.margin-95px-bottom- Margin of 95px bottom side.margin-100px-bottom- Margin of 100px bottom side.margin-1-rem-bottom- Margin of 1rem bottom side.margin-1-half-rem-bottom- Margin of 1.5rem bottom side.margin-2-rem-bottom- Margin of 2rem bottom side.margin-2-half-rem-bottom- Margin of 2.5rem bottom side.margin-3-rem-bottom- Margin of 3rem bottom side.margin-3-half-rem-bottom- Margin of 3.5rem bottom side.margin-4-rem-bottom- Margin of 4rem bottom side.margin-4-half-rem-bottom- Margin of 4.5rem bottom side.margin-5-rem-bottom- Margin of 5rem bottom side.margin-5-half-rem-bottom- Margin of 5.5rem bottom side.margin-6-rem-bottom- Margin of 6rem bottom side.margin-6-half-rem-bottom- Margin of 6.5rem bottom side.margin-7-rem-bottom- Margin of 7rem bottom side.margin-7-half-rem-bottom- Margin of 7.5rem bottom side.margin-8-rem-bottom- Margin of 8rem bottom side.margin-8-half-rem-bottom- Margin of 8.5rem bottom side.margin-9-rem-bottom- Margin of 9rem bottom side.margin-9-half-rem-bottom- Margin of 9.5rem bottom side.margin-10-rem-bottom- Margin of 10rem bottom side.margin-10-half-rem-bottom- Margin of 10.5rem bottom side
Margin right side
.margin-one-right- Margin of 1% right side.margin-two-right- Margin of 2% right side.margin-three-right- Margin of 3% right side.margin-four-right- Margin of 4% right side.margin-five-right- Margin of 5% right side.margin-six-right- Margin of 6% right side.margin-seven-right- Margin of 7% right side.margin-eight-right- Margin of 8% right side.margin-nine-right- Margin of 9% right side.margin-ten-right- Margin of 10% right side.margin-eleven-right- Margin of 11% right side.margin-twelve-right- Margin of 12% right side.margin-thirteen-right- Margin of 13% right side.margin-fourteen-right- Margin of 14% right side.margin-fifteen-right- Margin of 15% right side.margin-sixteen-right- Margin of 16% right side.margin-seventeen-right- Margin of 17% right side.margin-eighteen-right- Margin of 18% right side.margin-nineteen-right- Margin of 19% right side.margin-twenty-right- Margin of 20% right side.margin-5px-right- Margin of 5px right side.margin-10px-right- Margin of 10px right side.margin-15px-right- Margin of 15px right side.margin-20px-right- Margin of 20px right side.margin-25px-right- Margin of 25px right side.margin-30px-right- Margin of 30px right side.margin-35px-right- Margin of 35px right side.margin-40px-right- Margin of 40px right side.margin-45px-right- Margin of 45px right side.margin-50px-right- Margin of 50px right side.margin-55px-right- Margin of 55px right side.margin-60px-right- Margin of 60px right side.margin-65px-right- Margin of 65px right side.margin-70px-right- Margin of 70px right side.margin-75px-right- Margin of 75px right side.margin-80px-right- Margin of 80px right side.margin-85px-right- Margin of 85px right side.margin-90px-right- Margin of 90px right side.margin-95px-right- Margin of 95px right side.margin-100px-right- Margin of 100px right side.margin-1-rem-right- Margin of 1rem right side.margin-1-half-rem-right- Margin of 1.5rem right side.margin-2-rem-right- Margin of 2rem right side.margin-2-half-rem-right- Margin of 2.5rem right side.margin-3-rem-right- Margin of 3rem right side.margin-3-half-rem-right- Margin of 3.5rem right side.margin-4-rem-right- Margin of 4rem right side.margin-4-half-rem-right- Margin of 4.5rem right side.margin-5-rem-right- Margin of 5rem right side.margin-5-half-rem-right- Margin of 5.5rem right side.margin-6-rem-right- Margin of 6rem right side.margin-6-half-rem-right- Margin of 6.5rem right side.margin-7-rem-right- Margin of 7rem right side.margin-7-half-rem-right- Margin of 7.5rem right side.margin-8-rem-right- Margin of 8rem right side.margin-8-half-rem-right- Margin of 8.5rem right side.margin-9-rem-right- Margin of 9rem right side.margin-9-half-rem-right- Margin of 9.5rem right side.margin-10-rem-right- Margin of 10rem right side.margin-10-half-rem-right- Margin of 10.5rem right side
Margin left side
.margin-one-left- Margin of 1% left side.margin-two-left- Margin of 2% left side.margin-three-left- Margin of 3% left side.margin-four-left- Margin of 4% left side.margin-five-left- Margin of 5% left side.margin-six-left- Margin of 6% left side.margin-seven-left- Margin of 7% left side.margin-eight-left- Margin of 8% left side.margin-nine-left- Margin of 9% left side.margin-ten-left- Margin of 10% left side.margin-eleven-left- Margin of 11% left side.margin-twelve-left- Margin of 12% left side.margin-thirteen-left- Margin of 13% left side.margin-fourteen-left- Margin of 14% left side.margin-fifteen-left- Margin of 15% left side.margin-sixteen-left- Margin of 16% left side.margin-seventeen-left- Margin of 17% left side.margin-eighteen-left- Margin of 18% left side.margin-nineteen-left- Margin of 19% left side.margin-twenty-left- Margin of 20% left side.margin-5px-left- Margin of 5px left side.margin-10px-left- Margin of 10px left side.margin-15px-left- Margin of 15px left side.margin-20px-left- Margin of 20px left side.margin-25px-left- Margin of 25px left side.margin-30px-left- Margin of 30px left side.margin-35px-left- Margin of 35px left side.margin-40px-left- Margin of 40px left side.margin-45px-left- Margin of 45px left side.margin-50px-left- Margin of 50px left side.margin-55px-left- Margin of 55px left side.margin-60px-left- Margin of 60px left side.margin-65px-left- Margin of 65px left side.margin-70px-left- Margin of 70px left side.margin-75px-left- Margin of 75px left side.margin-80px-left- Margin of 80px left side.margin-85px-left- Margin of 85px left side.margin-90px-left- Margin of 90px left side.margin-95px-left- Margin of 95px left side.margin-100px-left- Margin of 100px left side.margin-1-rem-left- Margin of 1rem left side.margin-1-half-rem-left- Margin of 1.5rem left side.margin-2-rem-left- Margin of 2rem left side.margin-2-half-rem-left- Margin of 2.5rem left side.margin-3-rem-left- Margin of 3rem left side.margin-3-half-rem-left- Margin of 3.5rem left side.margin-4-rem-left- Margin of 4rem left side.margin-4-half-rem-left- Margin of 4.5rem left side.margin-5-rem-left- Margin of 5rem left side.margin-5-half-rem-left- Margin of 5.5rem left side.margin-6-rem-left- Margin of 6rem left side.margin-6-half-rem-left- Margin of 6.5rem left side.margin-7-rem-left- Margin of 7rem left side.margin-7-half-rem-left- Margin of 7.5rem left side.margin-8-rem-left- Margin of 8rem left side.margin-8-half-rem-left- Margin of 8.5rem left side.margin-9-rem-left- Margin of 9rem left side.margin-9-half-rem-left- Margin of 9.5rem left side.margin-10-rem-left- Margin of 10rem left side.margin-10-half-rem-left- Margin of 10.5rem left side
Margin left & right side
.margin-one-lr- Margin of 1% left and right side.margin-two-lr- Margin of 2% left and right side.margin-three-lr- Margin of 3% left and right side.margin-four-lr- Margin of 4% left and right side.margin-five-lr- Margin of 5% left and right side.margin-six-lr- Margin of 6% left and right side.margin-seven-lr- Margin of 7% left and right side.margin-eight-lr- Margin of 8% left and right side.margin-nine-lr- Margin of 9% left and right side.margin-ten-lr- Margin of 10% left and right side.margin-eleven-lr- Margin of 11% left and right side.margin-twelve-lr- Margin of 12% left and right side.margin-thirteen-lr- Margin of 13% left and right side.margin-fourteen-lr- Margin of 14% left and right side.margin-fifteen-lr- Margin of 15% left and right side.margin-sixteen-lr- Margin of 16% left and right side.margin-seventeen-lr- Margin of 17% left and right side.margin-eighteen-lr- Margin of 18% left and right side.margin-nineteen-lr- Margin of 19% left and right side.margin-twenty-lr- Margin of 20% left and right side.margin-5px-lr- Margin of 5px left and right side.margin-10px-lr- Margin of 10px left and right side.margin-15px-lr- Margin of 15px left and right side.margin-20px-lr- Margin of 20px left and right side.margin-25px-lr- Margin of 25px left and right side.margin-30px-lr- Margin of 30px left and right side.margin-35px-lr- Margin of 35px left and right side.margin-40px-lr- Margin of 40px left and right side.margin-45px-lr- Margin of 45px left and right side.margin-50px-lr- Margin of 50px left and right side.margin-55px-lr- Margin of 55px left and right side.margin-60px-lr- Margin of 60px left and right side.margin-65px-lr- Margin of 65px left and right side.margin-70px-lr- Margin of 70px left and right side.margin-75px-lr- Margin of 75px left and right side.margin-80px-lr- Margin of 80px left and right side.margin-85px-lr- Margin of 85px left and right side.margin-90px-lr- Margin of 90px left and right side.margin-95px-lr- Margin of 95px left and right side.margin-100px-lr- Margin of 100px left and right side.margin-1-rem-lr- Margin of 1rem left and right side.margin-1-half-rem-lr- Margin of 1.5rem left and right side.margin-2-rem-lr- Margin of 2rem left and right side.margin-2-half-rem-lr- Margin of 2.5rem left and right side.margin-3-rem-lr- Margin of 3rem left and right side.margin-3-half-rem-lr- Margin of 3.5rem left and right side.margin-4-rem-lr- Margin of 4rem left and right side.margin-4-half-rem-lr- Margin of 4.5rem left and right side.margin-5-rem-lr- Margin of 5rem left and right side.margin-5-half-rem-lr- Margin of 5.5rem left and right side.margin-6-rem-lr- Margin of 6rem left and right side.margin-6-half-rem-lr- Margin of 6.5rem left and right side.margin-7-rem-lr- Margin of 7rem left and right side.margin-7-half-rem-lr- Margin of 7.5rem left and right side.margin-8-rem-lr- Margin of 8rem left and right side.margin-8-half-rem-lr- Margin of 8.5rem left and right side.margin-9-rem-lr- Margin of 9rem left and right side.margin-9-half-rem-lr- Margin of 9.5rem left and right side.margin-10-rem-lr- Margin of 10rem left and right side.margin-10-half-rem-lr- Margin of 10.5rem left and right side
Margin top & bottom side
.margin-one-tb- Margin of 1% top and bottom side.margin-two-tb- Margin of 2% top and bottom side.margin-three-tb- Margin of 3% top and bottom side.margin-four-tb- Margin of 4% top and bottom side.margin-five-tb- Margin of 5% top and bottom side.margin-six-tb- Margin of 6% top and bottom side.margin-seven-tb- Margin of 7% top and bottom side.margin-eight-tb- Margin of 8% top and bottom side.margin-nine-tb- Margin of 9% top and bottom side.margin-ten-tb- Margin of 10% top and bottom side.margin-eleven-tb- Margin of 11% top and bottom side.margin-twelve-tb- Margin of 12% top and bottom side.margin-thirteen-tb- Margin of 13% top and bottom side.margin-fourteen-tb- Margin of 14% top and bottom side.margin-fifteen-tb- Margin of 15% top and bottom side.margin-sixteen-tb- Margin of 16% top and bottom side.margin-seventeen-tb- Margin of 17% top and bottom side.margin-eighteen-tb- Margin of 18% top and bottom side.margin-nineteen-tb- Margin of 19% top and bottom side.margin-twenty-tb- Margin of 20% top and bottom side.margin-5px-tb- Margin of 5px top and bottom side.margin-10px-tb- Margin of 10px top and bottom side.margin-15px-tb- Margin of 15px top and bottom side.margin-20px-tb- Margin of 20px top and bottom side.margin-25px-tb- Margin of 25px top and bottom side.margin-30px-tb- Margin of 30px top and bottom side.margin-35px-tb- Margin of 35px top and bottom side.margin-40px-tb- Margin of 40px top and bottom side.margin-45px-tb- Margin of 45px top and bottom side.margin-50px-tb- Margin of 50px top and bottom side.margin-55px-tb- Margin of 55px top and bottom side.margin-60px-tb- Margin of 60px top and bottom side.margin-65px-tb- Margin of 65px top and bottom side.margin-70px-tb- Margin of 70px top and bottom side.margin-75px-tb- Margin of 75px top and bottom side.margin-80px-tb- Margin of 80px top and bottom side.margin-85px-tb- Margin of 85px top and bottom side.margin-90px-tb- Margin of 90px top and bottom side.margin-95px-tb- Margin of 95px top and bottom side.margin-100px-tb- Margin of 100px top and bottom side.margin-1-rem-tb- Margin of 1rem top and bottom side.margin-1-half-rem-tb- Margin of 1.5rem top and bottom side.margin-2-rem-tb- Margin of 2rem top and bottom side.margin-2-half-rem-tb- Margin of 2.5rem top and bottom side.margin-3-rem-tb- Margin of 3rem top and bottom side.margin-3-half-rem-tb- Margin of 3.5rem top and bottom side.margin-4-rem-tb- Margin of 4rem top and bottom side.margin-4-half-rem-tb- Margin of 4.5rem top and bottom side.margin-5-rem-tb- Margin of 5rem top and bottom side.margin-5-half-rem-tb- Margin of 5.5rem top and bottom side.margin-6-rem-tb- Margin of 6rem top and bottom side.margin-6-half-rem-tb- Margin of 6.5rem top and bottom side.margin-7-rem-tb- Margin of 7rem top and bottom side.margin-7-half-rem-tb- Margin of 7.5rem top and bottom side.margin-8-rem-tb- Margin of 8rem top and bottom side.margin-8-half-rem-tb- Margin of 8.5rem top and bottom side.margin-9-rem-tb- Margin of 9rem top and bottom side.margin-9-half-rem-tb- Margin of 9.5rem top and bottom side.margin-10-rem-tb- Margin of 10rem top and bottom side.margin-10-half-rem-tb- Margin of 10.5rem top and bottom side
.margin-auto-lr- Set auto margin for left and right side.margin-auto- Set auto margin.no-margin- Remove margin from all sides.no-margin-top- Remove margin from top side.no-margin-bottom- Remove margin from bottom side.no-margin-left- Remove margin from left side.no-margin-right- Remove margin from right side.no-margin-lr- Remove margin from left and right sides
Padding all side
.padding-one-all- Padding of 1% each side.padding-two-all- Padding of 2% each side.padding-three-all- Padding of 3% each side.padding-four-all- Padding of 4% each side.padding-five-all- Padding of 5% each side.padding-six-all- Padding of 6% each side.padding-seven-all- Padding of 7% each side.padding-eight-all- Padding of 8% each side.padding-nine-all- Padding of 9% each side.padding-ten-all- Padding of 10% each side.padding-eleven-all- Padding of 11% each side.padding-twelve-all- Padding of 12% each side.padding-thirteen-all- Padding of 13% each side.padding-fourteen-all- Padding of 14% each side.padding-fifteen-all- Padding of 15% each side.padding-sixteen-all- Padding of 16% each side.padding-seventeen-all- Padding of 17% each side.padding-eighteen-all- Padding of 18% each side.padding-nineteen-all- Padding of 19% each side.padding-twenty-all- Padding of 20% each side.padding-5px-all- Padding of 5px each side.padding-10px-all- Padding of 10px each side.padding-15px-all- Padding of 15px each side.padding-20px-all- Padding of 20px each side.padding-25px-all- Padding of 25px each side.padding-30px-all- Padding of 30px each side.padding-35px-all- Padding of 35px each side.padding-40px-all- Padding of 40px each side.padding-45px-all- Padding of 45px each side.padding-50px-all- Padding of 50px each side.padding-55px-all- Padding of 55px each side.padding-60px-all- Padding of 60px each side.padding-65px-all- Padding of 65px each side.padding-70px-all- Padding of 70px each side.padding-75px-all- Padding of 75px each side.padding-80px-all- Padding of 80px each side.padding-85px-all- Padding of 85px each side.padding-90px-all- Padding of 90px each side.padding-95px-all- Padding of 95px each side.padding-100px-all- Padding of 100px each side.padding-1-rem-all- Padding of 1rem each side.padding-1-half-rem-all- Padding of 1.5rem each side.padding-2-rem-all- Padding of 2rem each side.padding-2-half-rem-all- Padding of 2.5rem each side.padding-3-rem-all- Padding of 3rem each side.padding-3-half-rem-all- Padding of 3.5rem each side.padding-4-rem-all- Padding of 4rem each side.padding-4-half-rem-all- Padding of 4.5rem each side.padding-5-rem-all- Padding of 5rem each side.padding-5-half-rem-all- Padding of 5.5rem each side.padding-6-rem-all- Padding of 6rem each side.padding-6-half-rem-all- Padding of 6.5rem each side.padding-7-rem-all- Padding of 7rem each side.padding-7-half-rem-all- Padding of 7.5rem each side.padding-8-rem-all- Padding of 8rem each side.padding-8-half-rem-all- Padding of 8.5rem each side.padding-9-rem-all- Padding of 9rem each side.padding-9-half-rem-all- Padding of 9.5rem each side.padding-10-rem-all- Padding of 10rem each side.padding-10-half-rem-all- Padding of 10.5rem each side
Padding top side
.padding-one-top- Padding of 1% top side.padding-two-top- Padding of 2% top side.padding-three-top- Padding of 3% top side.padding-four-top- Padding of 4% top side.padding-five-top- Padding of 5% top side.padding-six-top- Padding of 6% top side.padding-seven-top- Padding of 7% top side.padding-eight-top- Padding of 8% top side.padding-nine-top- Padding of 9% top side.padding-ten-top- Padding of 10% top side.padding-eleven-top- Padding of 11% top side.padding-twelve-top- Padding of 12% top side.padding-thirteen-top- Padding of 13% top side.padding-fourteen-top- Padding of 14% top side.padding-fifteen-top- Padding of 15% top side.padding-sixteen-top- Padding of 16% top side.padding-seventeen-top- Padding of 17% top side.padding-eighteen-top- Padding of 18% top side.padding-nineteen-top- Padding of 19% top side.padding-twenty-top- Padding of 20% top side.padding-5px-top- Padding of 5px top side.padding-10px-top- Padding of 10px top side.padding-15px-top- Padding of 15px top side.padding-20px-top- Padding of 20px top side.padding-25px-top- Padding of 25px top side.padding-30px-top- Padding of 30px top side.padding-35px-top- Padding of 35px top side.padding-40px-top- Padding of 40px top side.padding-45px-top- Padding of 45px top side.padding-50px-top- Padding of 50px top side.padding-55px-top- Padding of 55px top side.padding-60px-top- Padding of 60px top side.padding-65px-top- Padding of 65px top side.padding-70px-top- Padding of 70px top side.padding-75px-top- Padding of 75px top side.padding-80px-top- Padding of 80px top side.padding-85px-top- Padding of 85px top side.padding-90px-top- Padding of 90px top side.padding-95px-top- Padding of 95px top side.padding-100px-top- Padding of 100px top side.padding-1-rem-top- Padding of 1rem top side.padding-1-half-rem-top- Padding of 1.5rem top side.padding-2-rem-top- Padding of 2rem top side.padding-2-half-rem-top- Padding of 2.5rem top side.padding-3-rem-top- Padding of 3rem top side.padding-3-half-rem-top- Padding of 3.5rem top side.padding-4-rem-top- Padding of 4rem top side.padding-4-half-rem-top- Padding of 4.5rem top side.padding-5-rem-top- Padding of 5rem top side.padding-5-half-rem-top- Padding of 5.5rem top side.padding-6-rem-top- Padding of 6rem top side.padding-6-half-rem-top- Padding of 6.5rem top side.padding-7-rem-top- Padding of 7rem top side.padding-7-half-rem-top- Padding of 7.5rem top side.padding-8-rem-top- Padding of 8rem top side.padding-8-half-rem-top- Padding of 8.5rem top side.padding-9-rem-top- Padding of 9rem top side.padding-9-half-rem-top- Padding of 9.5rem top side.padding-10-rem-top- Padding of 10rem top side.padding-10-half-rem-top- Padding of 10.5rem top side
Padding bottom side
.padding-one-bottom- Padding of 1% bottom side.padding-two-bottom- Padding of 2% bottom side.padding-three-bottom- Padding of 3% bottom side.padding-four-bottom- Padding of 4% bottom side.padding-five-bottom- Padding of 5% bottom side.padding-six-bottom- Padding of 6% bottom side.padding-seven-bottom- Padding of 7% bottom side.padding-eight-bottom- Padding of 8% bottom side.padding-nine-bottom- Padding of 9% bottom side.padding-ten-bottom- Padding of 10% bottom side.padding-eleven-bottom- Padding of 11% bottom side.padding-twelve-bottom- Padding of 12% bottom side.padding-thirteen-bottom- Padding of 13% bottom side.padding-fourteen-bottom- Padding of 14% bottom side.padding-fifteen-bottom- Padding of 15% bottom side.padding-sixteen-bottom- Padding of 16% bottom side.padding-seventeen-bottom- Padding of 17% bottom side.padding-eighteen-bottom- Padding of 18% bottom side.padding-nineteen-bottom- Padding of 19% bottom side.padding-twenty-bottom- Padding of 20% bottom side.padding-5px-bottom- Padding of 5px bottom side.padding-10px-bottom- Padding of 10px bottom side.padding-15px-bottom- Padding of 15px bottom side.padding-20px-bottom- Padding of 20px bottom side.padding-25px-bottom- Padding of 25px bottom side.padding-30px-bottom- Padding of 30px bottom side.padding-35px-bottom- Padding of 35px bottom side.padding-40px-bottom- Padding of 40px bottom side.padding-45px-bottom- Padding of 45px bottom side.padding-50px-bottom- Padding of 50px bottom side.padding-55px-bottom- Padding of 55px bottom side.padding-60px-bottom- Padding of 60px bottom side.padding-65px-bottom- Padding of 65px bottom side.padding-70px-bottom- Padding of 70px bottom side.padding-75px-bottom- Padding of 75px bottom side.padding-80px-bottom- Padding of 80px bottom side.padding-85px-bottom- Padding of 85px bottom side.padding-90px-bottom- Padding of 90px bottom side.padding-95px-bottom- Padding of 95px bottom side.padding-100px-bottom- Padding of 100px bottom side.padding-1-rem-bottom- Padding of 1rem bottom side.padding-1-half-rem-bottom- Padding of 1.5rem bottom side.padding-2-rem-bottom- Padding of 2rem bottom side.padding-2-half-rem-bottom- Padding of 2.5rem bottom side.padding-3-rem-bottom- Padding of 3rem bottom side.padding-3-half-rem-bottom- Padding of 3.5rem bottom side.padding-4-rem-bottom- Padding of 4rem bottom side.padding-4-half-rem-bottom- Padding of 4.5rem bottom side.padding-5-rem-bottom- Padding of 5rem bottom side.padding-5-half-rem-bottom- Padding of 5.5rem bottom side.padding-6-rem-bottom- Padding of 6rem bottom side.padding-6-half-rem-bottom- Padding of 6.5rem bottom side.padding-7-rem-bottom- Padding of 7rem bottom side.padding-7-half-rem-bottom- Padding of 7.5rem bottom side.padding-8-rem-bottom- Padding of 8rem bottom side.padding-8-half-rem-bottom- Padding of 8.5rem bottom side.padding-9-rem-bottom- Padding of 9rem bottom side.padding-9-half-rem-bottom- Padding of 9.5rem bottom side.padding-10-rem-bottom- Padding of 10rem bottom side.padding-10-half-rem-bottom- Padding of 10.5rem bottom side
Padding right side
.padding-one-right- Padding of 1% right side.padding-two-right- Padding of 2% right side.padding-three-right- Padding of 3% right side.padding-four-right- Padding of 4% right side.padding-five-right- Padding of 5% right side.padding-six-right- Padding of 6% right side.padding-seven-right- Padding of 7% right side.padding-eight-right- Padding of 8% right side.padding-nine-right- Padding of 9% right side.padding-ten-right- Padding of 10% right side.padding-eleven-right- Padding of 11% right side.padding-twelve-right- Padding of 12% right side.padding-thirteen-right- Padding of 13% right side.padding-fourteen-right- Padding of 14% right side.padding-fifteen-right- Padding of 15% right side.padding-sixteen-right- Padding of 16% right side.padding-seventeen-right- Padding of 17% right side.padding-eighteen-right- Padding of 18% right side.padding-nineteen-right- Padding of 19% right side.padding-twenty-right- Padding of 20% right side.padding-5px-right- Padding of 5px right side.padding-10px-right- Padding of 10px right side.padding-15px-right- Padding of 15px right side.padding-20px-right- Padding of 20px right side.padding-25px-right- Padding of 25px right side.padding-30px-right- Padding of 30px right side.padding-35px-right- Padding of 35px right side.padding-40px-right- Padding of 40px right side.padding-45px-right- Padding of 45px right side.padding-50px-right- Padding of 50px right side.padding-55px-right- Padding of 55px right side.padding-60px-right- Padding of 60px right side.padding-65px-right- Padding of 65px right side.padding-70px-right- Padding of 70px right side.padding-75px-right- Padding of 75px right side.padding-80px-right- Padding of 80px right side.padding-85px-right- Padding of 85px right side.padding-90px-right- Padding of 90px right side.padding-95px-right- Padding of 95px right side.padding-100px-right- Padding of 100px right side.padding-1-rem-right- Padding of 1rem right side.padding-1-half-rem-right- Padding of 1.5rem right side.padding-2-rem-right- Padding of 2rem right side.padding-2-half-rem-right- Padding of 2.5rem right side.padding-3-rem-right- Padding of 3rem right side.padding-3-half-rem-right- Padding of 3.5rem right side.padding-4-rem-right- Padding of 4rem right side.padding-4-half-rem-right- Padding of 4.5rem right side.padding-5-rem-right- Padding of 5rem right side.padding-5-half-rem-right- Padding of 5.5rem right side.padding-6-rem-right- Padding of 6rem right side.padding-6-half-rem-right- Padding of 6.5rem right side.padding-7-rem-right- Padding of 7rem right side.padding-7-half-rem-right- Padding of 7.5rem right side.padding-8-rem-right- Padding of 8rem right side.padding-8-half-rem-right- Padding of 8.5rem right side.padding-9-rem-right- Padding of 9rem right side.padding-9-half-rem-right- Padding of 9.5rem right side.padding-10-rem-right- Padding of 10rem right side.padding-10-half-rem-right- Padding of 10.5rem right side
Padding left side
.padding-one-left- Padding of 1% left side.padding-two-left- Padding of 2% left side.padding-three-left- Padding of 3% left side.padding-four-left- Padding of 4% left side.padding-five-left- Padding of 5% left side.padding-six-left- Padding of 6% left side.padding-seven-left- Padding of 7% left side.padding-eight-left- Padding of 8% left side.padding-nine-left- Padding of 9% left side.padding-ten-left- Padding of 10% left side.padding-eleven-left- Padding of 11% left side.padding-twelve-left- Padding of 12% left side.padding-thirteen-left- Padding of 13% left side.padding-fourteen-left- Padding of 14% left side.padding-fifteen-left- Padding of 15% left side.padding-sixteen-left- Padding of 16% left side.padding-seventeen-left- Padding of 17% left side.padding-eighteen-left- Padding of 18% left side.padding-nineteen-left- Padding of 19% left side.padding-twenty-left- Padding of 20% left side.padding-5px-left- Padding of 5px left side.padding-10px-left- Padding of 10px left side.padding-15px-left- Padding of 15px left side.padding-20px-left- Padding of 20px left side.padding-25px-left- Padding of 25px left side.padding-30px-left- Padding of 30px left side.padding-35px-left- Padding of 35px left side.padding-40px-left- Padding of 40px left side.padding-45px-left- Padding of 45px left side.padding-50px-left- Padding of 50px left side.padding-55px-left- Padding of 55px left side.padding-60px-left- Padding of 60px left side.padding-65px-left- Padding of 65px left side.padding-70px-left- Padding of 70px left side.padding-75px-left- Padding of 75px left side.padding-80px-left- Padding of 80px left side.padding-85px-left- Padding of 85px left side.padding-90px-left- Padding of 90px left side.padding-95px-left- Padding of 95px left side.padding-100px-left- Padding of 100px left side.padding-1-rem-left- Padding of 1rem left side.padding-1-half-rem-left- Padding of 1.5rem left side.padding-2-rem-left- Padding of 2rem left side.padding-2-half-rem-left- Padding of 2.5rem left side.padding-3-rem-left- Padding of 3rem left side.padding-3-half-rem-left- Padding of 3.5rem left side.padding-4-rem-left- Padding of 4rem left side.padding-4-half-rem-left- Padding of 4.5rem left side.padding-5-rem-left- Padding of 5rem left side.padding-5-half-rem-left- Padding of 5.5rem left side.padding-6-rem-left- Padding of 6rem left side.padding-6-half-rem-left- Padding of 6.5rem left side.padding-7-rem-left- Padding of 7rem left side.padding-7-half-rem-left- Padding of 7.5rem left side.padding-8-rem-left- Padding of 8rem left side.padding-8-half-rem-left- Padding of 8.5rem left side.padding-9-rem-left- Padding of 9rem left side.padding-9-half-rem-left- Padding of 9.5rem left side.padding-10-rem-left- Padding of 10rem left side.padding-10-half-rem-left- Padding of 10.5rem left side
Padding left & right side
.padding-one-lr- Padding of 1% left and right side.padding-two-lr- Padding of 2% left and right side.padding-three-lr- Padding of 3% left and right side.padding-four-lr- Padding of 4% left and right side.padding-five-lr- Padding of 5% left and right side.padding-six-lr- Padding of 6% left and right side.padding-seven-lr- Padding of 7% left and right side.padding-eight-lr- Padding of 8% left and right side.padding-nine-lr- Padding of 9% left and right side.padding-ten-lr- Padding of 10% left and right side.padding-eleven-lr- Padding of 11% left and right side.padding-twelve-lr- Padding of 12% left and right side.padding-thirteen-lr- Padding of 13% left and right side.padding-fourteen-lr- Padding of 14% left and right side.padding-fifteen-lr- Padding of 15% left and right side.padding-sixteen-lr- Padding of 16% left and right side.padding-seventeen-lr- Padding of 17% left and right side.padding-eighteen-lr- Padding of 18% left and right side.padding-nineteen-lr- Padding of 19% left and right side.padding-twenty-lr- Padding of 20% left and right side.padding-5px-lr- Padding of 5px left and right side.padding-10px-lr- Padding of 10px left and right side.padding-15px-lr- Padding of 15px left and right side.padding-20px-lr- Padding of 20px left and right side.padding-25px-lr- Padding of 25px left and right side.padding-30px-lr- Padding of 30px left and right side.padding-35px-lr- Padding of 35px left and right side.padding-40px-lr- Padding of 40px left and right side.padding-45px-lr- Padding of 45px left and right side.padding-50px-lr- Padding of 50px left and right side.padding-55px-lr- Padding of 55px left and right side.padding-60px-lr- Padding of 60px left and right side.padding-65px-lr- Padding of 65px left and right side.padding-70px-lr- Padding of 70px left and right side.padding-75px-lr- Padding of 75px left and right side.padding-80px-lr- Padding of 80px left and right side.padding-85px-lr- Padding of 85px left and right side.padding-90px-lr- Padding of 90px left and right side.padding-95px-lr- Padding of 95px left and right side.padding-100px-lr- Padding of 100px left and right side.padding-1-rem-lr- Padding of 1rem left and right side.padding-1-half-rem-lr- Padding of 1.5rem left and right side.padding-2-rem-lr- Padding of 2rem left and right side.padding-2-half-rem-lr- Padding of 2.5rem left and right side.padding-3-rem-lr- Padding of 3rem left and right side.padding-3-half-rem-lr- Padding of 3.5rem left and right side.padding-4-rem-lr- Padding of 4rem left and right side.padding-4-half-rem-lr- Padding of 4.5rem left and right side.padding-5-rem-lr- Padding of 5rem left and right side.padding-5-half-rem-lr- Padding of 5.5rem left and right side.padding-6-rem-lr- Padding of 6rem left and right side.padding-6-half-rem-lr- Padding of 6.5rem left and right side.padding-7-rem-lr- Padding of 7rem left and right side.padding-7-half-rem-lr- Padding of 7.5rem left and right side.padding-8-rem-lr- Padding of 8rem left and right side.padding-8-half-rem-lr- Padding of 8.5rem left and right side.padding-9-rem-lr- Padding of 9rem left and right side.padding-9-half-rem-lr- Padding of 9.5rem left and right side.padding-10-rem-lr- Padding of 10rem left and right side.padding-10-half-rem-lr- Padding of 10.5rem left and right side
Padding top & bottom side
.padding-one-tb- Padding of 1% top and bottom side.padding-two-tb- Padding of 2% top and bottom side.padding-three-tb- Padding of 3% top and bottom side.padding-four-tb- Padding of 4% top and bottom side.padding-five-tb- Padding of 5% top and bottom side.padding-six-tb- Padding of 6% top and bottom side.padding-seven-tb- Padding of 7% top and bottom side.padding-eight-tb- Padding of 8% top and bottom side.padding-nine-tb- Padding of 9% top and bottom side.padding-ten-tb- Padding of 10% top and bottom side.padding-eleven-tb- Padding of 11% top and bottom side.padding-twelve-tb- Padding of 12% top and bottom side.padding-thirteen-tb- Padding of 13% top and bottom side.padding-fourteen-tb- Padding of 14% top and bottom side.padding-fifteen-tb- Padding of 15% top and bottom side.padding-sixteen-tb- Padding of 16% top and bottom side.padding-seventeen-tb- Padding of 17% top and bottom side.padding-eighteen-tb- Padding of 18% top and bottom side.padding-nineteen-tb- Padding of 19% top and bottom side.padding-twenty-tb- Padding of 20% top and bottom side.padding-5px-tb- Padding of 5px top and bottom side.padding-10px-tb- Padding of 10px top and bottom side.padding-15px-tb- Padding of 15px top and bottom side.padding-20px-tb- Padding of 20px top and bottom side.padding-25px-tb- Padding of 25px top and bottom side.padding-30px-tb- Padding of 30px top and bottom side.padding-35px-tb- Padding of 35px top and bottom side.padding-40px-tb- Padding of 40px top and bottom side.padding-45px-tb- Padding of 45px top and bottom side.padding-50px-tb- Padding of 50px top and bottom side.padding-55px-tb- Padding of 55px top and bottom side.padding-60px-tb- Padding of 60px top and bottom side.padding-65px-tb- Padding of 65px top and bottom side.padding-70px-tb- Padding of 70px top and bottom side.padding-75px-tb- Padding of 75px top and bottom side.padding-80px-tb- Padding of 80px top and bottom side.padding-85px-tb- Padding of 85px top and bottom side.padding-90px-tb- Padding of 90px top and bottom side.padding-95px-tb- Padding of 95px top and bottom side.padding-100px-tb- Padding of 100px top and bottom side.padding-1-rem-tb- Padding of 1rem top and bottom side.padding-1-half-rem-tb- Padding of 1.5rem top and bottom side.padding-2-rem-tb- Padding of 2rem top and bottom side.padding-2-half-rem-tb- Padding of 2.5rem top and bottom side.padding-3-rem-tb- Padding of 3rem top and bottom side.padding-3-half-rem-tb- Padding of 3.5rem top and bottom side.padding-4-rem-tb- Padding of 4rem top and bottom side.padding-4-half-rem-tb- Padding of 4.5rem top and bottom side.padding-5-rem-tb- Padding of 5rem top and bottom side.padding-5-half-rem-tb- Padding of 5.5rem top and bottom side.padding-6-rem-tb- Padding of 6rem top and bottom side.padding-6-half-rem-tb- Padding of 6.5rem top and bottom side.padding-7-rem-tb- Padding of 7rem top and bottom side.padding-7-half-rem-tb- Padding of 7.5rem top and bottom side.padding-8-rem-tb- Padding of 8rem top and bottom side.padding-8-half-rem-tb- Padding of 8.5rem top and bottom side.padding-9-rem-tb- Padding of 9rem top and bottom side.padding-9-half-rem-tb- Padding of 9.5rem top and bottom side.padding-10-rem-tb- Padding of 10rem top and bottom side.padding-10-half-rem-tb- Padding of 10.5rem top and bottom side
.no-padding- Remove padding from all sides.no-padding-lr- Remove padding from left and right sides.no-padding-tb- Remove padding from top and bottom sides.no-padding-top- Remove padding from top side.no-padding-bottom- Remove padding from bottom side.no-padding-right- Remove padding from right side.no-padding-left- Remove padding from left side
Float
.float-start- Float DIV to left.float-end- Float DIV to right.float-none- No float
Display
.d-block- For display block.d-inline-block- For display inline-block.d-inline- For display inline.d-none- For display none.d-table- For display table.d-table-cell- For display table-cell.d-flex- For display flex.d-initial- For display initial.overflow-hidden- For overflow hidden.overflow-visible- For overflow visible.overflow-auto- For overflow auto
Position
.position-inherit- For element position inherit.position-relative- For element position relative.position-absolute- For element position absolute.position-fixed- For element position fixed
Width
.w-1px- For width of 1px on DIV/Text.w-2px- For width of 2px on DIV/Text.w-3px- For width of 3px on DIV/Text.w-4px- For width of 4px on DIV/Text.w-5px- For width of 5px on DIV/Text.w-6px- For width of 6px on DIV/Text.w-7px- For width of 7px on DIV/Text.w-8px- For width of 8px on DIV/Text.w-9px- For width of 9px on DIV/Text.w-10px- For width of 10px on DIV/Text.w-15px- For width of 15px on DIV/Text.w-20px- For width of 20px on DIV/Text.w-25px- For width of 25px on DIV/Text.w-30px- For width of 30px on DIV/Text.w-35px- For width of 35px on DIV/Text.w-40px- For width of 40px on DIV/Text.w-45px- For width of 45px on DIV/Text.w-50px- For width of 50px on DIV/Text.w-55px- For width of 55px on DIV/Text.w-60px- For width of 60px on DIV/Text.w-65px- For width of 65px on DIV/Text.w-70px- For width of 70px on DIV/Text.w-75px- For width of 75px on DIV/Text.w-80px- For width of 80px on DIV/Text.w-85px- For width of 85px on DIV/Text.w-90px- For width of 90px on DIV/Text.w-95px- For width of 95px on DIV/Text.w-100px- For width of 100px on DIV/Text.w-110px- For width of 110px on DIV/Text.w-120px- For width of 120px on DIV/Text.w-130px- For width of 130px on DIV/Text.w-140px- For width of 140px on DIV/Text.w-150px- For width of 150px on DIV/Text.w-160px- For width of 160px on DIV/Text.w-170px- For width of 170px on DIV/Text.w-180px- For width of 180px on DIV/Text.w-190px- For width of 190px on DIV/Text.w-200px- For width of 200px on DIV/Text.w-250px- For width of 250px on DIV/Text.w-300px- For width of 300px on DIV/Text.w-350px- For width of 350px on DIV/Text.w-400px- For width of 400px on DIV/Text.w-450px- For width of 450px on DIV/Text.w-500px- For width of 500px on DIV/Text.w-550px- For width of 550px on DIV/Text.w-600px- For width of 600px on DIV/Text.w-650px- For width of 650px on DIV/Text.w-700px- For width of 700px on DIV/Text.w-750px- For width of 750px on DIV/Text.w-800px- For width of 800px on DIV/Text.w-850px- For width of 850px on DIV/Text.w-900px- For width of 900px on DIV/Text.w-950px- For width of 950px on DIV/Text.w-1000px- For width of 1000px on DIV/Text.w-10- For width of 10% on DIV/Text.w-15- For width of 15% on DIV/Text.w-20- For width of 20% on DIV/Text.w-25- For width of 25% on DIV/Text.w-30- For width of 30% on DIV/Text.w-35- For width of 35% on DIV/Text.w-40- For width of 40% on DIV/Text.w-45- For width of 45% on DIV/Text.w-50- For width of 50% on DIV/Text.w-55- For width of 55% on DIV/Text.w-57- For width of 57% on DIV/Text.w-60- For width of 60% on DIV/Text.w-65- For width of 65% on DIV/Text.w-70- For width of 70% on DIV/Text.w-75- For width of 75% on DIV/Text.w-80- For width of 80% on DIV/Text.w-85- For width of 85% on DIV/Text.w-90- For width of 90% on DIV/Text.w-95- For width of 95% on DIV/Text.w-100- For width of 100% on DIV/Text.w-auto- For width of auto on DIV/Text
Height
.h-1px- For height of 1px on DIV.h-2px- For height of 2px on DIV.h-3px- For height of 3px on DIV.h-4px- For height of 4px on DIV.h-5px- For height of 5px on DIV.h-6px- For height of 6px on DIV.h-7px- For height of 7px on DIV.h-8px- For height of 8px on DIV.h-9px- For height of 9px on DIV.h-10px- For height of 10px on DIV.h-15px- For height of 15px on DIV.h-20px- For height of 20px on DIV.h-25px- For height of 25px on DIV.h-30px- For height of 30px on DIV.h-35px- For height of 35px on DIV.h-40px- For height of 40px on DIV.h-42px- For height of 42px on DIV.h-45px- For height of 45px on DIV.h-50px- For height of 50px on DIV.h-55px- For height of 55px on DIV.h-60px- For height of 60px on DIV.h-65px- For height of 65px on DIV.h-70px- For height of 70px on DIV.h-75px- For height of 75px on DIV.h-80px- For height of 80px on DIV.h-85px- For height of 85px on DIV.h-90px- For height of 90px on DIV.h-95px- For height of 95px on DIV.h-100px- For height of 100px on DIV.h-110px- For height of 110px on DIV.h-120px- For height of 120px on DIV.h-130px- For height of 130px on DIV.h-140px- For height of 140px on DIV.h-150px- For height of 150px on DIV.h-160px- For height of 160px on DIV.h-170px- For height of 170px on DIV.h-180px- For height of 180px on DIV.h-190px- For height of 190px on DIV.h-200px- For height of 200px on DIV.h-250px- For height of 250px on DIV.h-300px- For height of 300px on DIV.h-350px- For height of 350px on DIV.h-400px- For height of 400px on DIV.h-450px- For height of 450px on DIV.h-480px- For height of 480px on DIV.h-500px- For height of 500px on DIV.h-520px- For height of 520px on DIV.h-550px- For height of 550px on DIV.h-580px- For height of 580px on DIV.h-600px- For height of 600px on DIV.h-650px- For height of 650px on DIV.h-700px- For height of 700px on DIV.h-720px- For height of 720px on DIV.h-750px- For height of 750px on DIV.h-800px- For height of 800px on DIV.h-820px- For height of 820px on DIV.h-830px- For height of 830px on DIV.h-850px- For height of 850px on DIV.h-50- For height of 50% on DIV.h-100- For height of 100% on DIV.h-auto- For height of auto on DIV.max-h-100- For maximum height of 100% on DIV.max-h-inherit- For maximum height of inherit on DIV.min-h-100px- For minimum height of 100px on DIV.min-h-200px- For minimum height of 200px on DIV.min-h-300px- For minimum height of 300px on DIV.min-h-400px- For minimum height of 400px on DIV.min-h-500px- For minimum height of 500px on DIV.min-h-600px- For minimum height of 600px on DIV.min-h-700px- For minimum height of 700px on DIV.min-h-100vh- For minimum height of 100vh on DIV
Screen height
.full-screen- For height full screen on DIV.extra-small-screen- For height as extra small screen on DIV.small-screen- For height as small screen on DIV.one-half-screen- For height one half of screen on DIV.one-third-screen- For height one third of screen on DIV.one-fourth-screen- For height one fourth screen on DIV.one-fifth-screen- For height one fifth screen on DIV
Border width
.border-width-1px- For border width of 1px.border-width-2px- For border width of 2px.border-width-3px- For border width of 3px.border-width-4px- For border width of 4px.border-width-5px- For border width of 5px.border-width-6px- For border width of 6px.border-width-7px- For border width of 7px.border-width-8px- For border width of 8px.border-width-9px- For border width of 9px.border-width-10px- For border width of 10px.border-width-11px- For border width of 11px.border-width-12px- For border width of 12px.border-width-13px- For border width of 13px.border-width-14px- For border width of 14px.border-width-15px- For border width of 15px.border-width-16px- For border width of 16px.border-width-17px- For border width of 17px.border-width-18px- For border width of 18px.border-width-19px- For border width of 19px.border-width-20px- For border width of 20px
Border display
.border-all- set border on each side of the block.border-top- set border on top side of the block.border-bottom- set border on bottom side of the block.border-left- set border on left side of the block.border-right- set border on right side of the block.border-lr- set border on left and right sides of the block.border-tb- set border on top and bottom sides of the block
Border color
.border-color-white- set white border color.border-color-black- set black border color.border-color-sky-blue- set sky blue border color.border-color-extra-dark-gray- set extra dark gray border color.border-color-medium-dark-gray- set medium dark gray border color.border-color-dark-gray- set dark gray border color.border-color-extra-medium-gray- set extra medium gray border color.border-color-medium-gray- set medium gray border color.border-color-medium-light-gray- set medium light gray border color.border-color-extra-light-gray- set extra light gray border color.border-color-light-gray- set light gray border color.border-color-light-pink- set light pink border color.border-color-fast-blue- set fast blue border color.border-color-light-peach- set light peach border color.border-color-neon-orange- set neon orange border color.border-color-green- set green border color.border-color-olivine-green- set olivine green border color.border-color-shamrock-green- set shamrock green border color.border-color-light-brownish-orange- set light brownish orange border color.border-color-golden-brown- set golden brown border color.border-color-transparent- set transparent border color.border-color-black-transparent- set black transparent border color.border-color-white-transparent- set white transparent border color.border-color-golden-transparent- set golden transparent border color.border-color-pink-transparent- set pink transparent border color.border-color-dark-white-transparent- set dark white transparent border color.border-color-medium-white-transparent- set medium white transparent border color.border-color-full-dark-white-transparent- set full dark white transparent border color.border-color-light-white-transparent- set light white transparent border color.border-color-nero-transparent- set nero transparent border color.border-color-extra-medium-gray-transparent- set extra medium gray transparent border color.border-color-copper-red-transparent- set copper red transparent border color
Border gradient color
.border-gradient-magenta-orange- set gradient magenta orange transparent border color.border-gradient-purple-magenta- set gradient purple magenta transparent border color.border-gradient-light-purple-light-orange- set gradient light purple light orange border color.border-gradient-sky-blue-pink- set gradient sky blue pink border color.border-gradient-peacock-blue-crome-yellow- set gradient peacock blue crome yellow border color.border-gradient-fast-blue-purple- set gradient fast blue purple border color.border-gradient-light-purple-light-red- set gradient light purple light red border color.border-gradient-light-brownish-orange-black- set gradient light brownish orange black border color.border-gradient-red-violet-purple- set gradient red violet purple border color
Border style
.border-dotted- set dotted border style.border-dashed- set dashed border style.border-solid- set solid border style.border-double- set double border style.border-groove- set groove border style.border-ridge- set ridge border style.border-inset- set inset border style.border-outset- set outset border style.border-none- set none border style.border-hidden- set hidden border style.border-transperent- set transparent border color.no-border- Remove border from all side.no-border-top- remove border from top.no-border-bottom- remove border from bottom.no-border-right- remove border from right.no-border-left- remove border from left.no-border-top-bottom- Remove border from top and bottom.no-border-left-right- Remove border from left and right
Border radius
.border-radius-0px- set 0px of border radius.border-radius-1px- set 1px of border radius.border-radius-2px- set 2px of border radius.border-radius-3px- set 3px of border radius.border-radius-4px- set 4px of border radius.border-radius-5px- set 5px of border radius.border-radius-6px- set 6px of border radius.border-radius-7px- set 7px of border radius.border-radius-8px- set 8px of border radius.border-radius-9px- set 9px of border radius.border-radius-10px- set 10px of border radius.border-radius-20px- set 20px of border radius.border-radius-30px- set 30px of border radius.border-radius-40px- set 40px of border radius.border-radius-50px- set 50px of border radius.border-radius-100px- set 100px of border radius.border-radius-50- set 50% of border radius.border-radius-100- set 100% of border radius.no-border-radius- remove border radius
Useful tips
1. How to setup onepage navigation?
In LITHO you can add link/button which direct you to other section of the same page with smooth scroll effect like it is one page website. You just need to add class: section-link and href should be the ID of the section as per the example shown below:
<a href="#home" class="section-link">Home</a>
NotePlease note that destination section should have valid ID and you can check one-page-navigation.html page for your reference.
2. How to fix revolution slider red error message?
If you are opening the HTML page directly in the browser instead of online url with http / https, then in that case please open that page in text editor and uncomment some code at the bottom as per the explanation provided there and then that slider should work fine. But please make sure to comment / remove those lines of code when you upload the page in your server online.
3. How to open a popup automatically when the page load?
You can add a DIV with subscribe-popup ID in a page and then it will display this DIV content in popup when this page load. Please refer this demo page - modal-subscription.html page for your reference. If you want to add some delay like the popup should display 5 seconds after the page load then please open /js/main.js file, search delaySecond and set it to 5.
4. How to enable animations in mobile?
Some animations create conflict and do not work in mobile devices, so by default we have disabled all the animations for mobile devices. If you want to enable it at your risk then you can change mobileAnimation variable to true instead of false in /js/main.js file.
5. How to open external videos in popup instead of external website in mobile?
Magnific library by default open external video / map in external website instead of in popup for mobile devices having width of 767px or lower. But if you want to display external content in popup always in all devices then please change disableOn variable to 0 instead of 767 in /js/main.js file.
6. How to add page loader?
Page loader will display loading icon till the page is loaded fully. If you want to achieve this then please add below code directly below BODY opening tag in your page HTML code. You can check this demo page - home-vertical-portfolio.html for more details.
<div class="page-loader"></div>
7. How to change logo size container?
You can increase the max-height as per your need in /css/style.css file under this css class: header .navbar .navbar-brand img, header.side-menu .logo img, header .sidebar-nav-menu .navbar-brand img
8. How to add sticky demos and buy now buttons in your website?
Please open /js/main.js file and search themeDemoHTML, you can uncomment that variable line and the next line also. You can amend the HTML code in themeDemoHTML variable value as per your need to adjust those side icons, content and images as per your need.
9. How to enable GDPR cookies policy notice bar in the bottom?
Please open /js/main.js file and search GDPR policy, you can uncomment some lines of code there in that code section. You can amend the HTML code in gdprHTML variable value as per your need to adjust the content and button. Once it is closed by user, it will not display again for 30 days and you can change this cookie period in days by changing value of this variable - gdprExpireDays.
10. How to make your footer sticky?
You need to put main body content of the page inside a DIV with main-content class and then add footer-sticky class in your footer tag. Please refer this demo page footer-style-11.html for more details.
Slider types & options
LITHO includes 2 types of sliders as mentioned below:
Swiper slider

<!-- start section -->
<section class="p-0" >
    <div class="container-fluid position-relative">
        <div class="row">
            <div class="swiper-container white-move full-screen p-0 md-h-650px sm-h-500px" data-slider-options='{ "slidesPerView": 1, "loop": true, "autoplay": { "delay": 4500, "disableOnInteraction": false },  "pagination": { "el": ".swiper-pagination", "clickable": true }, "navigation": { "nextEl": ".swiper-button-next-nav", "prevEl": ".swiper-button-previous-nav" }, "keyboard": { "enabled": true, "onlyInViewport": true }, "effect": "slide" }'>
                <div class="swiper-wrapper">
                    <!-- start slider item -->
                    <div class="swiper-slide cover-background" style="background-image:url('image path');">
                        <div class="container h-100">
                            <div class="row justify-content-center h-100">
                                <div class="col-12 col-xl-6 col-sm-7 d-flex flex-column justify-content-center text-center h-100">
                                    <span class="alt-font font-weight-500 text-extra-medium letter-spacing-2px text-white text-uppercase d-block margin-35px-bottom sm-margin-15px-bottom">Package start only $250</span>
                                    <h1 class="alt-font font-weight-800 title-large text-white text-uppercase letter-spacing-minus-4px margin-45px-bottom sm-letter-spacing-minus-1px sm-margin-30px-bottom text-shadow-large sm-no-text-shadow xs-w-90 mx-auto">Deserts discovery</h1>
                                    <a href="#" class="btn btn-fancy btn-large btn-dark-gray btn-box-shadow align-self-center">Discover Tour</a>
                                </div>
                            </div>
                        </div>
                    </div>
                    <!-- end slider item -->
                    <!-- start slider item -->
                    <div class="swiper-slide cover-background" style="background-image:url('image path');">
                        <div class="container h-100">
                            <div class="row justify-content-center h-100">
                                <div class="col-12 col-xl-6 col-sm-7 d-flex flex-column justify-content-center text-center h-100">
                                    <span class="alt-font font-weight-500 text-extra-medium letter-spacing-2px text-white text-uppercase d-block margin-35px-bottom sm-margin-15px-bottom">Package start only $250</span>
                                    <h1 class="alt-font font-weight-800 title-large text-white text-uppercase letter-spacing-minus-4px margin-45px-bottom sm-letter-spacing-minus-1px sm-margin-30px-bottom text-shadow-large sm-no-text-shadow xs-w-90 mx-auto">Beaches discover</h1>
                                    <a href="#" class="btn btn-fancy btn-large btn-dark-gray btn-box-shadow align-self-center">Discover Tour</a>
                                </div>
                            </div>
                        </div>
                    </div>
                    <!-- end slider item -->
                    <!-- start slider item -->
                    <div class="swiper-slide cover-background" style="background-image:url('image path');">
                        <div class="container h-100">
                            <div class="row justify-content-center h-100">
                                <div class="col-12 col-xl-6 col-sm-7 d-flex flex-column justify-content-center text-center h-100">
                                    <span class="alt-font font-weight-500 text-extra-medium letter-spacing-2px text-white text-uppercase d-block margin-35px-bottom sm-margin-15px-bottom">Package start only $250</span>
                                    <h1 class="alt-font font-weight-800 title-large text-white text-uppercase letter-spacing-minus-4px margin-45px-bottom sm-letter-spacing-minus-1px sm-margin-30px-bottom text-shadow-large sm-no-text-shadow xs-w-70 mx-auto">Summer season</h1>
                                    <a href="#" class="btn btn-fancy btn-large btn-dark-gray btn-box-shadow align-self-center">Discover Tour</a>
                                </div>
                            </div>
                        </div>
                    </div>
                    <!-- end slider item -->
                </div>
                <!-- start slider pagination -->
                <div class="swiper-pagination swiper-light-pagination d-sm-none"></div>
                <!-- end slider pagination -->
                <!-- start slider navigation -->
                <div class="swiper-button-next-nav swiper-button-next rounded-circle slider-navigation-style-07 d-none d-sm-flex"><i class="feather icon-feather-arrow-right"></i></div>
                <div class="swiper-button-previous-nav swiper-button-prev rounded-circle slider-navigation-style-07 d-none d-sm-flex"><i class="feather icon-feather-arrow-left"></i></div>
                <!-- end slider navigation -->
            </div>
        </div>
    </div>
    </section>
<!-- end section -->
Following are some parameters that you can use in data-slider-option attribute.
| Parameter | Description |
|---|---|
init |
Whether Swiper should be initialised automatically when you create an instance. If disabled, then you need to init it manually by calling mySwiper.init() |
updateOnWindowResize |
Swiper will recalculate slides position on window resize (orientationchange) |
initialSlide |
Index number of initial slide. |
direction |
Could be 'horizontal' or 'vertical' (for vertical slider). |
speed |
Duration of transition between slides (in ms) |
setWrapperSize |
Enabled this option and plugin will set width/height on swiper wrapper equal to total size of all slides. Mostly should be used as compatibility fallback option for browser that don't support flexbox layout well |
virtualTranslate |
Enabled this option and swiper will be operated as usual except it will not move, real translate values on wrapper will not be set. Useful when you may need to create custom slide transition |
width |
Swiper width (in px). Parameter allows to force Swiper width. Useful only if you initialize Swiper when it is hidden.
Setting this parameter will make Swiper not responsive. But can be useful when running under Node.js (e.g. for testing with libs like Jest, and for SSR) |
height |
Swiper height (in px). Parameter allows to force Swiper height. Useful only if you initialize Swiper when it is hidden.
Setting this parameter will make Swiper not responsive. But can be useful when running under Node.js (e.g. for testing with libs like Jest, and for SSR) |
autoHeight |
Set to true and slider wrapper will adopt its height to the height of the currently active slide |
roundLengths |
Set to true to round values of slides width and height to prevent blurry texts on usual resolution screens (if you have such) |
nested |
Set to true on nested Swiper for correct touch events interception. Use only on nested swipers that use same direction as the parent one |
uniqueNavElements |
If enabled (by default) and navigation elements' parameters passed as a string (like ".pagination") then Swiper will look for such elements through child elements first. Applies for pagination, prev/next buttons and scrollbar elements |
effect |
Transition effect. Could be "slide", "fade", "cube", "coverflow" or "flip" |
runCallbacksOnInit |
Fire [Transition/SlideChange][Start/End] events on swiper initialization. Such events will be fired on initialization in case of your initialSlide is not 0, or you use loop mode |
watchOverflow |
When enabled Swiper will be disabled and hide navigation buttons on case there are not enough slides for sliding |
userAgent |
userAgent string. Required for browser/device detection when rendered on server-side (for SSR) |
url |
Required for active slide detection when rendered on server-side (SSR) and enabled history |
on |
Register event handlers |
cssMode |
When enabled it will use modern CSS Scroll Snap API. It doesn't support all of Swiper's features, but potentially should bring a much better performance in simple configurations. This is what is not supported when it is enabled:
|
spaceBetween |
Distance between slides in px. If you use "margin" css property to the elements which go into Swiper in which you pass "spaceBetween" into, navigation might not work property. |
slidesPerView |
Number of slides per view (slides visible at the same time on slider's container). If you use it with "auto" value and along with loop: true then you need to specify loopedSlides parameter with amount of slides to loop (duplicate)
slidesPerView: 'auto' is currently not compatible with multirow mode, when slidesPerColumn > 1
|
slidesPerColumn |
Number of slides per column, for multirow layout slidesPerColumn > 1 is currently not compatible with loop mode (loop: true) |
slidesPerColumnFill |
userAgent string. Required for browser/device detection when rendered on server-side (for SSR) |
userAgent |
Could be 'column' or 'row'. Defines how slides should fill rows, by column or by row. When 'column' it uses flex-direction: column layout which requires specified height on swiper-container. |
slidesPerGroup |
Set numbers of slides to define and enable group sliding. Useful to use with slidesPerView > 1 |
slidesPerGroupSkip |
The parameter works in the following way: If slidesPerGroupSkip equals 0 (default), no slides are excluded from grouping, and the resulting behaviour is the same as without this change. If slidesPerGroupSkip is equal or greater than 1 the first X slides are treated as single groups, whereas all following slides are grouped by the slidesPerGroup value. |
centeredSlides |
If true, then active slide will be centered, not always on the left side. |
centeredSlidesBounds |
If true, then active slide will be centered without adding gaps at the beginning and end of slider. Required centeredSlides: true. Not intended to be used with loop or pagination |
slidesOffsetBefore |
Add (in px) additional slide offset in the beginning of the container (before all slides) |
slidesOffsetAfter |
Add (in px) additional slide offset in the end of the container (after all slides) |
normalizeSlideIndex |
Normalize slide index. See #1766 |
centerInsufficientSlides |
If true, then active slide will be centered, not always on the left side. |
centeredSlides |
When enabled it center slides if the amount of slides less than slidesPerView. Not intended to be used loop mode and slidesPerColumn |
grabCursor |
This option may a little improve desktop usability. If true, user will see the "grab" cursor when hover on Swiper |
touchEventsTarget |
Target element to listen touch events on. Can be 'container' (to listen for touch events on swiper-container) or 'wrapper' (to listen for touch events on swiper-wrapper) |
touchRatio |
Touch ratio |
touchAngle |
Allowable angle (in degrees) to trigger touch move |
simulateTouch |
If true, Swiper will accept mouse events like touch events (click and drag to change slides) |
shortSwipes |
Set to false if you want to disable short swipes |
longSwipes |
Set to false if you want to disable long swipes |
longSwipesRatio |
Ratio to trigger swipe to next/previous slide during long swipes |
longSwipesMs |
Minimal duration (in ms) to trigger swipe to next/previous slide during long swipes |
followFinger |
If disabled, then slider will be animated only when you release it, it will not move while you hold your finger on it |
allowTouchMove |
If false, then the only way to switch the slide is use of external API functions like slidePrev or slideNext |
threshold |
Threshold value in px. If "touch distance" will be lower than this value then swiper will not move |
touchStartPreventDefault |
If disabled, touchstart (mousedown) event won't be prevented |
touchStartForcePreventDefault |
Force to always prevent default for touchstart (mousedown) event |
touchMoveStopPropagation |
If enabled, then propagation of "touchmove" will be stopped |
iOSEdgeSwipeDetection |
Enable to release Swiper events for swipe-to-go-back work in iOS UIWebView |
iOSEdgeSwipeThreshold |
Area (in px) from left edge of the screen to release touch events for swipe-to-go-back in iOS UIWebView |
touchReleaseOnEdges |
Enable to release touch events on slider edge position (beginning, end) to allow for further page scrolling |
passiveListeners |
Passive event listeners will be used by default where possible to improve scrolling performance on mobile devices. But if you need to use e.preventDefault and you have conflict with it, then you should disable this parameter |
resistance |
Set to false if you want to disable resistant bounds |
resistanceRatio |
This option allows you to control resistance ratio |
preventInteractionOnTransition |
When enabled it won't allow to change slides by swiping or navigation/pagination buttons during transition |
allowSlidePrev |
Set to false to disable swiping to previous slide direction (to left or top) |
allowSlideNext |
Set to false to disable swiping to next slide direction (to right or bottom) |
noSwiping |
Enable/disable swiping on elements matched to class specified in noSwipingClass |
noSwipingClass |
Specify noSwiping's' element css class |
noSwipingSelector |
Can be used instead of noSwipingClass to specify elements to disable swiping on. For example 'input' will disable swiping on all inputs |
swipeHandler |
String with CSS selector or HTML element of the container with pagination that will work as only available handler for swiping |
preventClicks |
Set to true to prevent accidental unwanted clicks on links during swiping |
preventClicksPropagation |
Set to true to stop clicks event propagation on links during swiping |
slideToClickedSlide |
Set to true and click on any slide will produce transition to this slide |
freeMode |
If true then slides will not have fixed positions |
freeModeMomentum |
If true, then slide will keep moving for a while after you release it |
freeModeMomentumRatio |
Higher value produces larger momentum distance after you release slider |
freeModeMomentumVelocityRatio |
Higher value produces larger momentum velocity after you release slider |
freeModeMomentumBounce |
Set to false if you want to disable momentum bounce in free mode |
freeModeMomentumBounceRatio |
Higher value produces larger momentum bounce effect |
freeModeMinimumVelocity |
Minimum touchmove-velocity required to trigger free mode momentum |
freeModeSticky |
Set to true to enable snap to slides positions in free mode |
watchSlidesProgress |
Enable this feature to calculate each slides progress |
watchSlidesVisibility |
watchSlidesProgress should be enabled. Enable this option and slides that are in viewport will have additional visible class |
preloadImages |
When enabled Swiper will force to load all images |
updateOnImagesReady |
When enabled Swiper will be reinitialized after all inner images (<img> tags) are loaded. Required preloadImages: true |
loop |
Set to true to enable continuous loop mode If you use it along with slidesPerView: 'auto' then you need to specify loopedSlides parameter with amount of slides to loop (duplicate) Also, because of nature of how the loop mode works, it will add duplicated slides. Such duplicated slides will have additional classes:
|
loopedSlides |
If you use slidesPerView:'auto' with loop mode you should tell to Swiper how many slides it should loop (duplicate) using this parameter |
loopFillGroupWithBlank |
Enable and loop mode will fill groups with insufficient number of slides with blank slides. Good to be used with slidesPerGroup parameter |
loopPreventsSlide |
When enabled it prevents Swiper slide prev/next transitions when transitions is already in progress (has effect when loop enabled) |
breakpoints |
Allows to set different parameter for different responsive breakpoints (screen sizes). Not all parameters can be changed in breakpoints, only those which are not required different layout and logic, like slidesPerView, slidesPerGroup, spaceBetween, slidesPerColumn. Such parameters like loop and effect won't work. For example:<div class="swiper-container white-move full-screen md-h-650px sm-h-500px" data-slider-options='{ "slidesPerView": 1, "loop": true, "autoplay": { "delay": 4500, "disableOnInteraction": false }, "effect": "slide", "breakpoints": { "1200": { "slidesPerView": 2, "spaceBetween": 30 } } }'>
<div class="swiper-wrapper">
<div class="swiper-slide">
...
</div>
</div>
</div> |
observer |
Set to true to enable Mutation Observer on Swiper and its elements. In this case Swiper will be updated (reinitialized) each time if you change its style (like hide/show) or modify its child elements (like adding/removing slides) |
observeParents |
Set to true if you also need to watch Mutations for Swiper parent elements |
observeSlideChildren |
Set to true if you also need to watch Mutations for Swiper slide children elements |
containerModifierClass |
The beginning of the modifier CSS class that can be added to swiper container depending on different parameters |
slideClass |
CSS class name of slide |
slideActiveClass |
CSS class name of currently active slide |
slideDuplicateActiveClass |
CSS class name of duplicated slide which represents the currently active slide |
slideVisibleClass |
CSS class name of currently visible slide |
slideDuplicateClass |
CSS class name of slide duplicated by loop mode |
slideNextClass |
CSS class name of slide which is right after currently active slide |
slideDuplicateNextClass |
CSS class name of duplicated slide which represents the slide next to active slide |
slidePrevClass |
CSS class name of slide which is right before currently active slide |
slideDuplicatePrevClass |
CSS class name of duplicated slide which represents the slide previous to active slide |
slideBlankClass |
CSS class name of blank slide append to fill groups in loop mode when loopFillGroupWithBlank is also enabled |
wrapperClass |
CSS class name of slides wrapper |
Read Swiper Slider Document
Revolution slider

<!-- start revolution slider --> <section class="p-0 example home-startup bg-dark-slate-blue"> <article class="content"> <div id="rev_slider_26_1_wrapper" class="rev_slider_wrapper fullscreen-container" data-alias="mask-showcase" data-source="gallery"> <!-- Start revolution slider 5.4.1 fullscreen mode --> <div id="rev_slider_26_1" class="rev_slider fullscreenbanner" style="display:none;" data-version="5.4.1"> <ul> <!-- start slide 01 --> <li data-index="rs-73" data-transition="zoomout" data-slotamount="default" data-hideafterloop="0" data-hideslideonmobile="off" data-easein="default" data-easeout="default" data-masterspeed="1500" data-thumb="http://works.themepunch.com/revolution_5_3/wp-content/" data-rotate="0" data-saveperformance="off" data-title="01" data-param1="01" data-description=""> <!-- main image --> <img src="image path" alt="" data-bgcolor="#262b32" data-bgposition="center center" data-bgfit="cover" data-bgrepeat="no-repeat" data-bgparallax="off" class="rev-slidebg" data-no-retina> <div class="overlay-bg bg-extra-dark-gray" style="opacity: 0.5;"></div> <!-- main text layer --> <div class="tp-caption tp-resizeme alt-font text-white font-weight-600 text-center" id="slide-411-layer-01" data-frames='[{"delay":200,"speed":2000,"frame":"0","from":"y:[100%];z:0;rX:0deg;rY:0;rZ:0;sX:1;sY:1;skX:0;skY:0;opacity:0;","mask":"x:0px;y:[-100%];s:inherit;e:inherit;","to":"o:1;","ease":"Power2.easeInOut"},{"delay":"wait","speed":300,"frame":"999","to":"auto:auto;","ease":"Power3.easeInOut"}]' data-type="text" data-whitespace="nowrap" data-x="['center','center','center','center']" data-hoffset="['0','0','0','0']" data-y="['middle','middle','middle','middle']" data-voffset="['-50','-50','-115','-65']" data-width="auto" data-height="auto" data-fontsize="['70','53','60','35']" data-lineheight="['70','59','70','39']" data-letterspacing="['-2','-1','-1','-1']" data-responsive="off" data-responsive_offset="off" data-paddingtop="['0','0','0','0']" data-paddingbottom="['15','8','8','8']" data-paddingright="['0','0','0','0']" data-paddingleft="['0','0','0','0']" style="text-shadow: 0 0 20px rgba(0,0,0,0.3);">Start your online <br>business today</div> <!-- small text layer --> <div class="tp-caption tp-resizeme alt-font text-white font-weight-300 text-center" id="slide-411-layer-02" data-frames='[{"delay":1200,"speed":1000,"frame":"0","from":"y:[100%];z:0;rX:0deg;rY:0;rZ:0;sX:1;sY:1;skX:0;skY:0;opacity:0;","mask":"x:0px;y:[-100%];s:inherit;e:inherit;","to":"o:1;","ease":"Power2.easeInOut"},{"delay":"wait","speed":300,"frame":"999","to":"auto:auto;","ease":"Power3.easeInOut"}]' data-type="text" data-x="['center','center','center','center']" data-hoffset="['0','0','0','0']" data-y="['middle','middle','middle','middle']" data-voffset="['65','100','-5','15']" data-width="auto" data-height="auto" data-fontsize="['19','16','19','14']" data-lineheight="['28','14','23','20']" data-letterspacing="['0.5','0.5','0.5','0.5']" data-responsive="off" data-responsive_offset="on">The best way to promote your business</div> <!-- btn layer --> <a class="tp-caption tp-resizeme rs-btn btn btn-rounded d-flex align-items-center justify-content-center" href="contact-us-classic.html" id="slide-411-layer-03" data-x="['center','center','center','center']" data-hoffset="['0','0','0','0']" data-y="['middle','middle','middle','middle']" data-voffset="['152','130','82','80']" data-whitespace="nowrap" data-type="button" data-responsive="off" data-responsive_offset="off" data-frames='[{"delay":1200,"speed":1000,"frame":"0","from":"y:[100%];z:0;rX:0deg;rY:0;rZ:0;sX:1;sY:1;skX:0;skY:0;opacity:0;","mask":"x:0px;y:[-100%];s:inherit;e:inherit;","to":"o:1;","ease":"Power2.easeInOut"},{"delay":"wait","speed":300,"frame":"999","to":"auto:auto;","ease":"Power3.easeInOut"}]' data-textAlign="['center','center','center','center']" data-paddingtop="['8','8','8','8']" data-paddingbottom="['8','8','8','8']" data-paddingright="['7','7','7','7']" data-paddingleft="['34','34','34','34']" style="background-color: #00B057; color: #fff; font-size: 15px;">Get started now <div style="display: flex; justify-content: center; align-items: center; width: 38px; height: 38px; border-radius: 50%; background: #007C3E; margin-left: 19px;"> <i class="fas fa-play" style="color: #fff; font-size: 12px; line-height: 15px; margin-top: 2px; margin-left: 3px;"></i> </div> </a> </li> <!-- end slide 01 --> <!-- start slide 02 --> <li data-index="rs-74" data-transition="zoomout" data-slotamount="default" data-hideafterloop="0" data-hideslideonmobile="off" data-easein="default" data-easeout="default" data-masterspeed="1500" data-thumb="http://works.themepunch.com/revolution_5_3/wp-content/" data-rotate="0" data-saveperformance="off" data-title="02" data-param1="02" data-description=""> <!-- main image --> <img src="image path" alt="" data-bgcolor="#262b32" data-bgposition="center center" data-bgfit="cover" data-bgrepeat="no-repeat" data-bgparallax="off" class="rev-slidebg" data-no-retina> <div class="overlay-bg bg-extra-dark-gray" style="opacity: 0.5;"></div> <!-- main text layer --> <div class="tp-caption tp-resizeme alt-font text-white font-weight-600 text-center" id="slide-411-layer-04" data-frames='[{"delay":200,"speed":2000,"frame":"0","from":"y:[100%];z:0;rX:0deg;rY:0;rZ:0;sX:1;sY:1;skX:0;skY:0;opacity:0;","mask":"x:0px;y:[-100%];s:inherit;e:inherit;","to":"o:1;","ease":"Power2.easeInOut"},{"delay":"wait","speed":300,"frame":"999","to":"auto:auto;","ease":"Power3.easeInOut"}]' data-type="text" data-whitespace="nowrap" data-x="['center','center','center','center']" data-hoffset="['0','0','0','0']" data-y="['middle','middle','middle','middle']" data-voffset="['-50','-50','-115','-65']" data-width="auto" data-height="auto" data-fontsize="['70','53','60','35']" data-lineheight="['70','59','70','39']" data-letterspacing="['-2','-1','-1','-1']" data-responsive="off" data-responsive_offset="off" data-paddingtop="['0','0','0','0']" data-paddingbottom="['15','8','8','8']" data-paddingright="['0','0','0','0']" data-paddingleft="['0','0','0','0']" style="text-shadow: 0 0 20px rgba(0,0,0,0.3);">Combine thinking<br> and technical</div> <!-- small text layer --> <div class="tp-caption tp-resizeme alt-font text-white font-weight-300 text-center" id="slide-411-layer-05" data-frames='[{"delay":1200,"speed":1000,"frame":"0","from":"y:[100%];z:0;rX:0deg;rY:0;rZ:0;sX:1;sY:1;skX:0;skY:0;opacity:0;","mask":"x:0px;y:[-100%];s:inherit;e:inherit;","to":"o:1;","ease":"Power2.easeInOut"},{"delay":"wait","speed":300,"frame":"999","to":"auto:auto;","ease":"Power3.easeInOut"}]' data-type="text" data-x="['center','center','center','center']" data-hoffset="['0','0','0','0']" data-y="['middle','middle','middle','middle']" data-voffset="['65','100','-5','15']" data-width="auto" data-height="auto" data-fontsize="['19','13','19','14']" data-lineheight="['28','14','23','20']" data-letterspacing="['0.5','0.5','0.5','0.5']" data-responsive="off" data-responsive_offset="on">The best way to promote your business</div> <!-- btn layer --> <a class="tp-caption tp-resizeme rs-btn btn btn-rounded d-flex align-items-center justify-content-center" href="contact-us-classic.html" id="slide-411-layer-06" data-x="['center','center','center','center']" data-hoffset="['0','0','0','0']" data-y="['middle','middle','middle','middle']" data-voffset="['152','130','82','80']" data-whitespace="nowrap" data-type="button" data-responsive="off" data-responsive_offset="off" data-frames='[{"delay":1200,"speed":1000,"frame":"0","from":"y:[100%];z:0;rX:0deg;rY:0;rZ:0;sX:1;sY:1;skX:0;skY:0;opacity:0;","mask":"x:0px;y:[-100%];s:inherit;e:inherit;","to":"o:1;","ease":"Power2.easeInOut"},{"delay":"wait","speed":300,"frame":"999","to":"auto:auto;","ease":"Power3.easeInOut"}]' data-textAlign="['center','center','center','center']" data-paddingtop="['8','8','8','8']" data-paddingbottom="['8','8','8','8']" data-paddingright="['7','7','7','7']" data-paddingleft="['34','34','34','34']" style="background-color: #00B057; color: #fff; font-size: 15px;">Get started now <div style="display: flex; justify-content: center; align-items: center; width: 38px; height: 38px; border-radius: 50%; background: #007C3E; margin-left: 19px;"> <i class="fas fa-play" style="color: #fff; font-size: 12px; line-height: 15px; margin-top: 2px; margin-left: 3px;"></i> </div> </a> </li> <!-- end slide 02 --> <!-- start slide 03 --> <li data-index="rs-75" data-transition="zoomout" data-slotamount="default" data-hideafterloop="0" data-hideslideonmobile="off" data-easein="default" data-easeout="default" data-masterspeed="1500" data-thumb="http://works.themepunch.com/revolution_5_3/wp-content/" data-rotate="0" data-saveperformance="off" data-title="03" data-param1="03" data-description=""> <!-- main image --> <img src="image path" alt="" data-bgcolor="#262b32" data-bgposition="center center" data-bgfit="cover" data-bgrepeat="no-repeat" data-bgparallax="off" class="rev-slidebg" data-no-retina> <div class="overlay-bg bg-extra-dark-gray" style="opacity: 0.5;"></div> <!-- main text layer --> <div class="tp-caption tp-resizeme alt-font text-white font-weight-600 text-center" id="slide-411-layer-07" data-frames='[{"delay":200,"speed":2000,"frame":"0","from":"y:[100%];z:0;rX:0deg;rY:0;rZ:0;sX:1;sY:1;skX:0;skY:0;opacity:0;","mask":"x:0px;y:[-100%];s:inherit;e:inherit;","to":"o:1;","ease":"Power2.easeInOut"},{"delay":"wait","speed":300,"frame":"999","to":"auto:auto;","ease":"Power3.easeInOut"}]' data-type="text" data-whitespace="nowrap" data-x="['center','center','center','center']" data-hoffset="['0','0','0','0']" data-y="['middle','middle','middle','middle']" data-voffset="['-50','-50','-115','-65']" data-width="auto" data-height="auto" data-fontsize="['70','53','60','35']" data-lineheight="['70','59','70','39']" data-letterspacing="['-2','-1','-1','-1']" data-responsive="off" data-responsive_offset="off" data-paddingtop="['0','0','0','0']" data-paddingbottom="['15','8','8','8']" data-paddingright="['0','0','0','0']" data-paddingleft="['0','0','0','0']" style="text-shadow: 0 0 20px rgba(0,0,0,0.3);">Delivering creative<br> digital products</div> <!-- small text layer --> <div class="tp-caption tp-resizeme alt-font text-white font-weight-300 text-center" id="slide-411-layer-08" data-frames='[{"delay":1200,"speed":1000,"frame":"0","from":"y:[100%];z:0;rX:0deg;rY:0;rZ:0;sX:1;sY:1;skX:0;skY:0;opacity:0;","mask":"x:0px;y:[-100%];s:inherit;e:inherit;","to":"o:1;","ease":"Power2.easeInOut"},{"delay":"wait","speed":300,"frame":"999","to":"auto:auto;","ease":"Power3.easeInOut"}]' data-type="text" data-x="['center','center','center','center']" data-hoffset="['0','0','0','0']" data-y="['middle','middle','middle','middle']" data-voffset="['65','100','-5','15']" data-width="auto" data-height="auto" data-fontsize="['19','13','19','14']" data-lineheight="['28','14','23','20']" data-letterspacing="['0.5','0.5','0.5','0.5']" data-responsive="off" data-responsive_offset="on">The best way to promote your business</div> <!-- btn layer --> <a class="tp-caption tp-resizeme rs-btn btn btn-rounded d-flex align-items-center justify-content-center" href="contact-us-classic.html" id="slide-411-layer-09" data-x="['center','center','center','center']" data-hoffset="['0','0','0','0']" data-y="['middle','middle','middle','middle']" data-voffset="['152','130','82','80']" data-whitespace="nowrap" data-type="button" data-responsive="off" data-responsive_offset="off" data-frames='[{"delay":1200,"speed":1000,"frame":"0","from":"y:[100%];z:0;rX:0deg;rY:0;rZ:0;sX:1;sY:1;skX:0;skY:0;opacity:0;","mask":"x:0px;y:[-100%];s:inherit;e:inherit;","to":"o:1;","ease":"Power2.easeInOut"},{"delay":"wait","speed":300,"frame":"999","to":"auto:auto;","ease":"Power3.easeInOut"}]' data-textAlign="['center','center','center','center']" data-paddingtop="['8','8','8','8']" data-paddingbottom="['8','8','8','8']" data-paddingright="['7','7','7','7']" data-paddingleft="['34','34','34','34']" style="background-color: #00B057; color: #fff; font-size: 15px;">Get started now <div style="display: flex; justify-content: center; align-items: center; width: 38px; height: 38px; border-radius: 50%; background: #007C3E; margin-left: 19px;"> <i class="fas fa-play" style="color: #fff; font-size: 12px; line-height: 15px; margin-top: 2px; margin-left: 3px;"></i> </div> </a> </li> <!-- end slide 01 --> </ul> </div> </div> </article> </section> <!-- end revolution slider -->
Javascript
var revapi263,
        tpj;
(function () {
    if (tpj === undefined) {
        tpj = jQuery;
        if ("off" == "on")
            tpj.noConflict();
    }
    if (!/loaded|interactive|complete/.test(document.readyState))
        document.addEventListener("DOMContentLoaded", onLoad);
    else
        onLoad();
    function onLoad() {
        if (tpj("#rev_slider_26_1").revolution == undefined) {
            revslider_showDoubleJqueryError("#rev_slider_26_1");
        } else {
            var revOffset = tpj(window).width() <= 991 ? '73px' : '';
            revapi263 = tpj("#rev_slider_26_1").show().revolution({
                sliderType: "standard",
                jsFileLocation: "revolution/js/",
                sliderLayout: "fullscreen",
                dottedOverlay: "none",
                delay: 4500,
                navigation: {
                    keyboardNavigation: "on",
                    keyboard_direction: "horizontal",
                    mouseScrollNavigation: "off",
                    mouseScrollReverse: "default",
                    onHoverStop: "off",
                    touch: {
                        touchenabled: "on",
                        touchOnDesktop: "on",
                        swipe_threshold: 75,
                        swipe_min_touches: 1,
                        swipe_direction: "horizontal",
                        drag_block_vertical: false
                    },
                    arrows: {
                        enable: true,
                        style: 'ares',
                        tmp: '',
                        rtl: false,
                        hide_onleave: false,
                        hide_onmobile: true,
                        hide_under: 767,
                        hide_over: 9999,
                        hide_delay: 0,
                        hide_delay_mobile: 0,

                        left: {
                            container: 'slider',
                            h_align: 'left',
                            v_align: 'center',
                            h_offset: 60,
                            v_offset: 0
                        },

                        right: {
                            container: 'slider',
                            h_align: 'right',
                            v_align: 'center',
                            h_offset: 60,
                            v_offset: 0
                        }
                    },
                    bullets: {
                        enable: true,
                        style: 'zeus',
                        direction: 'horizontal',
                        rtl: false,

                        container: 'slider',
                        h_align: 'center',
                        v_align: 'bottom',
                        h_offset: 0,
                        v_offset: 30,
                        space: 7,

                        hide_onleave: false,
                        hide_onmobile: false,
                        hide_under: 0,
                        hide_over: 767,
                        hide_delay: 200,
                        hide_delay_mobile: 1200
                    },
                },
                responsiveLevels: [1240, 1025, 778, 480],
                visibilityLevels: [1920, 1500, 1025, 768],
                gridwidth: [1200, 991, 778, 480],
                gridheight: [1025, 1366, 1025, 868],
                lazyType: "none",
                shadow: 0,
                spinner: "spinner4",
                stopLoop: "off",
                stopAfterLoops: -1,
                stopAtSlide: -1,
                shuffle: "off",
                autoHeight: "on",
                fullScreenAutoWidth: "on",
                fullScreenAlignForce: "off",
                fullScreenOffsetContainer: "",
                fullScreenOffset: revOffset,
                disableProgressBar: "on",
                hideThumbsOnMobile: "off",
                hideSliderAtLimit: 0,
                hideCaptionAtLimit: 0,
                hideAllCaptionAtLimit: 0,
                debugMode: false,
                fallbacks: {
                    simplifyAll: "off",
                    nextSlideOnWindowFocus: "off",
                    disableFocusListener: false,
                }
            });
        }
        ; /* END OF revapi call */
    }
    ; /* END OF ON LOAD FUNCTION */
}()); /* END OF WRAPPING FUNCTION */
Read Revolution Slider Document
Helper classes
We have created some helper classes for the Sliders. Here are a few of them:
.full-screen- Makes the slider full screen.opacity-very-light- For very light opacity.opacity-light- For light opacity.opacity-extra-medium- For extra medium opacity.opacity-medium- For medium opacity.opacity-full- For full opacity.opacity-full-dark- For full dark opacity
Accordions
Extend the default collapse behavior to create an accordion with the panel component. See below image and code for more information.
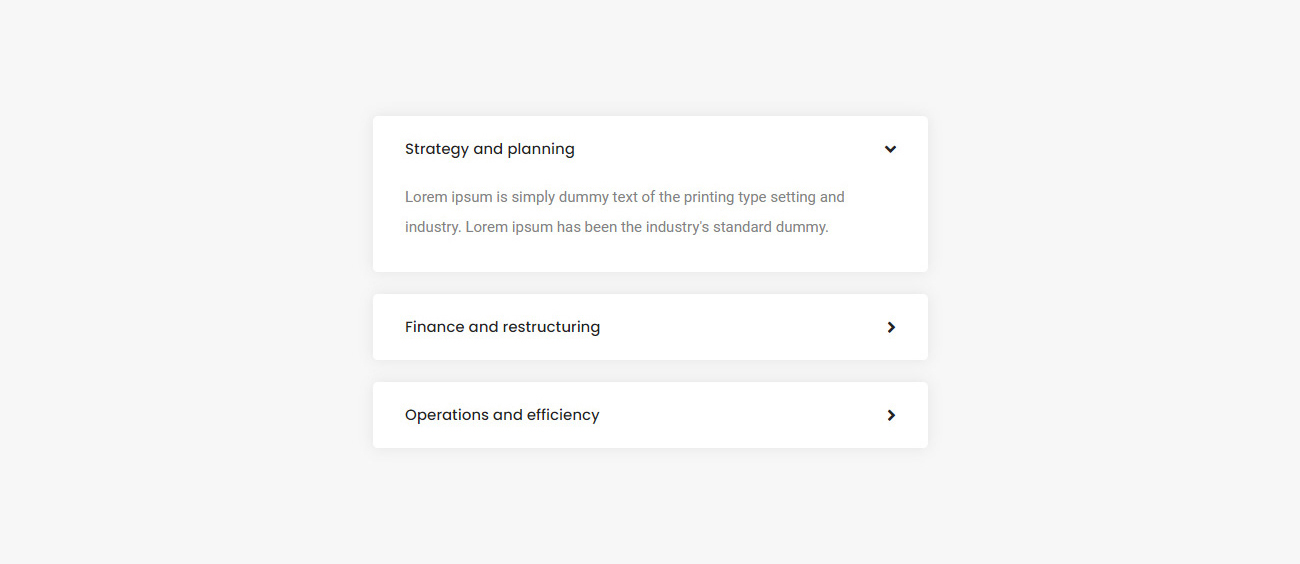
<div class="col-12 col-lg-6 col-md-10">
<div class="panel-group accordion-event accordion-style-03" id="accordion3" data-active-icon="fa-angle-down" data-inactive-icon="fa-angle-right">
    <!-- start accordion item -->
    <div class="panel bg-white box-shadow-small border-radius-5px wow animate__fadeIn" data-wow-delay="0.2s">
        <div class="panel-heading active-accordion">
            <a class="accordion-toggle collapsed" data-bs-toggle="collapse" data-bs-parent="#accordion3" href="#accordion-style-03-01" aria-expanded="false">
                <div class="panel-title">
                    <span class="alt-font text-extra-dark-gray d-inline-block font-weight-500">Strategy and planning</span>
                    <i class="indicator fas fa-angle-down text-extra-dark-gray icon-extra-small"></i>
                </div>
            </a>
        </div>
        <div id="accordion-style-03-01" class="panel-collapse collapse show" data-bs-parent="#accordion3">
            <div class="panel-body">Lorem ipsum is simply dummy text of the printing type setting and industry. Lorem ipsum has been the industry's standard dummy.</div>
        </div>
    </div>
    <!-- end accordion item -->
    <!-- start accordion item -->
    <div class="panel bg-white box-shadow-small border-radius-5px wow animate__fadeIn" data-wow-delay="0.4s">
        <div class="panel-heading">
            <a class="accordion-toggle collapsed" data-bs-toggle="collapse" data-bs-parent="#accordion3" href="#accordion-style-03-02" aria-expanded="false">
                <div class="panel-title">
                    <span class="alt-font text-extra-dark-gray d-inline-block font-weight-500">Finance and restructuring</span>
                    <i class="indicator fas fa-angle-right text-extra-dark-gray icon-extra-small"></i>
                </div>
            </a>
        </div>
        <div id="accordion-style-03-02" class="panel-collapse collapse" data-bs-parent="#accordion3">
            <div class="panel-body">Lorem ipsum is simply dummy text of the printing type setting and industry. Lorem ipsum has been the industry's standard dummy.</div>
        </div>
    </div>
    <!-- end accordion item -->
    <!-- start accordion item -->
    <div class="panel bg-white box-shadow-small border-radius-5px wow animate__fadeIn" data-wow-delay="0.6s">
        <div class="panel-heading">
            <a class="accordion-toggle collapsed" data-bs-toggle="collapse" data-bs-parent="#accordion3" href="#accordion-style-03-03" aria-expanded="false">
                <div class="panel-title">
                    <span class="alt-font text-extra-dark-gray d-inline-block font-weight-500">Operations and efficiency</span>
                    <i class="indicator fas fa-angle-right text-extra-dark-gray icon-extra-small"></i>
                </div>
            </a>
        </div>
        <div id="accordion-style-03-03" class="panel-collapse collapse" data-bs-parent="#accordion3">
            <div class="panel-body">Lorem ipsum is simply dummy text of the printing type setting and industry. Lorem ipsum has been the industry's standard dummy.</div>
        </div>
    </div>
    <!-- end accordion item -->
</div>
</div>
NoteWe have many examples and shown in accordions.html page. You can add your desired icon name in data-active-icon and data-inactive-icon attributes in panel-group DIV to expand and collapse more details respectively. And same way add icon name class in accordion item I tag for default load view. You can add show class in accordion item expanded content DIV to make that opened by default when the page load.
Animation
Scroll to reveal animations are latest in the trends. You can do them too with LITHO. You can use animations on any element you want. Here is the Sample Code:
<div class="animate__bounce wow">bounce</div>
You can also use delays, duration and offset for your animations:
<section class="wow animate__fadeIn" data-wow-duration="1200ms" data-wow-delay="500ms">
    ...
</section>
NoteDelay duration is in milliseconds.
Here is the list of the Animation Types you can use:
bounceflashpulserubberBandshakeswingtadawobblejelloheartBeatbounceInbounceInDownbounceInLeftbounceInRightbounceInUpbounceOutbounceOutDownbounceOutLeftbounceOutRightbounceOutUpfadeInfadeInDownfadeInDownBigfadeInLeftfadeInLeftBigfadeInRightfadeInRightBigfadeInUpfadeInUpBigfadeOutfadeOutDownfadeOutDownBigfadeOutLeftfadeOutLeftBigfadeOutRightfadeOutRightBigfadeOutUpfadeOutUpBigflipflipInXflipInYflipOutXflipOutYlightSpeedInlightSpeedOutrotateInrotateInDownLeftrotateInDownRightrotateInUpLeftrotateInUpRightrotateOutrotateOutDownLeftrotateOutDownRightrotateOutUpLeftrotateOutUpRightslideInUpslideInDownslideInLeftslideInRightslideOutUpslideOutDownslideOutLeftslideOutRightzoomInzoomInDownzoomInLeftzoomInRightzoomInUpzoomOutzoomOutDownzoomOutLeftzoomOutRightzoomOutUphingejackInTheBoxrollInrollOut
Blog post
Beautiful blog post layouts to display your content with attractive look. See below image and code for more information.
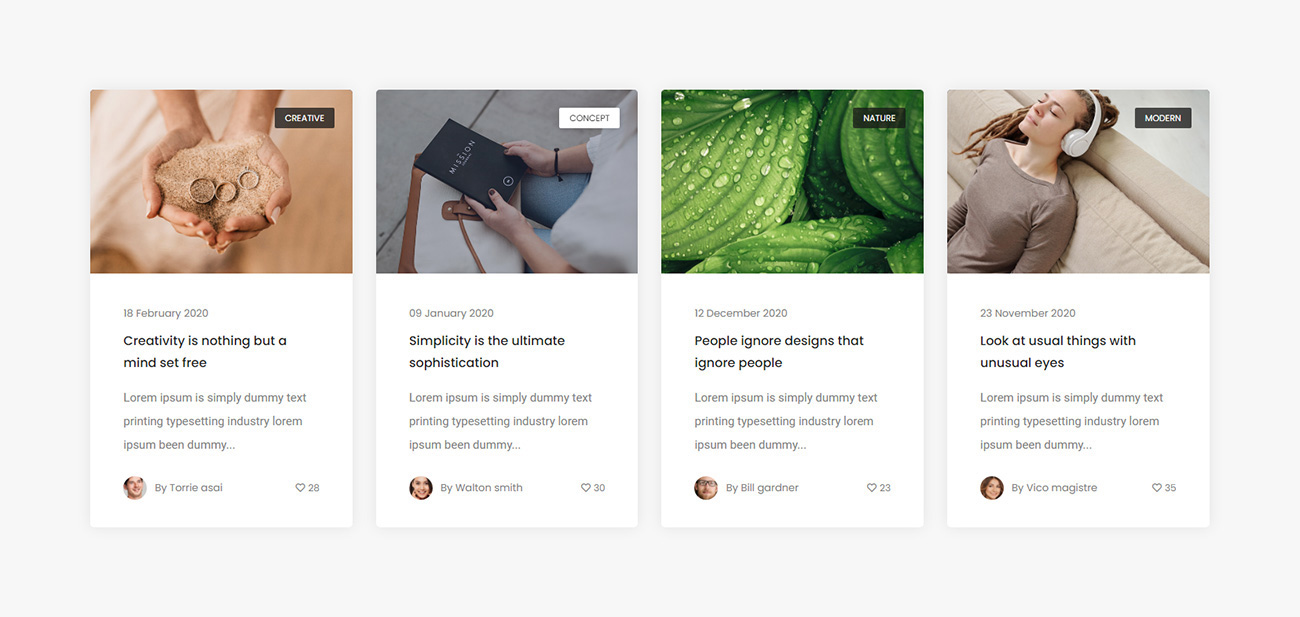
<ul class="blog-grid blog-wrapper grid grid-4col xl-grid-4col lg-grid-3col md-grid-2col sm-grid-2col xs-grid-1col gutter-extra-large">
    <li class="grid-sizer"></li>
    <!-- start blog item -->
    <li class="grid-item wow animate__fadeIn">
        <div class="blog-post border-radius-5px bg-white box-shadow-medium">
            <div class="blog-post-image bg-medium-slate-blue">
                <a href="#" title=""><img src="image path" alt=""></a>
                <a href="#" class="blog-category alt-font">Creative</a>
            </div>
            <div class="post-details padding-3-rem-lr padding-2-half-rem-tb">
                <a href="#" class="alt-font text-small d-inline-block margin-10px-bottom">18 February 2020</a>
                <a href="#" class="alt-font font-weight-500 text-extra-medium text-extra-dark-gray margin-15px-bottom d-block">Creativity is nothing but a mind set free</a>
                <p>Lorem ipsum is simply dummy text printing typesetting industry lorem ipsum been dummy...</p>
                <div class="d-flex align-items-center">
                    <img class="avtar-image" src="image path" alt=""/>
                    <span class="alt-font text-small me-auto">By <a href="#">Torrie asai</a></span>
                    <a href="#" class="blog-like alt-font text-extra-small"><i class="far fa-heart"></i><span>28</span></a>
                </div>
            </div>
        </div>
    </li>
    <!-- end blog item -->
    <!-- start blog item -->
    <li class="grid-item wow animate__fadeIn" data-wow-delay="0.2s">
        <div class="blog-post border-radius-5px bg-white box-shadow-medium">
            <div class="blog-post-image bg-medium-slate-blue">
                <a href="#" title=""><img src="image path" alt=""></a>
                <a href="#" class="blog-category alt-font">Concept</a>
            </div>
            <div class="post-details padding-3-rem-lr padding-2-half-rem-tb">
                <a href="#" class="alt-font text-small d-inline-block margin-10px-bottom">09 January 2020</a>
                <a href="#" class="alt-font font-weight-500 text-extra-medium text-extra-dark-gray margin-15px-bottom d-block">Simplicity is the ultimate sophistication</a>
                <p>Lorem ipsum is simply dummy text printing typesetting industry lorem ipsum been dummy...</p>
                <div class="d-flex align-items-center">
                    <img class="avtar-image" src="image path" alt=""/>
                    <span class="alt-font text-small me-auto">By <a href="#" class="text-sky-blue-hover">Walton smith</a></span>
                    <a href="#" class="blog-like alt-font text-extra-small"><i class="far fa-heart"></i><span>30</span></a>
                </div>
            </div>
        </div>
    </li>
    <!-- end blog item -->
    <!-- start blog item -->
    <li class="grid-item wow animate__fadeIn" data-wow-delay="0.4s">
        <div class="blog-post border-radius-5px bg-white box-shadow-medium">
            <div class="blog-post-image bg-medium-slate-blue">
                <a href="#" title=""><img src="image path" alt=""></a>
                <a href="#" class="blog-category alt-font">Nature</a>
            </div>
            <div class="post-details padding-3-rem-lr padding-2-half-rem-tb">
                <a href="#" class="alt-font text-small d-inline-block margin-10px-bottom">12 December 2020</a>
                <a href="#" class="alt-font font-weight-500 text-extra-medium text-extra-dark-gray margin-15px-bottom d-block">People ignore designs that ignore people</a>
                <p>Lorem ipsum is simply dummy text printing typesetting industry lorem ipsum been dummy...</p>
                <div class="d-flex align-items-center">
                    <img class="avtar-image" src="image path" alt=""/>
                    <span class="alt-font text-small me-auto">By <a href="#" class="text-sky-blue-hover">Bill gardner</a></span>
                    <a href="#" class="blog-like alt-font text-extra-small"><i class="far fa-heart"></i><span>23</span></a>
                </div>
            </div>
        </div>
    </li>
    <!-- end blog item -->
    <!-- start blog item -->
    <li class="grid-item wow animate__fadeIn" data-wow-delay="0.6s">
        <div class="blog-post border-radius-5px bg-white box-shadow-medium">
            <div class="blog-post-image bg-medium-slate-blue">
                <a href="#" title=""><img src="image path" alt=""></a>
                <a href="#" class="blog-category alt-font">Modern</a>
            </div>
            <div class="post-details padding-3-rem-lr padding-2-half-rem-tb">
                <a href="#" class="alt-font text-small d-inline-block margin-10px-bottom">23 November 2020</a>
                <a href="#" class="alt-font font-weight-500 text-extra-medium text-extra-dark-gray margin-15px-bottom d-block">Look at usual things with unusual eyes</a>
                <p>Lorem ipsum is simply dummy text printing typesetting industry lorem ipsum been dummy...</p>
                <div class="d-flex align-items-center">
                    <img class="avtar-image" src="image path" alt=""/>
                    <span class="alt-font text-small me-auto">By <a href="#" class="text-sky-blue-hover">Vico magistre</a></span>
                    <a href="#" class="blog-like alt-font text-extra-small"><i class="far fa-heart"></i><span>35</span></a>
                </div>
            </div>
        </div>
    </li>
    <!-- end blog item -->
</ul>
NoteFor demo, You can please check this in blog-grid.html page.
Blockquote
Wrap <blockquote> around any HTML as the quote. For straight quotes, we recommend a <p>.</p>

<!-- start blockquote item -->
<blockquote class="border-width-6px alt-font border-color-light-peach margin-4-half-rem-tb md-no-padding-right xs-no-margin-tb">
    <p>Tomorrow is the most important thing in life comes into us at midnight very clean. It's perfect when it arrives and it puts itself in our hands.</p>
    <footer class="text-small letter-spacing-2px d-inline-block text-uppercase">Shoko mugikura</footer>
</blockquote>
<!-- end blockquote item -->
NoteFor demo, You can please check this in blockquote.html page.
Buttons
Use the button classes on an <a> and <button> element.
<!-- start buttons -->
<a href="#" class="btn btn-extra-large btn-fast-blue d-table d-lg-inline-block lg-margin-15px-bottom md-margin-auto-lr">Button extra large</a>
<a href="#" class="btn btn-large btn-fast-blue d-table d-lg-inline-block lg-margin-15px-bottom md-margin-auto-lr">Button large</a>
<a href="#" class="btn btn-medium btn-fast-blue d-table d-lg-inline-block lg-margin-15px-bottom md-margin-auto-lr">Button medium</a>
<a href="#" class="btn btn-small btn-fast-blue d-table d-lg-inline-block lg-margin-15px-bottom md-margin-auto-lr">Button small</a>
<a href="#" class="btn btn-very-small btn-fast-blue d-table d-lg-inline-block lg-margin-15px-bottom md-margin-auto-lr">Very small</a>
<!-- end buttons -->
NoteFor demo, You can please check this in buttons.html page.
Call to action
LITHO provides creative call to actions, see below image and code for more information.

<!-- start section -->
<section class="parallax wow animate__fadeIn" data-parallax-background-ratio="0.5" style="background-image:url('image path');">
        <div class="opacity-medium bg-dark-slate-blue"></div>
        <div class="container">
            <div class="row align-items-center justify-content-center">
                <div class="col-12 col-xl-7 col-md-8 col-sm-10 position-relative text-center text-md-start sm-margin-30px-bottom">
                    <h4 class="alt-font font-weight-600 text-white mb-0">Gearing your company through an Innovative strategy</h4>
                </div>
                <div class="col-12 col-xl-5 col-md-4 position-relative text-center text-md-end">
                    <a href="#" class="btn btn-large btn-gradient-shamrock-green-light-orange">Download litho</a>
                </div>
            </div>
        </div>
    </section>
<!-- end section -->
NoteFor demo, You can please check this in call-to-action.html page.
Clients
Showcase of clients logos or images. See below image and code for more information.
<div class="row row-cols-1 row-cols-lg-4 row-cols-md-3 row-cols-sm-2 client-logo-style-01 align-items-center">
<!-- start client logo item -->
<div class="col text-center margin-30px-bottom sm-margin-15px-bottom">
    <div class="client-box padding-15px-all border border-color-dark-gray">
        <a href="#"><img class="client-box-image" src="image path" alt="" /></a>
    </div>
</div>
<!-- end client logo item -->
<!-- start client logo item -->
<div class="col text-center md-margin-30px-bottom sm-margin-15px-bottom">
    <div class="client-box padding-15px-all border border-color-dark-gray">
        <a href="#"><img class="client-box-image" src="image path" alt="" /></a>
    </div>
</div>
<!-- end client logo item -->
<!-- start client logo item -->
<div class="col text-center xs-margin-15px-bottom">
    <div class="client-box padding-15px-all border border-color-dark-gray">
        <a href="#"><img class="client-box-image" src="image path" alt="" /></a>
    </div>
</div>
<!-- end client logo item -->
<!-- start client logo item -->
<div class="col text-center">
    <div class="client-box padding-15px-all border border-color-dark-gray">
        <a href="#"><img class="client-box-image" src="image path" alt="" /></a>
    </div>
</div>
<!-- end client logo item -->
</div>
NoteFor demo, You can please check this in clients.html page.
Clients carousel
Showcase of clients logos or images in slider view. See below image and code for more information.

<div class="row">
<div class="col-12 position-relative">
    <div class="swiper-container text-center" data-slider-options='{ "slidesPerView": 1, "loop": true, "navigation": { "nextEl": ".swiper-button-next-nav", "prevEl": ".swiper-button-previous-nav" }, "autoplay": { "delay": 3000, "disableOnInteraction": false }, "keyboard": { "enabled": true, "onlyInViewport": true }, "breakpoints": { "1200": { "slidesPerView": 4 }, "992": { "slidesPerView": 3 }, "768": { "slidesPerView": 3 } } }'>
        <div class="swiper-wrapper">
            <!-- start slider item --><div class="swiper-slide"><a href="#" target="_blank"><img alt="" src="image path"></a></div><!-- end slider item -->
            <!-- start slider item --><div class="swiper-slide"><a href="#" target="_blank"><img alt="" src="image path"></a></div><!-- end slider item -->
            <!-- start slider item --><div class="swiper-slide"><a href="#" target="_blank"><img alt="" src="image path"></a></div><!-- end slider item -->
            <!-- start slider item --><div class="swiper-slide"><a href="#" target="_blank"><img alt="" src="image path"></a></div><!-- end slider item -->
            <!-- start slider item --><div class="swiper-slide"><a href="#" target="_blank"><img alt="" src="image path"></a></div><!-- end slider item -->
        </div>
    </div>
    <!-- start slider navigation -->
    <div class="swiper-button-next-nav swiper-button-next rounded-circle light slider-navigation-style-07 box-shadow-double-large"><i class="feather icon-feather-arrow-right"></i></div>
    <div class="swiper-button-previous-nav swiper-button-prev rounded-circle light slider-navigation-style-07 box-shadow-double-large"><i class="feather icon-feather-arrow-left"></i></div>
    <!-- end slider navigation -->
</div>
</div>
NoteFor demo, You can please check this in client-carousel.html page.
Contact form
Contact form for contact pages, so your users can contact you for any queries or service request. See below image and code for more information.
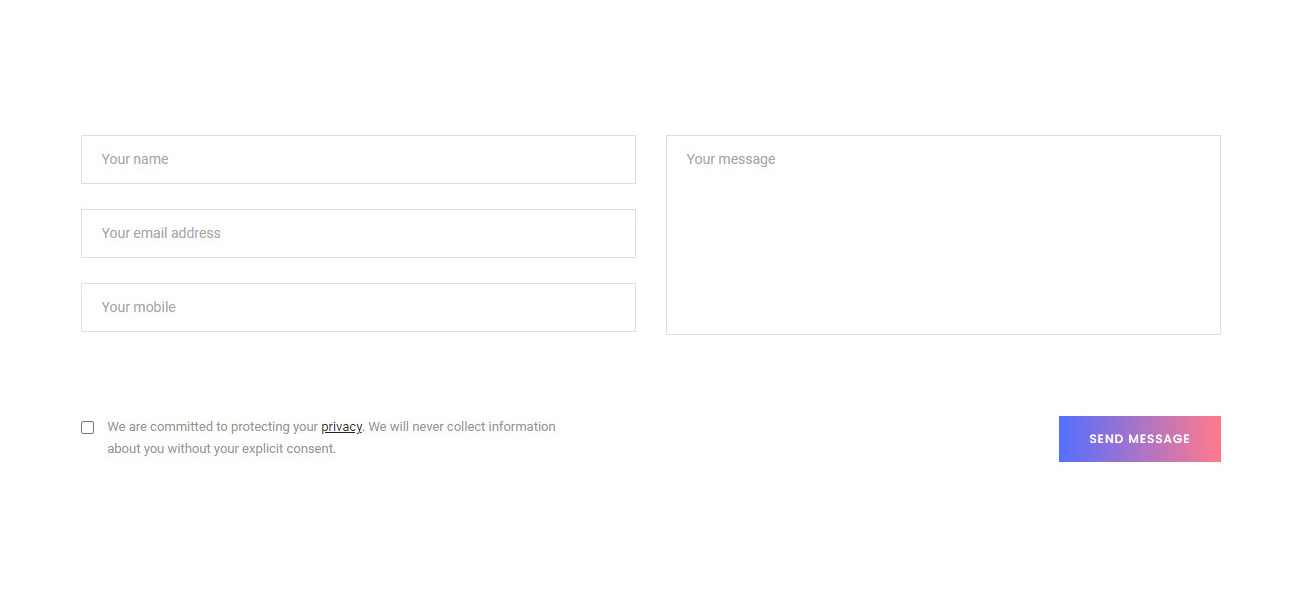
<!-- start form -->
<div class="row justify-content-center">
    <div class="col-12">
        <form id="project-contact-form" action="email-templates/contact-form.php" method="post" novalidate="">
            <div class="row row-cols-1 row-cols-md-2">
                <div class="col margin-4-rem-bottom sm-margin-25px-bottom">
                    <input class="medium-input bg-white margin-25px-bottom required" type="text" name="name" placeholder="Your name">
                    <input class="medium-input bg-white margin-25px-bottom required" type="email" name="email" placeholder="Your email address">
                    <input class="medium-input bg-white mb-0" type="tel" name="phone" placeholder="Your mobile">
                </div>
                <div class="col margin-4-rem-bottom sm-margin-20px-bottom">
                    <textarea class="medium-textarea bg-white h-200px" rows="6" name="comment" placeholder="Your message"></textarea>
                </div>
                <div class="col text-start sm-margin-20px-bottom">
                    <input type="checkbox" name="terms_condition" id="terms_condition" value="1" class="terms-condition d-inline-block align-top w-auto mb-0 margin-10px-right margin-5px-top required">
                    <label for="terms_condition" class="text-small d-inline-block align-top w-85 md-w-90 xs-w-85">I accept the terms & conditions and I understand that my data will be hold securely in accordance with the <a href="#" target="_blank" class="text-decoration-underline text-extra-dark-gray">privacy policy</a>.</label>
                </div>
                <div class="col text-center text-md-end">
                    <input type="hidden" name="redirect" value="">
                    <button id="project-contact-us-button" class="btn btn-medium btn-fancy btn-gradient-sky-blue-pink mb-0 submit" type="submit">Send Message</button>
                </div>
            </div>
            <div class="form-results d-none"></div>
        </form>
    </div>
</div>
<!-- end form -->
Contact us form will not work unless you have your files running on a hosting server with Apache and PHP with Javascript enabled browser. When you have your files ready on your hosting server, you need to edit the settings to make the email function work. You need to upload whole folder /email-templates/ in your website root directory.
To make any form field required, add required class in that specific data field in HTML code, and for email address validation you need to put that field type as email instead of input or others.
Open /email-templates/contact-form.php and change your Receiver Email Address (receiver_email) at the top from info@yourdomain.com to your real email address, same way you can change subject line from "Contact form details" as per your need. Also replace yourdomain.com with your real domain name in logo image url in the email body template (http://www.yourdomain.com/images/logo-email.png).
If your server do not support PHP mail function and you want to send emails via SMTP then please change enable_smtp to yes and then add your SMTP credentials for these: YOUR_SMTP_HOST, YOUR_SMTP_USERNAME, YOUR_SMTP_PASSWORD, SMTPSecure and Port. Please consult your hosting support to get required SMTP credentials.
If you are using newsletter subscriber form then you can manage email receiver, php mail or SMTP as per above details in this file - /email-templates/subscribe-newsletter.php. But if you want to integrate your Mailchimp account, then you do not need to set above details but you only need to set Mailchimp credentials in that same file like YOUR_MAILCHIMP_API_KEY and YOUR_MAILCHIMP_LIST_ID and also change enable_mailchimp to yes.
If you want to add Google reCAPTCHA V2 in your form to avoid spam submission then you can add DIV code like below in the FORM tag above submit button, with your Google reCaptcha site API key and also make sure to add related JS file at bottom, please take reference from contact-form.html demo page. You can create Google reCAPTCHA V2 API key from this page - https://www.google.com/recaptcha/admin/create by logging in to your Google account. If you want to implement invisible Google reCAPTCHA, which is V3 then you do not need to do above changes but just need to add the script code provided by Google (when you create V3 API key) in all the pages of your website.
<div class="g-recaptcha margin-35px-bottom" data-sitekey="YOUR_SITE_KEY"></div>
If you want to redirect user to thank you page or any other external url instead of showing success message on the same page, then add your full url in the value of redirect hidden field code like below in the FORM HTML code.
<input type="hidden" name="redirect" value="https://lithohtml.themezaa.com/thank-you.html">
NoteFor demo, You can please check contact form in contact-form.html page and newsletter subscription form in subscribe.html page.
Columns
Using a single set of .col-lg-* grid classes, you can create a basic grid system that starts out stacked on mobile devices and tablet devices (the extra small to small range) before becoming horizontal on desktop (medium) devices. Place grid columns in any .row.
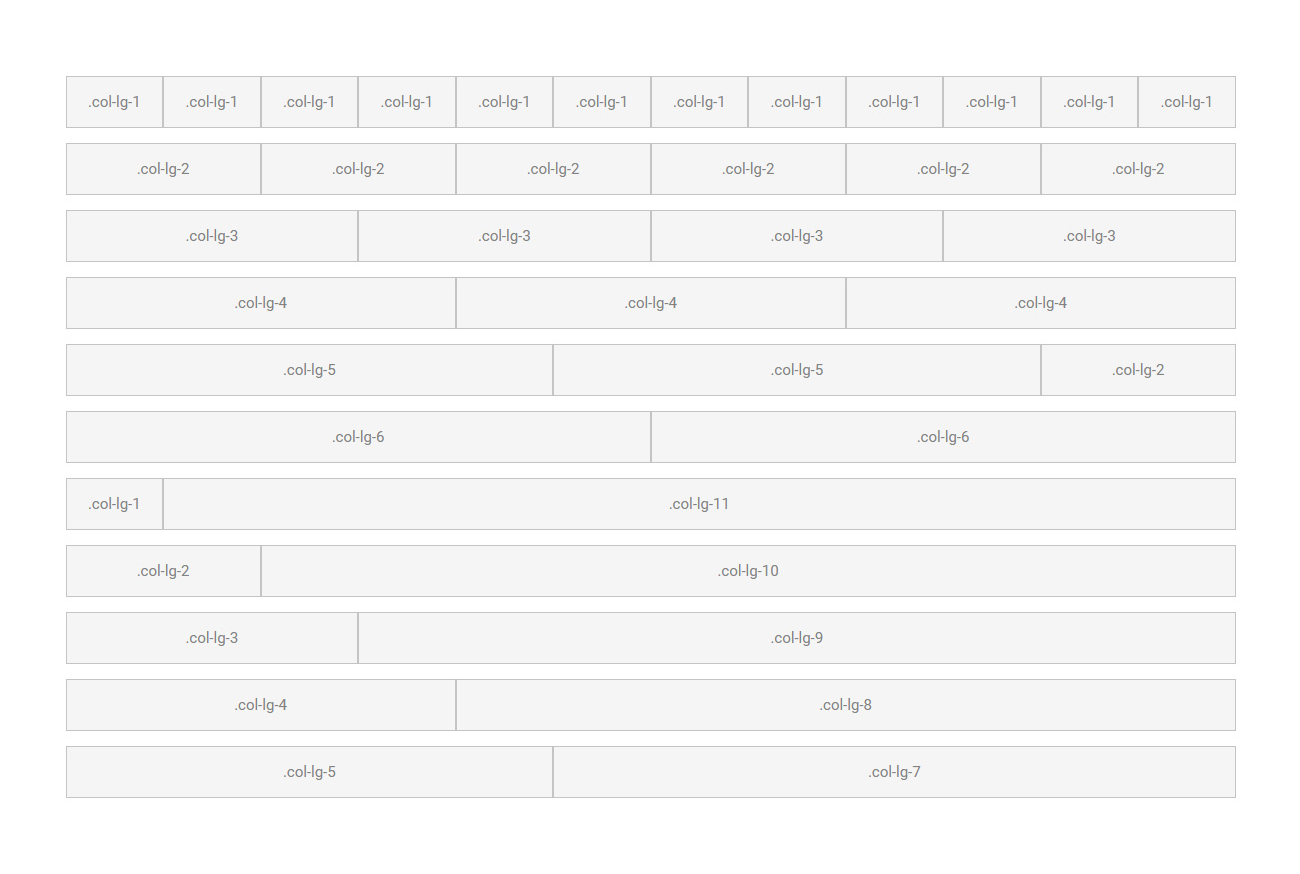
<!-- row -->
<div class="row show-grid">
<div class="col-12 col-lg-1">.col-lg-1</div>
<div class="col-12 col-lg-1">.col-lg-1</div>
<div class="col-12 col-lg-1">.col-lg-1</div>
<div class="col-12 col-lg-1">.col-lg-1</div>
<div class="col-12 col-lg-1">.col-lg-1</div>
<div class="col-12 col-lg-1">.col-lg-1</div>
<div class="col-12 col-lg-1">.col-lg-1</div>
<div class="col-12 col-lg-1">.col-lg-1</div>
<div class="col-12 col-lg-1">.col-lg-1</div>
<div class="col-12 col-lg-1">.col-lg-1</div>
<div class="col-12 col-lg-1">.col-lg-1</div>
<div class="col-12 col-lg-1">.col-lg-1</div>
</div>

<div class="row show-grid">
<div class="col-12 col-lg-2">.col-lg-2</div>
<div class="col-12 col-lg-2">.col-lg-2</div>
<div class="col-12 col-lg-2">.col-lg-2</div>
<div class="col-12 col-lg-2">.col-lg-2</div>
<div class="col-12 col-lg-2">.col-lg-2</div>
<div class="col-12 col-lg-2">.col-lg-2</div>
</div>

<div class="row show-grid">
<div class="col-12 col-lg-3">.col-lg-3</div>
<div class="col-12 col-lg-3">.col-lg-3</div>
<div class="col-12 col-lg-3">.col-lg-3</div>
<div class="col-12 col-lg-3">.col-lg-3</div>
</div>

<div class="row show-grid">
<div class="col-12 col-lg-4">.col-lg-4</div>
<div class="col-12 col-lg-4">.col-lg-4</div>
<div class="col-12 col-lg-4">.col-lg-4</div>
</div>

<div class="row show-grid">
<div class="col-12 col-lg-5">.col-lg-5</div>
<div class="col-12 col-lg-5">.col-lg-5</div>
<div class="col-12 col-lg-2">.col-lg-2</div>
</div>

<div class="row show-grid">
<div class="col-12 col-lg-6">.col-lg-6</div>
<div class="col-12 col-lg-6">.col-lg-6</div>
</div>

<div class="row show-grid">
<div class="col-12 col-lg-1">.col-lg-1</div>
<div class="col-12 col-lg-11">.col-lg-11</div>
</div>

<div class="row show-grid">
<div class="col-12 col-lg-2">.col-lg-2</div>
<div class="col-12 col-lg-10">.col-lg-10</div>
</div>

<div class="row show-grid">
<div class="col-12 col-lg-3">.col-lg-3</div>
<div class="col-12 col-lg-9">.col-lg-9</div>
</div>

<div class="row show-grid">
<div class="col-12 col-lg-4">.col-lg-4</div>
<div class="col-12 col-lg-8">.col-lg-8</div>
</div>

<div class="row show-grid">
<div class="col-12 col-lg-5">.col-lg-5</div>
<div class="col-12 col-lg-7">.col-lg-7</div>
</div>
NoteFor demo, You can please check this in columns.html page.
Counters
Different styles of counters for your website to present your statistics with numbers. See below image and code for more information.
<div class="row row-cols-1 row-cols-md-4 row-cols-sm-2">
<!-- start counter item -->
<div class="col text-center sm-margin-30px-bottom wow animate__fadeIn" data-wow-delay="0.1s">
    <h2 class="counter counter-number alt-font font-weight-600 text-extra-dark-gray mb-0 appear" data-to="220" data-speed="7000"></h2>
    <span class="alt-font text-uppercase d-block letter-spacing-1px">People</span>
</div>
<!-- end counter item -->
<!-- start counter item -->
<div class="col text-center sm-margin-30px-bottom wow animate__fadeIn" data-wow-delay="0.2s">
    <h2 class="counter counter-number alt-font font-weight-600 text-extra-dark-gray mb-0 appear" data-to="380" data-speed="7000"></h2>
    <span class="alt-font text-uppercase d-block letter-spacing-1px">Projects</span>
</div>
<!-- end counter item -->
<!-- start counter item -->
<div class="col text-center xs-margin-30px-bottom wow animate__fadeIn" data-wow-delay="0.3s">
    <h2 class="counter counter-number alt-font font-weight-600 text-extra-dark-gray mb-0 appear" data-to="700" data-speed="7000"></h2>
    <span class="alt-font text-uppercase d-block letter-spacing-1px">Channels</span>
</div>
<!-- end counter item -->
<!-- start counter item -->
<div class="col text-center wow animate__fadeIn" data-wow-delay="0.4s">
    <h2 class="counter counter-number alt-font font-weight-600 text-extra-dark-gray mb-0 appear" data-to="240" data-speed="7000"></h2>
    <span class="alt-font text-uppercase d-block letter-spacing-1px">Brands</span>
</div>
<!-- end counter item -->
</div>
NoteYou simply need to add your desired counter value in data-to attribute and the counting speed in data-speed attribute. For demo, You can please check this in counters.html page.
Countdown
Add countdown timer in your page to showcase any deal, website launch timer or for any other purpose. See below image and code for more information.

<!-- start timer -->
<div data-enddate="2021/12/26 04:30:40" class="countdown countdown-style-02 text-center alt-font margin-40px-bottom"></div>
<!-- end timer -->
NoteYou can add your desired end date of timer in data-enddate attribute. For demo, You can please check this in countdown.html page.
Custom icon with text
Beautiful custom icon with text - features box. See below image and code for more information.
<div class="row row-cols-1 row-cols-lg-4 row-cols-sm-2 justify-content-center">
<!-- start feature box item -->
<div class="col text-center">
    <div class="feature-box feature-box-shadow h-100 padding-2-rem-lr padding-45px-tb lg-padding-1-rem-lr md-padding-5-rem-lr sm-padding-4-rem-tb">
        <div class="feature-box-icon margin-30px-bottom">
            <img src="image path" alt=""/>
        </div>
        <div class="feature-box-content last-paragraph-no-margin">
            <span class="alt-font font-weight-600 d-block text-extra-dark-gray text-uppercase margin-5px-bottom">Significant bar</span>
            <p>Lorem ipsum dolor sit amet sectetura dipisicing</p>
        </div>
        <div class="feature-box-overlay bg-white border-radius-6px"></div>
    </div>
</div>
<!-- end feature box item -->
<!-- start feature box item -->
<div class="col text-center">
    <div class="feature-box feature-box-shadow h-100 padding-2-rem-lr padding-45px-tb lg-padding-1-rem-lr md-padding-5-rem-lr sm-padding-4-rem-tb">
        <div class="feature-box-icon margin-30px-bottom">
            <img src="image path" alt=""/>
        </div>
        <div class="feature-box-content last-paragraph-no-margin">
            <span class="alt-font font-weight-600 d-block text-extra-dark-gray text-uppercase margin-5px-bottom">Wonderful cuisine</span>
            <p>Lorem ipsum dolor sit amet sectetura dipisicing</p>
        </div>
        <div class="feature-box-overlay bg-white border-radius-6px"></div>
    </div>
</div>
<!-- end feature box item -->
<!-- start feature box item -->
<div class="col text-center">
    <div class="feature-box feature-box-shadow h-100 padding-2-rem-lr padding-45px-tb lg-padding-1-rem-lr md-padding-5-rem-lr sm-padding-4-rem-tb">
        <div class="feature-box-icon margin-30px-bottom">
            <img src="image path" alt=""/>
        </div>
        <div class="feature-box-content last-paragraph-no-margin">
            <span class="alt-font font-weight-600 d-block text-extra-dark-gray text-uppercase margin-5px-bottom">Classic restaurant</span>
            <p>Lorem ipsum dolor sit amet sectetura dipisicing</p>
        </div>
        <div class="feature-box-overlay bg-white border-radius-6px"></div>
    </div>
</div>
<!-- end feature box item -->
<!-- start feature box item -->
<div class="col text-center">
    <div class="feature-box feature-box-shadow h-100 padding-2-rem-lr padding-45px-tb lg-padding-1-rem-lr md-padding-5-rem-lr sm-padding-4-rem-tb">
        <div class="feature-box-icon margin-30px-bottom">
            <img src="image path" alt=""/>
        </div>
        <div class="feature-box-content last-paragraph-no-margin">
            <span class="alt-font font-weight-600 d-block text-extra-dark-gray text-uppercase margin-5px-bottom">Best masterchefs</span>
            <p>Lorem ipsum dolor sit amet sectetura dipisicing</p>
        </div>
        <div class="feature-box-overlay bg-white border-radius-6px"></div>
    </div>
</div>
<!-- end feature box item -->
</div>
NoteFor demo, You can please check this in custom-icon-with-text.html page.
Dropcaps
Different types of dropcaps for attractive typography in website. See below image and code for more information.

<!-- start dropcaps -->
<p><span class="first-letter first-letter-block bg-extra-dark-gray text-white">M</span>Lorem ipsum is simply dummy text of the printing and typesetting industry. It has survived not only five centuries. Simply dummy text of the printing and typesetting industry. It has survived not only five centuries. Lorem ipsum is simply dummy text of the printing and typesetting industry. It has survived not only five centuries. Simply dummy text of the printing and typesetting industry.</p>
<!-- end dropcaps -->
NoteFor demo, You can please check this in dropcaps.html page.
Fancy text box
Fancy text box with attractive look. See below image and code for more information.
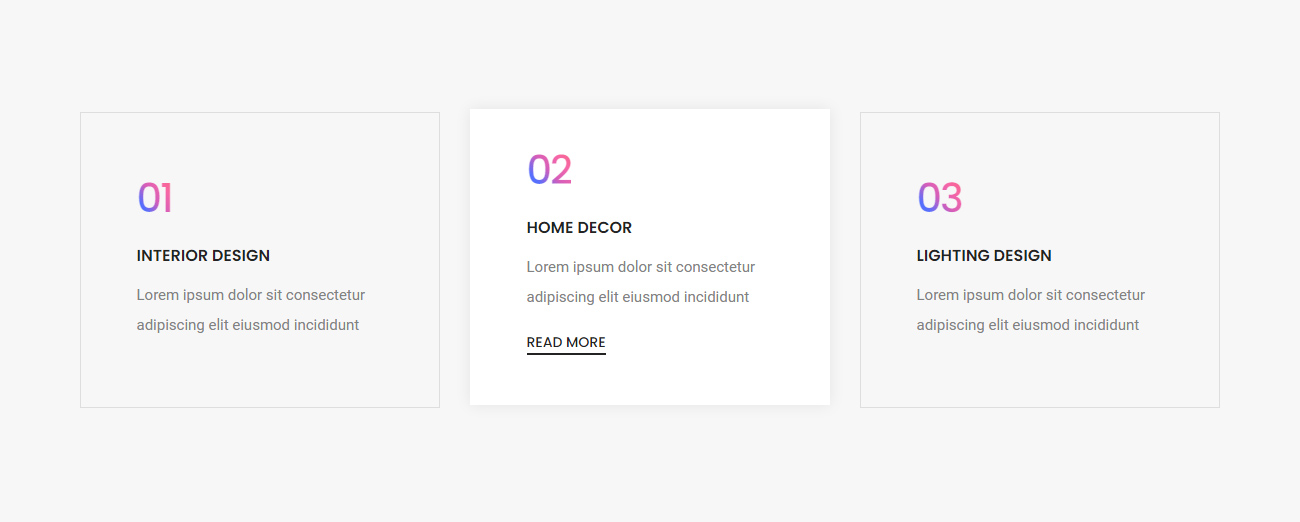
<div class="row row-cols-1 row-cols-md-3 row-cols-sm-2 justify-content-center">
    <!-- start feature box item -->
    <div class="col sm-margin-30px-bottom xs-margin-15px-bottom wow animate__fadeIn">
        <div class="feature-box text-start feature-box-show-hover box-shadow-small-hover feature-box-bg-white-hover border-all border-color-black-transparent overflow-hidden">
            <div class="feature-box-move-bottom-top padding-3-rem-tb padding-4-rem-lr md-padding-2-rem-tb md-padding-2-half-rem-lr sm-padding-3-rem-tb sm-padding-4-half-rem-lr">
                <h4 class="feature-box-icon alt-font font-weight-500 text-gradient-sky-blue-pink-2 d-inline-block margin-20px-bottom letter-spacing-minus-2px">01</h4>
                <div class="feature-box-content last-paragraph-no-margin">
                    <span class="text-extra-dark-gray text-extra-medium font-weight-600 text-uppercase d-block margin-10px-bottom alt-font">Interior design</span>
                    <p>Lorem ipsum dolor sit consectetur adipiscing elit eiusmod incididunt</p>
                </div>
                <div class="move-bottom-top margin-15px-top">
                    <a href="#" class="btn btn-link p-0 btn-extra-large text-extra-dark-gray md-margin-auto-lr">Read More</a>
                </div>
            </div>
        </div>
    </div>
    <!-- end feature box item -->
    <!-- start feature box item -->
    <div class="col sm-margin-30px-bottom xs-margin-15px-bottom wow animate__fadeIn" data-wow-delay="0.2s">
        <div class="feature-box text-start feature-box-show-hover box-shadow-small-hover feature-box-bg-white-hover border-all border-all border-color-black-transparent overflow-hidden last-paragraph-no-margin">
            <div class="feature-box-move-bottom-top padding-3-rem-tb padding-4-rem-lr md-padding-2-rem-tb md-padding-2-half-rem-lr sm-padding-3-rem-tb sm-padding-4-half-rem-lr">
                <h4 class="feature-box-icon alt-font font-weight-500 text-gradient-sky-blue-pink-2 d-inline-block margin-20px-bottom letter-spacing-minus-2px">02</h4>
                <div class="feature-box-content last-paragraph-no-margin">
                    <span class="text-extra-dark-gray text-extra-medium font-weight-600 text-uppercase d-block margin-10px-bottom alt-font">Home decor</span>
                    <p>Lorem ipsum dolor sit consectetur adipiscing elit eiusmod incididunt</p>
                </div>
                <div class="move-bottom-top margin-15px-top">
                    <a href="#" class="btn btn-link p-0 btn-extra-large text-extra-dark-gray md-margin-auto-lr">Read More</a>
                </div>
            </div>
        </div>
    </div>
    <!-- end feature box item -->
    <!-- start feature box item -->
    <div class="col wow animate__fadeIn" data-wow-delay="0.4s">
        <div class="feature-box text-start feature-box-show-hover box-shadow-small-hover feature-box-bg-white-hover border-all border-all border-color-black-transparent overflow-hidden last-paragraph-no-margin">
            <div class="feature-box-move-bottom-top padding-3-rem-tb padding-4-rem-lr md-padding-2-rem-tb md-padding-2-half-rem-lr sm-padding-3-rem-tb sm-padding-4-half-rem-lr">
                <h4 class="feature-box-icon alt-font font-weight-500 text-gradient-sky-blue-pink-2 d-inline-block margin-20px-bottom letter-spacing-minus-2px">03</h4>
                <div class="feature-box-content last-paragraph-no-margin">
                    <span class="text-extra-dark-gray text-extra-medium font-weight-600 text-uppercase d-block margin-10px-bottom alt-font">Lighting design</span>
                    <p>Lorem ipsum dolor sit consectetur adipiscing elit eiusmod incididunt</p>
                </div>
                <div class="move-bottom-top margin-15px-top">
                    <a href="#" class="btn btn-link p-0 btn-extra-large text-extra-dark-gray md-margin-auto-lr">Read More</a>
                </div>
            </div>
        </div>
    </div>
    <!-- end feature box item -->
</div>
NoteFor demo, You can please check this in fancy-text-box.html page.
Fancy text
Fancy text with attractive look. See below image and code for more information.
<h1 class="alt-font cd-headline rotate-1 text-extra-dark-gray margin-seven-bottom">
        <span>We create the</span>
        <span class="cd-words-wrapper text-base-color font-weight-500">
            <b class="is-visible">perfect</b>
            <b>design</b>
            <b>code</b>
            <b>delivered</b>
        </span>
    </h1>
    <h2 class="alt-font d-block cd-headline letters type text-extra-dark-gray margin-seven-bottom">
        <span>We create the</span>
        <span class="cd-words-wrapper text-base-color font-weight-500">
            <b class="is-visible">perfect</b>
            <b>design</b>
            <b>code</b>
            <b>delivered</b>
        </span>
    </h2>
    <h3 class="alt-font cd-headline letters rotate-2 text-extra-dark-gray margin-seven-bottom">
        <span>We create the</span>
        <span class="cd-words-wrapper text-base-color font-weight-500">
            <b class="is-visible">perfect</b>
            <b>design</b>
            <b>code</b>
            <b>delivered</b>
        </span>
    </h3>
    <h4 class="alt-font cd-headline loading-bar text-extra-dark-gray margin-seven-bottom">
        <span>We create the</span>
        <span class="cd-words-wrapper text-base-color font-weight-500">
            <b class="is-visible">perfect</b>
            <b>design</b>
            <b>code</b>
            <b>delivered</b>
        </span>
    </h4>
    <h5 class="alt-font cd-headline slide text-extra-dark-gray margin-seven-bottom">
        <span>We create the</span>
        <span class="cd-words-wrapper text-base-color font-weight-500">
            <b class="is-visible">delivered</b>
            <b>design</b>
            <b>code</b>
            <b>perfect</b>
        </span>
    </h5>
    <h6 class="alt-font cd-headline zoom text-extra-dark-gray margin-seven-bottom">
        <span>We create the</span>
        <span class="cd-words-wrapper text-base-color font-weight-500">
            <b class="is-visible">perfect</b>
            <b>design</b>
            <b>code</b>
            <b>delivered</b>
        </span>
    </h6>
    <h6 class="alt-font cd-headline push text-extra-dark-gray margin-seven-bottom">
        <span>We create the</span>
        <span class="cd-words-wrapper text-base-color font-weight-500">
            <b class="is-visible">perfect</b>
            <b>design</b>
            <b>code</b>
            <b>delivered</b>
        </span>
    </h6>
NoteFor demo, You can please check this in fancy-text.html page.
Google map
Embed google map for location and other use in website like in contact us page. See below image and code for more information.
<iframe class="w-100 h-500px" src="https://www.google.com/maps/embed?pb=!1m18!1m12!1m3!1d3151.843821917424!2d144.956054!3d-37.817127!2m3!1f0!2f0!3f0!3m2!1i1024!2i768!4f13.1!3m3!1m2!1s0x6ad65d4c2b349649%3A0xb6899234e561db11!2sEnvato!5e0!3m2!1sen!2sin!4v1427947693651"></iframe>
NoteFor demo, You can please check this in google-map.html page.
Heading
Different heading styles and font sizes. See below image and code for more information.
<h1 class="text-extra-dark-gray alt-font font-weight-600">Heading</h1>
<h2 class="text-extra-dark-gray alt-font font-weight-600">Heading</h2>
<h3 class="text-extra-dark-gray alt-font font-weight-600">Heading</h3>
<h4 class="text-extra-dark-gray alt-font font-weight-600">Heading</h4>
<h5 class="text-extra-dark-gray alt-font font-weight-600">Heading</h5>
<h6 class="text-extra-dark-gray alt-font font-weight-600">Heading</h6>
NoteFor demo, You can please check this in heading.html page.
Highlights
You can use the mark tag to highlight text.
<mark class="bg-success text-white">nam ad soleat alterum maluisset, cu est copiosae intellegat inciderint</mark>
NoteFor demo, You can please check this in highlights.html page.
Icon
Icon sizes
Litho provides 8 icon size for icon as well as other font sizes can also used as icon size, you can use classes .icon-extra-large , .icon-large , .icon-medium , .icon-very-medium , .icon-extra-medium , .icon-small , .icon-extra-small and .icon-very-small
<i class="fab fa-facebook icon-extra-large text-fast-blue"></i>
<i class="fab fa-facebook icon-large text-fast-blue"></i>
<i class="fab fa-facebook icon-medium text-fast-blue"></i>
<i class="fab fa-facebook icon-very-medium text-fast-blue"></i>
<i class="fab fa-facebook icon-extra-medium text-fast-blue"></i>
<i class="fab fa-facebook icon-small text-fast-blue"></i>
<i class="fab fa-facebook icon-extra-small text-fast-blue"></i>
<i class="fab fa-facebook icon-very-small text-fast-blue"></i>
Icon with text
Beautiful icon box with text - features box. See below image and code for more information.
<div class="row row-cols-1 row-cols-lg-3 row-cols-sm-2">
    <div class="col margin-60px-bottom sm-margin-30px-bottom xs-margin-40px-bottom wow animate__fadeIn">
        <!-- start feature box item -->
        <div class="feature-box feature-box-left-icon">
            <div class="feature-box-icon">
                <i class="line-icon-Navigation-LeftWindow icon-medium text-fast-blue margin-35px-bottom md-margin-15px-bottom sm-margin-10px-bottom"></i>
            </div>
            <div class="feature-box-content last-paragraph-no-margin">
                <span class="alt-font font-weight-500 margin-10px-bottom d-block text-extra-dark-gray">Amazing layouts</span>
                <p class="w-80">Lorem ipsum is simply dummy text of the printing typesetting ipsum been text.</p>
            </div>
        </div>
        <!-- end feature box item -->
    </div>
    <div class="col margin-60px-bottom sm-margin-30px-bottom xs-margin-40px-bottom wow animate__fadeIn" data-wow-delay="0.2s">
        <!-- start feature box item -->
        <div class="feature-box feature-box-left-icon">
            <div class="feature-box-icon">
                <i class="line-icon-Cursor-Click2 icon-medium text-fast-blue margin-35px-bottom md-margin-15px-bottom sm-margin-10px-bottom"></i>
            </div>
            <div class="feature-box-content last-paragraph-no-margin">
                <span class="alt-font font-weight-500 margin-10px-bottom d-block text-extra-dark-gray">No coding required</span>
                <p class="w-80">Lorem ipsum is simply dummy text of the printing typesetting ipsum been text.</p>
            </div>
        </div>
        <!-- end feature box item -->
    </div>
    <div class="col margin-60px-bottom sm-margin-30px-bottom xs-margin-40px-bottom wow animate__fadeIn" data-wow-delay="0.3s">
        <!-- start feature box item -->
        <div class="feature-box feature-box-left-icon">
            <div class="feature-box-icon">
                <i class="line-icon-Like-2 icon-medium text-fast-blue margin-35px-bottom md-margin-15px-bottom sm-margin-10px-bottom"></i>
            </div>
            <div class="feature-box-content last-paragraph-no-margin">
                <span class="alt-font font-weight-500 margin-10px-bottom d-block text-extra-dark-gray">Easy to customize</span>
                <p class="w-80">Lorem ipsum is simply dummy text of the printing typesetting ipsum been text.</p>
            </div>
        </div>
        <!-- end feature box item -->
    </div>
    <div class="col sm-margin-30px-bottom xs-margin-40px-bottom wow animate__fadeIn" data-wow-delay="0.4s">
        <!-- start feature box item -->
        <div class="feature-box feature-box-left-icon">
            <div class="feature-box-icon">
                <i class="line-icon-Talk-Man icon-medium text-fast-blue margin-35px-bottom md-margin-15px-bottom sm-margin-10px-bottom"></i>
            </div>
            <div class="feature-box-content last-paragraph-no-margin">
                <span class="alt-font font-weight-500 margin-10px-bottom d-block text-extra-dark-gray">Customer satisfaction</span>
                <p class="w-80">Lorem ipsum is simply dummy text of the printing typesetting ipsum been text.</p>
            </div>
        </div>
        <!-- end feature box item -->
    </div>
    <div class="col xs-margin-40px-bottom wow animate__fadeIn" data-wow-delay="0.5s">
        <!-- start feature box item -->
        <div class="feature-box feature-box-left-icon">
            <div class="feature-box-icon">
                <i class="line-icon-Heart icon-medium text-fast-blue margin-35px-bottom md-margin-15px-bottom sm-margin-10px-bottom"></i>
            </div>
            <div class="feature-box-content last-paragraph-no-margin">
                <span class="alt-font font-weight-500 margin-10px-bottom d-block text-extra-dark-gray">Huge icon collection</span>
                <p class="w-80">Lorem ipsum is simply dummy text of the printing typesetting ipsum been text.</p>
            </div>
        </div>
        <!-- end feature box item -->
    </div>
    <div class="col wow animate__fadeIn" data-wow-delay="0.6s">
        <!-- start feature box item -->
        <div class="feature-box feature-box-left-icon">
            <div class="feature-box-icon">
                <i class="line-icon-Gear-2 icon-medium text-fast-blue margin-35px-bottom md-margin-15px-bottom sm-margin-10px-bottom"></i>
            </div>
            <div class="feature-box-content last-paragraph-no-margin">
                <span class="alt-font font-weight-500 margin-10px-bottom d-block text-extra-dark-gray">Powerfull customize</span>
                <p class="w-80">Lorem ipsum is simply dummy text of the printing typesetting ipsum been text.</p>
            </div>
        </div>
        <!-- end feature box item -->
    </div>
    </div>
NoteFor demo, You can please check this in icon-with-text.html page.
Functionality to get your instagram posts and display it on your website. See below image and code for more information.
<!-- start instagram images -->
<div class="row justify-content-center">
    <div class="col-12 col-md-8">
        <ul class="instafeed-grid instafeed-wrapper grid grid-3col xl-grid-3col lg-grid-3col md-grid-2col sm-grid-2col xs-grid-1col gutter-large" data-total="6">
            <li class="grid-item"><figure><a href="#" data-href="{{link}}" target="_blank"><img src="image path" data-src="{{image}}" class="insta-image" alt="" /><span class="insta-counts"><i class="fab fa-instagram"></i>{{likes}}</span></a></figure></li>
        </ul>
    </div>
</div>
<!-- end instagram images -->
NoteFirst of all you need to create Instagram access token from your account, you can read this article for more information and then add that token in /js/main.js file in var token. You can use data-total attribute in HTML code to fetch your desired number of Instagram photos. For demo, You can please check this in instagram.html page.
Info banner
Info banner for display information in your website in different styles. See below image and code for more information.
<!-- start info banner -->
<div class="row row-cols-1 row-cols-lg-3 row-cols-sm-2 justify-content-center">
    <!-- start services item -->
    <div class="col md-margin-30px-bottom xs-margin-15px-bottom">
        <a href="#"><img src="image path" alt="" /></a>
        <div class="position-relative bg-white padding-3-half-rem-all box-shadow-small">
            <div class="bg-dark-purple text-small alt-font text-white text-uppercase position-absolute font-weight-500 top-minus-15px right-0px padding-5px-tb padding-20px-lr">$100 Per month</div>
            <span class="alt-font font-weight-500 text-extra-medium text-extra-dark-gray d-block margin-10px-bottom">Meditation classes</span>
            <p>Lorem ipsum dolor amet consectetur adipiscing do eiusmod tempor.</p>
            <div class="w-100 h-1px bg-medium-light-gray margin-20px-bottom d-inline-block"></div>
            <a class="alt-font font-weight-600 text-small text-dark-purple text-salmon-rose-hover text-uppercase d-flex align-items-center" href="#">Join classes<i class="feather icon-feather-arrow-right icon-extra-small ms-auto"></i></a>
        </div>
    </div>
    <!-- end services item -->
    <!-- start services item -->
    <div class="col md-margin-30px-bottom xs-margin-15px-bottom">
        <a href="#"><img src="image path" alt="" /></a>
        <div class="position-relative bg-white padding-3-half-rem-all box-shadow-small">
            <div class="bg-dark-purple text-small alt-font text-white text-uppercase position-absolute font-weight-500 top-minus-15px right-0px padding-5px-tb padding-20px-lr">$150 Per month</div>
            <span class="alt-font font-weight-500 text-extra-medium text-extra-dark-gray d-block margin-10px-bottom">Sound therapy</span>
            <p>Lorem ipsum dolor amet consectetur adipiscing do eiusmod tempor.</p>
            <div class="w-100 h-1px bg-medium-light-gray margin-20px-bottom d-inline-block"></div>
            <a class="alt-font font-weight-600 text-small text-dark-purple text-salmon-rose-hover text-uppercase d-flex align-items-center" href="#">Join classes<i class="feather icon-feather-arrow-right icon-extra-small ms-auto"></i></a>
        </div>
    </div>
    <!-- end services item -->
    <!-- start services item -->
    <div class="col">
        <a href="#"><img src="image path" alt="" /></a>
        <div class="position-relative bg-white padding-3-half-rem-all box-shadow-small">
            <div class="bg-dark-purple text-small alt-font text-white text-uppercase position-absolute font-weight-500 top-minus-15px right-0px padding-5px-tb padding-20px-lr">$180 Per month</div>
            <span class="alt-font font-weight-500 text-extra-medium text-extra-dark-gray d-block margin-10px-bottom">Kundalini yoga</span>
            <p>Lorem ipsum dolor amet consectetur adipiscing do eiusmod tempor.</p>
            <div class="w-100 h-1px bg-medium-light-gray margin-20px-bottom d-inline-block"></div>
            <a class="alt-font font-weight-600 text-small text-dark-purple text-salmon-rose-hover text-uppercase d-flex align-items-center" href="#">Join classes<i class="feather icon-feather-arrow-right icon-extra-small ms-auto"></i></a>
        </div>
    </div>
    <!-- end services item -->
</div>
<!-- end info banner -->
NoteFor demo, You can please check this in info-banner.html page.
Interactive banner
Beautiful designs of interactive banner. See below image and code for more information.
<div class="row align-items-center justify-content-center">
<!-- start interactive banner item -->
    <div class="col-12 col-lg-4 col-md-6 interactive-banners-style-02 md-margin-30px-bottom xs-margin-15px-bottom wow animate__fadeInRight" data-wow-delay="0.4s">
        <a href="#">
            <img src="image path" alt="">
            <div class="bg-gradient-black-transparent opacity-full"></div>
            <span class="category-name font-weight-500 border-radius-2px text-extra-small">Africa</span>
            <div class="alt-font category-content justify-content-center">
                <div class="d-flex">
                    <span class="m-0 align-self-center text-white text-large text-uppercase font-weight-500 w-50 letter-spacing-minus-1-half xl-w-80">The trescoat spa resort</span>
                    <span class="align-self-center text-center ms-auto interactive-banners-icon"><span class="d-inline-block line-height-40px rounded-circle bg-white w-40px h-40px"><i class="feather icon-feather-arrow-right text-extra-dark-gray"></i></span></span>
                </div>
            </div>
        </a>
    </div>
    <!-- end interactive banner item -->
    <!-- start interactive banner item -->
    <div class="col-12 col-lg-4 col-md-6 interactive-banners-style-02 md-margin-30px-bottom xs-margin-15px-bottom wow animate__fadeInRight" data-wow-delay="0.6s">
        <a href="#">
            <img src="image path" alt="">
            <div class="bg-gradient-black-transparent opacity-full"></div>
            <span class="category-name font-weight-500 border-radius-2px text-extra-small">Thailand</span>
            <div class="alt-font category-content justify-content-center">
                <div class="d-flex">
                    <span class="m-0 align-self-center text-white text-large text-uppercase font-weight-500 w-50 letter-spacing-minus-1-half xl-w-80">Moongo spa resort</span>
                    <span class="align-self-center text-center ms-auto interactive-banners-icon"><span class="d-inline-block line-height-40px rounded-circle bg-white w-40px h-40px"><i class="feather icon-feather-arrow-right text-extra-dark-gray"></i></span></span>
                </div>
            </div>
        </a>
    </div>
    <!-- end interactive banner item -->
    <!-- start interactive banner item -->
    <div class="col-12 col-lg-4 col-md-6 interactive-banners-style-02 wow animate__fadeInRight" data-wow-delay="0.8s">
        <a href="#">
            <img src="image path" alt="">
            <div class="bg-gradient-black-transparent opacity-full"></div>
            <span class="category-name font-weight-500 border-radius-2px text-extra-small">Singapore</span>
            <div class="alt-font category-content justify-content-center">
                <div class="d-flex">
                    <span class="m-0 align-self-center text-white text-large text-uppercase font-weight-500 w-60 letter-spacing-minus-1-half xl-w-80">Grand canyon baloon</span>
                    <span class="align-self-center text-center ms-auto interactive-banners-icon"><span class="d-inline-block line-height-40px rounded-circle bg-white w-40px h-40px"><i class="feather icon-feather-arrow-right text-extra-dark-gray"></i></span></span>
                </div>
            </div>
        </a>
    </div>
    <!-- end interactive banner item -->
</div>
NoteFor demo, You can please check this in interactive-banners.html page.
Image gallery
Awesome image gallery with amazing look. See below image and code for more information.
<!-- start image gallery -->
<ul class="portfolio-overlay portfolio-wrapper grid grid-4col xl-grid-4col lg-grid-4col md-grid-2col sm-grid-2col xs-grid-1col gutter-extra-large text-center">
    <li class="grid-sizer"></li>
    <!-- start lightbox gallery item -->
    <li class="grid-item wow animate__fadeIn">
        <a href="image path" title="Lightbox gallery image title..." data-group="lightbox-gallery" class="lightbox-group-gallery-item">
            <div class="portfolio-box">
                <div class="portfolio-image bg-gradient-sky-blue-pink">
                    <img src="image path" alt="" />
                    <div class="portfolio-hover justify-content-end d-flex flex-column padding-50px-tb lg-padding-30px-tb xs-padding-15px-tb">
                        <i class="feather icon-feather-zoom-in portfolio-plus-icon font-weight-300 text-white absolute-middle-center icon-small move-top-bottom"></i>
                    </div>
                </div>
            </div>
        </a>
    </li>
    <!-- end lightbox gallery item -->
    <!-- start lightbox gallery item -->
    <li class="grid-item wow animate__fadeIn" data-wow-delay="0.2s">
        <a href="image path" title="Lightbox gallery image title..." data-group="lightbox-gallery" class="lightbox-group-gallery-item">
            <div class="portfolio-box">
                <div class="portfolio-image bg-gradient-sky-blue-pink">
                    <img src="image path" alt="" />
                    <div class="portfolio-hover justify-content-end d-flex flex-column padding-50px-tb lg-padding-30px-tb xs-padding-15px-tb">
                        <i class="feather icon-feather-zoom-in portfolio-plus-icon font-weight-300 text-white absolute-middle-center icon-small move-top-bottom"></i>
                    </div>
                </div>
            </div>
        </a>
    </li>
    <!-- end lightbox gallery item -->
    <!-- start lightbox gallery item -->
    <li class="grid-item wow animate__fadeIn" data-wow-delay="0.4s">
        <a href="image path" title="Lightbox gallery image title..." data-group="lightbox-gallery" class="lightbox-group-gallery-item">
            <div class="portfolio-box">
                <div class="portfolio-image bg-gradient-sky-blue-pink">
                    <img src="image path" alt="" />
                    <div class="portfolio-hover justify-content-end d-flex flex-column padding-50px-tb lg-padding-30px-tb xs-padding-15px-tb">
                        <i class="feather icon-feather-zoom-in portfolio-plus-icon font-weight-300 text-white absolute-middle-center icon-small move-top-bottom"></i>
                    </div>
                </div>
            </div>
        </a>
    </li>
    <!-- end lightbox gallery item -->
    <!-- start lightbox gallery item -->
    <li class="grid-item wow animate__fadeIn" data-wow-delay="0.6s">
        <a href="image path" title="Lightbox gallery image title..." data-group="lightbox-gallery" class="lightbox-group-gallery-item">
            <div class="portfolio-box">
                <div class="portfolio-image bg-gradient-sky-blue-pink">
                    <img src="image path" alt="" />
                    <div class="portfolio-hover justify-content-end d-flex flex-column padding-50px-tb lg-padding-30px-tb xs-padding-15px-tb">
                        <i class="feather icon-feather-zoom-in portfolio-plus-icon font-weight-300 text-white absolute-middle-center icon-small move-top-bottom"></i>
                    </div>
                </div>
            </div>
        </a>
    </li>
    <!-- end lightbox gallery item -->
</ul>
<!-- end image gallery -->
You can manage number of items to display in a row in different device width as per below classes and those should be added in portfolio-wrapper DIV. Please make sure to replace X with your desired number of items to display in a row. This same mechanism will be applicable to any type of grid like portfolio, blog and shop grids.
grid-Xcol: In general for all device width
xl-grid-Xcol: For extra large devices greater than equal to 1200px width
lg-grid-Xcol: For large devices greater than equal to 992px width
md-grid-Xcol: For medium devices greater than equal to 768px width
sm-grid-Xcol: For small devices greater than equal to 576px width
xs-grid-Xcol: For extra small devices less than 576px width
If you have added multiple galleries with Lightbox popup feature in the same page and want to separate big images display in the Lightbox popup per gallery then you need to add same value in LI A HREF data-group property for one gallery items and another value for other items of another gallery. But in this case you need to add lightbox-group-gallery-item class in all the items LI A HREF of all the galleries in the page.
NoteFor demo, You can please check this in image-gallery.html page.
Lists
12 types of list designs. See below image and code for more information.

<ul class="list-style-01 text-extra-dark-gray">
    <li><i class="fas fa-check text-extra-medium-gray"></i>Advanced customization theme options
        <span class="list-hover bg-white box-shadow-small border-radius-5px"></span>
    </li>
    <li><i class="fas fa-check text-extra-medium-gray"></i>Manage and share your workspace
        <span class="list-hover bg-white box-shadow-small border-radius-5px"></span>
    </li>
    <li><i class="fas fa-check text-extra-medium-gray"></i>Powerful theme for creatives designer
        <span class="list-hover bg-white box-shadow-small border-radius-5px"></span>
    </li>
    <li><i class="fas fa-check text-extra-medium-gray"></i>Browse amazing popular social features
        <span class="list-hover bg-white box-shadow-small border-radius-5px"></span>
    </li>
</ul>
NoteFor demo, You can please check this in lists.html page.
Lightbox gallery
Magnific Popup is a responsive lightbox & dialog script with focus on performance and providing best experience for user with any device. The list of gallery options & its descriptions are provided below for your reference:
- Single image lightbox
- Lightbox gallery
- Zoom gallery
- Popup with form
- Modal popup
- Open youTube video
- Open vimeo video
- Open google map
- Open subscription modal
Single image lightbox
Three simple popups with different scaling settings.
- Fits horizontally and vertically.
- Only horizontally
- No gaps, zoom animation, close icon in top-right corner.
<div class="row justify-content-center">
    <div class="col-12">
        <ul class="portfolio-overlay portfolio-wrapper grid grid-4col xl-grid-4col lg-grid-4col md-grid-2col sm-grid-2col xs-grid-1col gutter-extra-large text-center">
            <li class="grid-sizer"></li>
            <!-- start simple image gallery item -->
            <li class="grid-item wow animate__fadeIn">
                <a href="image path" title="Single Image gallery image title..." class="single-image-lightbox">
                    <div class="portfolio-box">
                        <div class="portfolio-image bg-gradient-sky-blue-pink">
                            <img src="image path" alt="" />
                            <div class="portfolio-hover justify-content-end d-flex flex-column padding-50px-tb lg-padding-30px-tb xs-padding-15px-tb">
                                <i class="feather icon-feather-zoom-in portfolio-plus-icon font-weight-300 text-white absolute-middle-center icon-small move-top-bottom"></i>
                            </div>
                        </div>
                    </div>
                </a>
            </li>
            <!-- end simple image gallery item -->
            <!-- start simple image gallery item -->
            <li class="grid-item wow animate__fadeIn" data-wow-delay="0.2s">
                <a href="image path" title="Single image gallery image title..." class="single-image-lightbox">
                    <div class="portfolio-box">
                        <div class="portfolio-image bg-gradient-sky-blue-pink">
                            <img src="image path" alt="" />
                            <div class="portfolio-hover justify-content-end d-flex flex-column padding-50px-tb lg-padding-30px-tb xs-padding-15px-tb">
                                <i class="feather icon-feather-zoom-in portfolio-plus-icon font-weight-300 text-white absolute-middle-center icon-small move-top-bottom"></i>
                            </div>
                        </div>
                    </div>
                </a>
            </li>
            <!-- end simple image gallery item -->
            <!-- start simple image gallery item -->
            <li class="grid-item wow animate__fadeIn" data-wow-delay="0.4s">
                <a href="image path" title="Single image gallery image title..." class="single-image-lightbox">
                    <div class="portfolio-box">
                        <div class="portfolio-image bg-gradient-sky-blue-pink">
                            <img src="image path" alt="" />
                            <div class="portfolio-hover justify-content-end d-flex flex-column padding-50px-tb lg-padding-30px-tb xs-padding-15px-tb">
                                <i class="feather icon-feather-zoom-in portfolio-plus-icon font-weight-300 text-white absolute-middle-center icon-small move-top-bottom"></i>
                            </div>
                        </div>
                    </div>
                </a>
            </li>
            <!-- end simple image gallery item -->
            <!-- start simple image gallery item -->
            <li class="grid-item wow animate__fadeIn" data-wow-delay="0.6s">
                <a href="image path" title="Single image gallery image title..." class="single-image-lightbox">
                    <div class="portfolio-box">
                        <div class="portfolio-image bg-gradient-sky-blue-pink">
                            <img src="image path" alt="" />
                            <div class="portfolio-hover justify-content-end d-flex flex-column padding-50px-tb lg-padding-30px-tb xs-padding-15px-tb">
                                <i class="feather icon-feather-zoom-in portfolio-plus-icon font-weight-300 text-white absolute-middle-center icon-small move-top-bottom"></i>
                            </div>
                        </div>
                    </div>
                </a>
            </li>
            <!-- end simple image gallery item -->
        </ul>
    </div>
</div>
Lightbox gallery
You can add the image gallery grid and if any image is clicked then it will display Lightbox popup to view bigger version of image with next / previos navigation.
<div class="row justify-content-center">
    <div class="col-12">
        <ul class="portfolio-overlay portfolio-wrapper grid grid-4col xl-grid-4col lg-grid-4col md-grid-2col sm-grid-2col xs-grid-1col gutter-extra-large text-center">
            <li class="grid-sizer"></li>
            <!-- start lightbox gallery item -->
            <li class="grid-item wow animate__fadeIn">
                <a href="image path" title="Lightbox gallery image title..." data-group="lightbox-gallery" class="lightbox-group-gallery-item">
                    <div class="portfolio-box">
                        <div class="portfolio-image bg-gradient-sky-blue-pink">
                            <img src="image path" alt="" />
                            <div class="portfolio-hover justify-content-end d-flex flex-column padding-50px-tb lg-padding-30px-tb xs-padding-15px-tb">
                                <i class="feather icon-feather-zoom-in portfolio-plus-icon font-weight-300 text-white absolute-middle-center icon-small move-top-bottom"></i>
                            </div>
                        </div>
                    </div>
                </a>
            </li>
            <!-- end lightbox gallery item -->
            <!-- start lightbox gallery item -->
            <li class="grid-item wow animate__fadeIn" data-wow-delay="0.2s">
                <a href="image path" title="Lightbox gallery image title..." data-group="lightbox-gallery" class="lightbox-group-gallery-item">
                    <div class="portfolio-box">
                        <div class="portfolio-image bg-gradient-sky-blue-pink">
                            <img src="image path" alt="" />
                            <div class="portfolio-hover justify-content-end d-flex flex-column padding-50px-tb lg-padding-30px-tb xs-padding-15px-tb">
                                <i class="feather icon-feather-zoom-in portfolio-plus-icon font-weight-300 text-white absolute-middle-center icon-small move-top-bottom"></i>
                            </div>
                        </div>
                    </div>
                </a>
            </li>
            <!-- end lightbox gallery item -->
            <!-- start lightbox gallery item -->
            <li class="grid-item wow animate__fadeIn" data-wow-delay="0.4s">
                <a href="image path" title="Lightbox gallery image title..." data-group="lightbox-gallery" class="lightbox-group-gallery-item">
                    <div class="portfolio-box">
                        <div class="portfolio-image bg-gradient-sky-blue-pink">
                            <img src="image path" alt="" />
                            <div class="portfolio-hover justify-content-end d-flex flex-column padding-50px-tb lg-padding-30px-tb xs-padding-15px-tb">
                                <i class="feather icon-feather-zoom-in portfolio-plus-icon font-weight-300 text-white absolute-middle-center icon-small move-top-bottom"></i>
                            </div>
                        </div>
                    </div>
                </a>
            </li>
            <!-- end lightbox gallery item -->
            <!-- start lightbox gallery item -->
            <li class="grid-item wow animate__fadeIn" data-wow-delay="0.6s">
                <a href="image path" title="Lightbox gallery image title..." data-group="lightbox-gallery" class="lightbox-group-gallery-item">
                    <div class="portfolio-box">
                        <div class="portfolio-image bg-gradient-sky-blue-pink">
                            <img src="image path" alt="" />
                            <div class="portfolio-hover justify-content-end d-flex flex-column padding-50px-tb lg-padding-30px-tb xs-padding-15px-tb">
                                <i class="feather icon-feather-zoom-in portfolio-plus-icon font-weight-300 text-white absolute-middle-center icon-small move-top-bottom"></i>
                            </div>
                        </div>
                    </div>
                </a>
            </li>
            <!-- end lightbox gallery item -->
        </ul>
    </div>
</div>
NoteFor demo visit image-gallery.html page.
Zoom gallery
It will work the same way like above Lightbox gallery but bigger image will load with zoom effect when clicked.
<div class="row justify-content-center">
    <div class="col-12">
        <ul class="portfolio-overlay portfolio-wrapper grid grid-4col xl-grid-4col lg-grid-4col md-grid-2col sm-grid-2col xs-grid-1col gutter-extra-large text-center zoom-gallery">
            <li class="grid-sizer"></li>
            <!-- start Zoom gallery item -->
            <li class="grid-item wow animate__fadeIn">
                <a href="image path" title="Zoom gallery image title..." class="project-img-gallery">
                    <div class="portfolio-box">
                        <div class="portfolio-image bg-gradient-sky-blue-pink">
                            <img src="image path" alt="" />
                            <div class="portfolio-hover justify-content-end d-flex flex-column padding-50px-tb lg-padding-30px-tb xs-padding-15px-tb">
                                <i class="feather icon-feather-zoom-in portfolio-plus-icon font-weight-300 text-white absolute-middle-center icon-small move-top-bottom"></i>
                            </div>
                        </div>
                    </div>
                </a>
            </li>
            <!-- end Zoom gallery item -->
            <!-- start Zoom gallery item -->
            <li class="grid-item wow animate__fadeIn" data-wow-delay="0.2s">
                <a href="image path" title="Zoom gallery image title..." class="project-img-gallery">
                    <div class="portfolio-box">
                        <div class="portfolio-image bg-gradient-sky-blue-pink">
                            <img src="image path" alt="" />
                            <div class="portfolio-hover justify-content-end d-flex flex-column padding-50px-tb lg-padding-30px-tb xs-padding-15px-tb">
                                <i class="feather icon-feather-zoom-in portfolio-plus-icon font-weight-300 text-white absolute-middle-center icon-small move-top-bottom"></i>
                            </div>
                        </div>
                    </div>
                </a>
            </li>
            <!-- end Zoom gallery item -->
            <!-- start Zoom gallery item -->
            <li class="grid-item wow animate__fadeIn" data-wow-delay="0.4s">
                <a href="image path" title="Zoom gallery image title..." class="project-img-gallery">
                    <div class="portfolio-box">
                        <div class="portfolio-image bg-gradient-sky-blue-pink">
                            <img src="image path" alt="" />
                            <div class="portfolio-hover justify-content-end d-flex flex-column padding-50px-tb lg-padding-30px-tb xs-padding-15px-tb">
                                <i class="feather icon-feather-zoom-in portfolio-plus-icon font-weight-300 text-white absolute-middle-center icon-small move-top-bottom"></i>
                            </div>
                        </div>
                    </div>
                </a>
            </li>
            <!-- end Zoom gallery item -->
            <!-- start Zoom gallery item -->
            <li class="grid-item wow animate__fadeIn" data-wow-delay="0.6s">
                <a href="image path" title="Zoom gallery image title..." class="project-img-gallery">
                    <div class="portfolio-box">
                        <div class="portfolio-image bg-gradient-sky-blue-pink">
                            <img src="image path" alt="" />
                            <div class="portfolio-hover justify-content-end d-flex flex-column padding-50px-tb lg-padding-30px-tb xs-padding-15px-tb">
                                <i class="feather icon-feather-zoom-in portfolio-plus-icon font-weight-300 text-white absolute-middle-center icon-small move-top-bottom"></i>
                            </div>
                        </div>
                    </div>
                </a>
            </li>
            <!-- end Zoom gallery item -->
        </ul>
    </div>
</div>
Popup with form
Entered data will not lost if you open and close the popup or if you go to another page and then press back browser button.
<!-- start pop-up with form section -->
<div class="col-12 col-xl-4 col-lg-8 col-md-10 text-center">
    <a href="#contact-form" class="btn btn-medium btn-round-edge btn-fast-blue popup-with-form">Start New Projects</a>
    <!-- start contact form -->
    <form id="contact-form" action="email-templates/contact-form.php" method="post" class="white-popup-block col-xl-4 col-lg-7 col-sm-9  p-0 mx-auto mfp-hide">
        <div class="padding-fifteen-all bg-white border-radius-6px xs-padding-six-all">
            <h6 class="text-extra-dark-gray font-weight-500 margin-35px-bottom xs-margin-15px-bottom">Looking for a excellent business idea?</h6>
            <div>
                <input class="medium-input margin-25px-bottom xs-margin-10px-bottom required" type="text" name="name" placeholder="Your name">
                <input class="medium-input margin-25px-bottom xs-margin-10px-bottom required" type="email" name="email" placeholder="Your email address">
                <input class="medium-input margin-25px-bottom xs-margin-10px-bottom" type="tel" name="phone" placeholder="Your mobile">
                <textarea class="medium-textarea xs-h-100px xs-margin-10px-bottom" rows="6" name="comment" placeholder="Your message"></textarea>
                <input type="hidden" name="redirect" value="">
                <button class="btn btn-medium btn-gradient-sky-blue-pink mb-0 submit" type="submit">Send Message</button>
                <div class="form-results d-none"></div>
            </div>
        </div>
    </form>
    <!-- end contact form -->
</div>
<!-- end pop-up with form section -->
NoteFor demo, you can check it here modal-contact-form.html
Modal popup
A modal popup disables the usual ways to close popups.
<div class="col-12 col-xl-4 col-lg-8 col-md-10 text-center">
    <h6 class="font-weight-300 margin-eight-bottom sm-margin-30px-bottom">A modal popup disables the usual ways to close popups.</h6>
    <a class="btn btn-medium btn-round-edge btn-fast-blue modal-popup" href="#modal-popup">Open Modal</a>
    <!-- start modal pop-up -->
    <div id="modal-popup" class="col-11 col-xl-3 col-lg-6 col-md-8 col-sm-9 mx-auto bg-white text-center modal-popup-main padding-4-half-rem-all mfp-hide border-radius-6px sm-padding-2-half-rem-lr">
        <span class="text-extra-dark-gray text-uppercase alt-font text-extra-large font-weight-600 margin-15px-bottom d-block">Simple modal popup</span>
        <p>Lorem ipsum is simply dummy text of the printing and typesetting industry lorem ipsum has been the industry's standard dummy text ever.</p>
        <a class="btn btn-fancy btn-small btn-transparent-light-gray popup-modal-dismiss" href="#">Dismiss</a>
    </div>
    <!-- end modal pop-up -->
</div>
NoteFor demo, you can check it here modal-popup.html
Open youTube video
In this example lightboxes are automatically disabled on small screen size and default behavior of link is triggered.
<!-- video popup -->
    <a class="btn btn-medium btn-round-edge btn-fast-blue popup-youtube" href="youtube video link">Open Youtube Video</a>
<!-- end video popup -->
NoteFor demo, you can check it here modal-youtube-video.html
Open vimeo video
In this example lightboxes are automatically disabled on small screen size and default behavior of link is triggered.
<!-- video popup -->
<a class="btn btn-medium btn-round-edge btn-fast-blue popup-vimeo" href="Vimeo video link">Open Vimeo Video</a>
<!-- end video popup -->
Notefor demo visit page modal-vimeo-video.html page.
Open google map
In this example lightboxes are automatically disabled on small screen size and default behavior of link is triggered.
<!-- google map popup -->
<a class="btn btn-medium btn-round-edge btn-fast-blue popup-googlemap" href="https://www.google.com/maps/embed?pb=!1m18!1m12!1m3!1d3151.840108181589!2d144.95373631531888!3d-37.8172139797519!2m3!1f0!2f0!3f0!3m2!1i1024!2i768!4f13.1!3m3!1m2!1s0x6ad65d4c2b349649%3A0xb6899234e561db11!2sEnvato!5e0!3m2!1sen!2sin!4v1597672202024!5m2!1sen!2sin">Open Gooogle Map</a>
<!-- end google map popup -->
NoteFor demo, you can check it here modal-google-map.html
Open subscription modal
You can display popup with newsletter subscription form on click of a button or on page load. If you will check mark Don't show this popup again option in the popup then this popup will not display on the page load automatically for next 30 days. If you want to change this cookie period then open /js/main.js file, search litho-promo-popup (cookie name) and there change expireDays value as per your need.
<!-- subscription popup -->
<div class="col-12 col-xl-5 col-lg-8 col-md-10 text-center">
    <a class="btn btn-medium btn-round-edge btn-fast-blue modal-popup" href="#subscribe-popup">Show modal again</a>
    <!-- start subscription popup -->
    <div id="subscribe-popup" class="mfp-hide subscribe-popup">
        <div class="container">
            <div class="row justify-content-center">
                <div class="col-12 col-lg-8 col-md-10 bg-white modal-popup-main">
                    <div class="row">
                        <div class="col-12 col-sm-7 order-2 order-sm-1 newsletter-popup padding-6-rem-all lg-padding-4-rem-all xs-padding-3-rem-all">
                            <span class="text-extra-large font-weight-500 text-extra-dark-gray d-block margin-10px-bottom">Subscribe to newsletter</span>
                            <p class="margin-30px-bottom xs-margin-20px-bottom">Subscribe to our newsletters and don't miss new arrivals the latest updates and our latest promotions.</p>
                            <form action="email-templates/subscribe-newsletter.php" method="post">
                                <div class="newsletter-style-03 position-relative margin-25px-bottom xs-margin-15px-bottom">
                                    <input class="medium-input bg-white m-0 required" name="email" placeholder="Enter your email address" type="email">
                                    <input type="hidden" name="redirect" value="">
                                    <button class="btn no-border submit" type="submit"><i class="feather icon-feather-mail m-0"></i></button>
                                    <div class="form-results d-none position-absolute"></div>
                                </div>
                            </form>
                            <input id="newsletter-off" class="d-none" type="checkbox" name="newsletter-off" />
                            <label for="newsletter-off" class="text-small"><span></span>Don't show this popup again</label>
                        </div>
                        <div class="col-12 col-sm-5 cover-background order-1 order-sm-2 xs-h-150px" style="background-image:url('image path');">
                            <button title="Close (Esc)" type="button" class="mfp-close">×</button>
                        </div>
                    </div>
                </div>
            </div>
        </div>
    </div>
    <!-- end subscription popup -->
</div>
<!-- end subscription popup -->
NoteFor demo, you can check it here modal-subscription.html
Message box
Wrap any text and an optional dismiss button in .alert and one of the four contextual classes (e.g., .alert-success ) for basic alert messages.
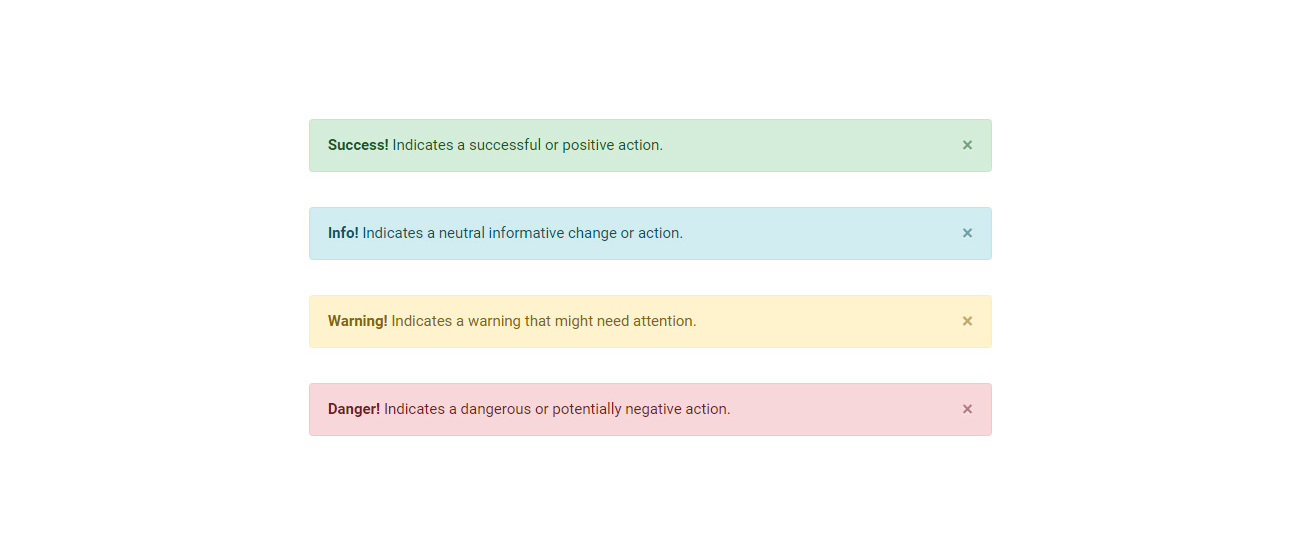
<!-- start message box item -->
<div class="col-12 col-md-9 col-lg-7 margin-35px-bottom alert alert-success alert-dismissible fade in show" role="alert">
    <button type="button" class="btn-close line-height-unset h-100 py-0" data-bs-dismiss="alert" aria-label="Close"></button>
    <strong>Success!</strong> Indicates a successful or positive action.
</div>
<!-- end message box item -->
<!-- start message box item -->
<div class="col-12 col-md-9 col-lg-7 margin-35px-bottom alert alert-info alert-dismissible fade in show" role="alert">
    <button type="button" class="btn-close line-height-unset" data-bs-dismiss="alert" aria-label="Close"></button>
    <strong>Info!</strong> Indicates a neutral informative change or action.
</div>
<!-- end message box item -->
<!-- start message box item -->
<div class="col-12 col-md-9 col-lg-7 margin-35px-bottom alert alert-warning alert-dismissible fade in show" role="alert">
    <button type="button" class="btn-close line-height-unset" data-bs-dismiss="alert" aria-label="Close"></button>
    <strong>Warning!</strong> Indicates a warning that might need attention.
</div>
<!-- end message box item -->
<!-- start message box item -->
<div class="col-12 col-md-9 col-lg-7 alert alert-danger alert-dismissible fade in show" role="alert">
    <button type="button" class="btn-close line-height-unset" data-bs-dismiss="alert" aria-label="Close"></button>
    <strong>Danger!</strong> Indicates a dangerous or potentially negative action.
</div>
<!-- end message box item -->
NoteFor demo, You can please check this in message-box.html page.
Overline icon box
Beautiful overline icon box - features box. See below image and code for more information.
<div class="row row-cols-1 row-cols-lg-3 row-cols-sm-2 justify-content-center">
    <!-- start feature box item -->
    <div class="col md-margin-30px-bottom sm-margin-15px-bottom">
        <div class="feature-box padding-4-half-rem-tb padding-4-rem-lr bg-white box-shadow-small box-shadow-extra-large-hover md-padding-3-rem-all sm-padding-5-rem-all border-top border-width-4px border-color-fast-blue">
            <div class="feature-box-icon">
                <i class="line-icon-Business-Man icon-large text-fast-blue margin-35px-bottom md-margin-15px-bottom sm-margin-10px-bottom"></i>
            </div>
            <div class="feature-box-content last-paragraph-no-margin">
                <span class="alt-font font-weight-500 margin-10px-bottom d-block text-extra-dark-gray text-extra-medium">Personal integrity</span>
                <p>Lorem ipsum dolor amet consectetur adipiscing elit do eiusmod incididunt ut labore et dolore magna.</p>
            </div>
        </div>
    </div>
    <!-- end feature box item -->
    <!-- start feature box item -->
    <div class="col md-margin-30px-bottom sm-margin-15px-bottom">
        <div class="feature-box padding-4-half-rem-tb padding-4-rem-lr bg-white box-shadow-small box-shadow-extra-large-hover md-padding-3-rem-all sm-padding-5-rem-all border-top border-width-4px border-color-fast-blue">
            <div class="feature-box-icon">
                <i class="line-icon-Air-Balloon icon-large text-fast-blue margin-35px-bottom md-margin-15px-bottom sm-margin-10px-bottom"></i>
            </div>
            <div class="feature-box-content last-paragraph-no-margin">
                <span class="alt-font font-weight-500 margin-10px-bottom d-block text-extra-dark-gray text-extra-medium">Strengthen your skills</span>
                <p>Lorem ipsum dolor amet consectetur adipiscing elit do eiusmod incididunt ut labore et dolore magna.</p>
            </div>
        </div>
    </div>
    <!-- end feature box item -->
    <!-- start feature box item -->
    <div class="col">
        <div class="feature-box padding-4-half-rem-tb padding-4-rem-lr bg-white box-shadow-small box-shadow-extra-large-hover md-padding-3-rem-all sm-padding-5-rem-all border-top border-width-4px border-color-fast-blue">
            <div class="feature-box-icon">
                <i class="line-icon-Idea-5 icon-large text-fast-blue margin-35px-bottom md-margin-15px-bottom sm-margin-10px-bottom"></i>
            </div>
            <div class="feature-box-content last-paragraph-no-margin">
                <span class="alt-font font-weight-500 margin-10px-bottom d-block text-extra-dark-gray text-extra-medium">Make ideas happen</span>
                <p>Lorem ipsum dolor amet consectetur adipiscing elit do eiusmod incididunt ut labore et dolore magna.</p>
            </div>
        </div>
    </div>
    <!-- end feature box item -->
</div>
NoteFor demo, You can please check this in overline-icon-box.html page.
Parallax scrolling
Section with parallax-scrolling effect. See below image and code for more information.
<!-- start parallax scrolling section -->
<section class="parallax one-third-screen" data-parallax-background-ratio="0.5" style="background-image: url('image path');"></section>
<!-- end parallax scrolling section -->
NoteFor demo, You can please check this in parallax-scrolling.html page.
Pie charts
Functionality to make pie charts with attractive look. See below image and code for more information. You can add default track color in data-track-color attribute and percentage filled gradient colors in data-start-color and data-end-color attributes of the SPAN of pie chart item.

<div class="row row-cols-1 row-cols-md-3 row-cols-sm-2 justify-content-center">
    <!-- start pie charts item -->
    <div class="col sm-margin-40px-bottom">
        <div class="chart-percent">
            <span class="pie-chart-style-01" data-line-width="6" data-percent="75" data-track-color="#f5f5f5" data-start-color="#fc9297" data-end-color="#be85f5">
                <span class="percent alt-font font-weight-500 title-extra-small letter-spacing-minus-1px text-extra-dark-gray"></span>
            </span>
        </div>
        <div class="chart-text text-center">
            <span class="d-inline-block w-1px h-40px bg-extra-dark-gray opacity-5 position-relative top-minus-20px"></span>
            <span class="alt-font text-small text-uppercase font-weight-500 text-extra-dark-gray d-block">Web development</span>
        </div>
    </div>
    <!-- end pie charts item -->
    <!-- start pie charts item -->
    <div class="col sm-margin-40px-bottom">
        <div class="chart-percent">
            <span class="pie-chart-style-01" data-line-width="6" data-percent="80" data-track-color="#f5f5f5" data-start-color="#fc9297" data-end-color="#be85f5">
                <span class="percent alt-font font-weight-500 title-extra-small letter-spacing-minus-1px text-extra-dark-gray"></span>
            </span>
        </div>
        <div class="chart-text text-center">
            <span class="d-inline-block w-1px h-40px bg-extra-dark-gray opacity-5 position-relative top-minus-20px"></span>
            <span class="alt-font text-small text-uppercase font-weight-500 text-extra-dark-gray d-block">Social marketing</span>
        </div>
    </div>
    <!-- end pie charts item -->
    <!-- start pie charts item -->
    <div class="col">
        <div class="chart-percent">
            <span class="pie-chart-style-01" data-line-width="6" data-percent="85" data-track-color="#f5f5f5" data-start-color="#fc9297" data-end-color="#be85f5">
                <span class="percent alt-font font-weight-500 title-extra-small letter-spacing-minus-1px text-extra-dark-gray"></span>
            </span>
        </div>
        <div class="chart-text text-center">
            <span class="d-inline-block w-1px h-40px bg-extra-dark-gray opacity-5 position-relative top-minus-20px"></span>
            <span class="alt-font text-small text-uppercase font-weight-500 text-extra-dark-gray d-block">Content creation</span>
        </div>
    </div>
    <!-- end pie charts item -->
</div>
NoteFor demo, You can please check this in pie-charts.html page.
Portfolio slider
Beautiful portfolio slider. See below image and code for more information.
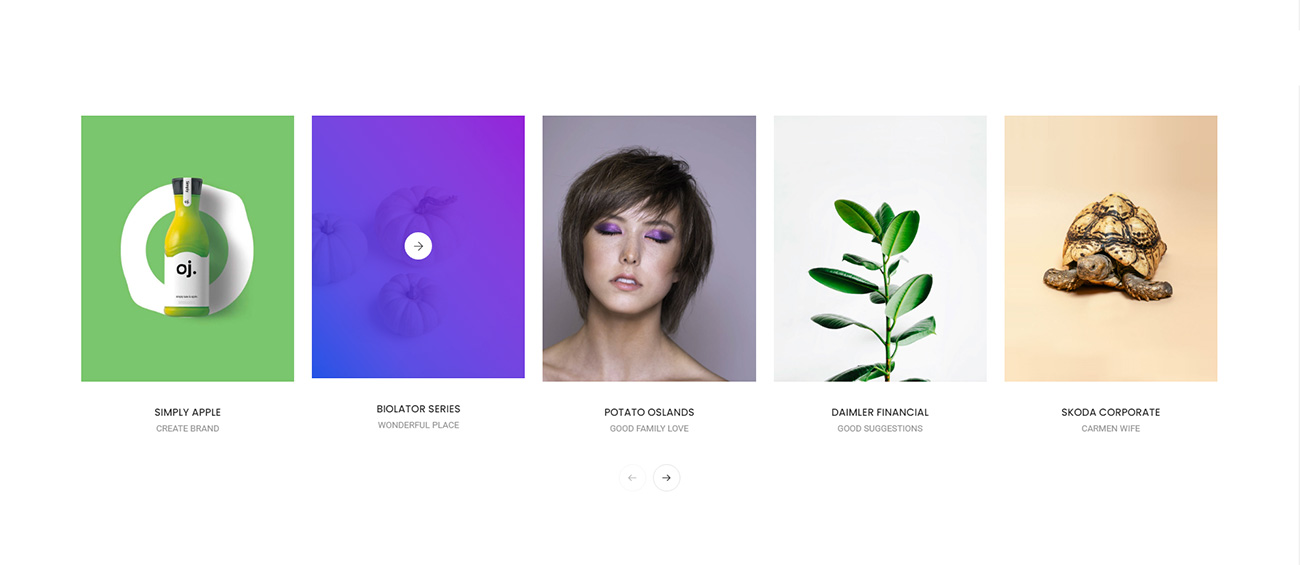
<div class="row">
    <div class="col-12 padding-8-half-rem-lr xl-padding-five-lr lg-padding-two-lr sm-padding-15px-lr">
        <div class="swiper-container overflow-hidden portfolio-classic position-relative swiper-pagination-bottom" data-slider-options='{ "slidesPerView": 1, "spaceBetween": 26, "navigation": { "nextEl": ".swiper-button-next-nav", "prevEl": ".swiper-button-previous-nav" }, "autoplay": { "delay": 3000, "disableOnInteraction": false }, "keyboard": { "enabled": true, "onlyInViewport": true }, "breakpoints": { "1200": { "slidesPerView": 5 }, "992": { "slidesPerView": 3 }, "768": { "slidesPerView": 2 } }, "effect": "slide" }'>
            <div class="swiper-wrapper">
                <!-- start slider item -->
                <div class="swiper-slide overflow-hidden">
                    <div class="portfolio-box text-center">
                        <div class="portfolio-image bg-gradient-fast-blue-purple">
                            <a href="#"><img src="image path" alt="" /></a>
                            <div class="portfolio-hover align-items-center justify-content-center d-flex">
                                <div class="portfolio-icon">
                                    <a href="#" class="border-all border-width-2px rounded-circle border-color-white bg-white"><i class="ti-arrow-right text-extra-dark-gray"></i></a>
                                </div>
                            </div>
                        </div>
                        <div class="portfolio-caption padding-30px-tb">
                            <a href="#" class="alt-font text-extra-dark-gray font-weight-500 text-uppercase">Simply Apple</a>
                            <span class="d-block text-medium-gray text-small line-height-18px text-uppercase">Create brand</span>
                        </div>
                    </div>
                </div>
                <!-- end slider item -->
                <!-- start slider item -->
                <div class="swiper-slide overflow-hidden">
                    <div class="portfolio-box text-center">
                        <div class="portfolio-image bg-gradient-fast-blue-purple">
                            <a href="#"><img src="image path" alt="" /></a>
                            <div class="portfolio-hover align-items-center justify-content-center d-flex">
                                <div class="portfolio-icon">
                                    <a href="#" class="border-all border-width-2px rounded-circle border-color-white bg-white"><i class="ti-arrow-right text-extra-dark-gray"></i></a>
                                </div>
                            </div>
                        </div>
                        <div class="portfolio-caption padding-30px-tb">
                            <a href="#" class="alt-font text-extra-dark-gray font-weight-500 text-uppercase">Biolator Series</a>
                            <span class="d-block text-medium-gray text-small line-height-18px text-uppercase">Wonderful place</span>
                        </div>
                    </div>
                </div>
                <!-- end slider item -->
                <!-- start slider item -->
                <div class="swiper-slide overflow-hidden">
                    <div class="portfolio-box text-center">
                        <div class="portfolio-image bg-gradient-fast-blue-purple">
                            <a href="#"><img src="image path" alt="" /></a>
                            <div class="portfolio-hover align-items-center justify-content-center d-flex">
                                <div class="portfolio-icon">
                                    <a href="#" class="border-all border-width-2px rounded-circle border-color-white bg-white"><i class="ti-arrow-right text-extra-dark-gray"></i></a>
                                </div>
                            </div>
                        </div>
                        <div class="portfolio-caption padding-30px-tb">
                            <a href="#" class="alt-font text-extra-dark-gray font-weight-500 text-uppercase">Potato Oslands</a>
                            <span class="d-block text-medium-gray text-small line-height-18px text-uppercase">Good family love</span>
                        </div>
                    </div>
                </div>
                <!-- end slider item -->
                <!-- start slider item -->
                <div class="swiper-slide overflow-hidden">
                    <div class="portfolio-box text-center">
                        <div class="portfolio-image bg-gradient-fast-blue-purple">
                            <a href="#"><img src="image path" alt="" /></a>
                            <div class="portfolio-hover align-items-center justify-content-center d-flex">
                                <div class="portfolio-icon">
                                    <a href="#" class="border-all border-width-2px rounded-circle border-color-white bg-white"><i class="ti-arrow-right text-extra-dark-gray"></i></a>
                                </div>
                            </div>
                        </div>
                        <div class="portfolio-caption padding-30px-tb">
                            <a href="#" class="alt-font text-extra-dark-gray font-weight-500 text-uppercase">Daimler Financial</a>
                            <span class="d-block text-medium-gray text-small line-height-18px text-uppercase">Good suggestions</span>
                        </div>
                    </div>
                </div>
                <!-- end slider item -->
                <!-- start slider item -->
                <div class="swiper-slide overflow-hidden">
                    <div class="portfolio-box text-center">
                        <div class="portfolio-image bg-gradient-fast-blue-purple">
                            <a href="#"><img src="image path" alt="" /></a>
                            <div class="portfolio-hover align-items-center justify-content-center d-flex">
                                <div class="portfolio-icon">
                                    <a href="#" class="border-all border-width-2px rounded-circle border-color-white bg-white"><i class="ti-arrow-right text-extra-dark-gray"></i></a>
                                </div>
                            </div>
                        </div>
                        <div class="portfolio-caption padding-30px-tb">
                            <a href="#" class="alt-font text-extra-dark-gray font-weight-500 text-uppercase">Skoda Corporate</a>
                            <span class="d-block text-medium-gray text-small line-height-18px text-uppercase">Carmen wife</span>
                        </div>
                    </div>
                </div>
                <!-- end slider item -->
                <!-- start slider item -->
                <div class="swiper-slide overflow-hidden">
                    ...
                </div>
                <!-- end slider item -->
                <!-- start slider item -->
                <div class="swiper-slide overflow-hidden">
                    ...
                </div>
                <!-- end slider item -->
            </div>
            <!-- start slider navigation -->
            <div class="swiper-button-previous-nav swiper-button-prev slider-navigation-style-03 rounded-circle center-prev"><i class="feather icon-feather-arrow-left"></i></div>
            <div class="swiper-button-next-nav swiper-button-next slider-navigation-style-03 rounded-circle center-next"><i class="feather icon-feather-arrow-right"></i></div>
            <!-- end slider navigation -->
        </div>
    </div>
</div>
NoteFor demo, You can please check this in portfolio-slider page.
Pricing table
Represent your plans / packages in creative manner with highlighting option in responsive table structure.
<div class="row row-cols-1 row-cols-md-3 align-items-center sm-no-margin-lr">
    <div class="col pricing-table-style-02 text-center px-0 sm-margin-30px-bottom xs-margin-15px-bottom wow animate__fadeInRight" data-wow-delay="0.4s">
        <!-- start pricing table -->
        <div class="pricing-table bg-white box-shadow-small">
            <!-- start pricing header -->
            <div class="pricing-header padding-55px-top">
                <i class="line-icon-Boy icon-large text-sunglow"></i>
                <span class="alt-font font-weight-600 text-extra-medium text-extra-dark-gray text-uppercase d-block margin-5px-top">Standard</span>
            </div>
            <!-- end pricing header -->
            <!-- start pricing body -->
            <div class="pricing-body padding-40px-tb">
                <h4 class="alt-font font-weight-600 text-slate-blue mb-0 letter-spacing-minus-2px">$800</h4>
                <div class="alt-font font-weight-500 text-small text-uppercase letter-spacing-1px margin-30px-bottom">Per month</div>
                <ul class="list-style-03">
                    <li class="border-0 p-0 margin-10px-bottom">Limited hours</li>
                    <li class="border-0 p-0">Limited projects</li>
                </ul>
            </div>
            <!-- end pricing body -->
            <!-- start pricing footer -->
            <div class="pricing-footer margin-55px-bottom">
                <a class="btn btn-fancy btn-small btn-transparent-light-gray" href="#">Get started</a>
            </div>
            <!-- end pricing footer -->
        </div>
        <!-- end pricing table -->
    </div>
    <div class="col pricing-table-style-02 text-center px-0">
        <!-- start pricing table -->
        <div class="pricing-table pricing-popular bg-white box-shadow-small">
            <div class="popular-label alt-font font-weight-600 text-extra-small text-extra-dark-gray bg-sunglow text-uppercase padding-5px-tb">Popular</div>
            <!-- start pricing header -->
            <div class="pricing-header padding-65px-top">
                <i class="line-icon-Business-Mens icon-large text-sunglow"></i>
                <span class="alt-font font-weight-600 text-extra-medium text-extra-dark-gray text-uppercase d-block margin-5px-top">Advanced</span>
            </div>
            <!-- end pricing header -->
            <!-- start pricing body -->
            <div class="pricing-body padding-40px-tb">
                <h4 class="alt-font font-weight-600 text-slate-blue mb-0 letter-spacing-minus-2px">$1200</h4>
                <div class="alt-font font-weight-500 text-small text-uppercase letter-spacing-1px margin-30px-bottom">Per month</div>
                <ul class="list-style-03">
                    <li class="border-0 p-0 margin-10px-bottom">Unlimited hours</li>
                    <li class="border-0 p-0 margin-10px-bottom">Unlimited projects</li>
                    <li class="border-0 p-0">Unlimited variations</li>
                </ul>
            </div>
            <!-- end pricing body -->
            <!-- start pricing footer -->
            <div class="pricing-footer margin-65px-bottom">
                <a class="btn btn-fancy btn-small btn-dark-gray" href="#">Get started</a>
            </div>
            <!-- end pricing footer -->
        </div>
        <!-- end pricing table -->
    </div>
    <div class="col pricing-table-style-02 text-center px-0 sm-margin-30px-top xs-margin-15px-top wow animate__fadeInLeft" data-wow-delay="0.4s">
        <!-- start pricing table -->
        <div class="pricing-table bg-white box-shadow-small">
            <!-- start pricing header -->
            <div class="pricing-header padding-55px-top">
                <i class="line-icon-Business-ManWoman icon-large text-sunglow"></i>
                <span class="alt-font font-weight-600 text-extra-medium text-extra-dark-gray text-uppercase d-block margin-5px-top">Business</span>
            </div>
            <!-- end pricing header -->
            <!-- start pricing body -->
            <div class="pricing-body padding-40px-tb">
                <h4 class="alt-font font-weight-600 text-slate-blue mb-0 letter-spacing-minus-2px">$900</h4>
                <div class="alt-font font-weight-500 text-small text-uppercase letter-spacing-1px margin-30px-bottom">Per month</div>
                <ul class="list-style-03">
                    <li class="border-0 p-0 margin-10px-bottom">Unlimited hours</li>
                    <li class="border-0 p-0">Unlimited projects</li>
                </ul>
            </div>
            <!-- end pricing body -->
            <!-- start pricing footer -->
            <div class="pricing-footer margin-55px-bottom">
                <a class="btn btn-fancy btn-small btn-transparent-light-gray" href="#">Get started</a>
            </div>
            <!-- end pricing footer -->
        </div>
        <!-- end pricing table -->
    </div>
</div>
NoteFor demo, You can please check this in pricing-table.html page.
Progress bar
Up-to-date feedback on the progress of a workflow or action with simple yet flexible progress bars. See below image and code for more information. You can add max value (like 100) in aria-valuemax and actual progress value (like 80) in aria-valuenow attributes in progress-bar DIV.

<div class="row justify-content-center">
    <div class="col-12 col-lg-6">
        <!-- start progress bar item -->
        <div class="progress bg-transparent margin-5-rem-bottom sm-margin-6-rem-bottom">
            <span class="progress-title alt-font text-medium text-extra-dark-gray text-uppercase font-weight-600">Web Interactive</span>
            <div class="progress-bar bg-extra-dark-gray" role="progressbar" aria-valuenow="80" aria-valuemin="0" aria-valuemax="100"><span class="alt-font text-small text-extra-dark-gray font-weight-600">80%</span></div>
        </div>
        <!-- end progress bar item -->
        <!-- start progress bar item -->
        <div class="progress bg-transparent margin-5-rem-bottom sm-margin-6-rem-bottom">
            <span class="progress-title alt-font text-medium text-extra-dark-gray text-uppercase font-weight-600">Logo and Identity</span>
            <div class="progress-bar bg-extra-dark-gray" role="progressbar" aria-valuenow="95" aria-valuemin="0" aria-valuemax="100"><span class="alt-font text-small text-extra-dark-gray font-weight-600">95%</span></div>
        </div>
        <!-- end progress bar item -->
        <!-- start progress bar item -->
        <div class="progress bg-transparent">
            <span class="progress-title alt-font text-medium text-extra-dark-gray text-uppercase font-weight-600">Graphic Design</span>
            <div class="progress-bar bg-extra-dark-gray" role="progressbar" aria-valuenow="75" aria-valuemin="0" aria-valuemax="100"><span class="alt-font text-small text-extra-dark-gray font-weight-600">75%</span></div>
        </div>
        <!-- end progress bar item -->
    </div>
</div>
NoteFor demo, You can please check this in process-bar.html page.
Process steps
Process steps feature for process tracking system in your website with amazing styles and attractive look. See below image and code for more information.
<div class="row justify-content-center">
    <!-- start process step item -->
    <div class="col-10 col-lg-3 col-sm-6 text-center process-step-style-03 md-margin-5-rem-bottom wow animate__fadeIn" data-wow-delay="0.2s">
        <div class="process-step-item">
            <div class="process-step-item-box">
                <span class="process-step-item-box-bfr bg-medium-gray"></span>
                <div class="process-step-icon">
                    <span class="process-step-number text-extra-dark-gray font-weight-500">
                        <span class="process-step-number-bfr bg-gradient-red-violet-purple"></span>1<span class="process-step-number-afr bg-white box-shadow-small"></span>
                    </span>
                </div>
                <div class="process-content last-paragraph-no-margin">
                    <span class="alt-font d-inline-block font-weight-600 text-gradient-red-violet-purple letter-spacing-1px text-uppercase margin-10px-bottom">Research</span>
                    <p>Lorem ipsum dolor consectetur adipiscing eiusmod tempor</p>
                </div>
            </div>
        </div>
    </div>
    <!-- end process step item -->
    <!-- start process step item -->
    <div class="col-10 col-lg-3 col-sm-6 text-center process-step-style-03 md-margin-5-rem-bottom wow animate__fadeIn" data-wow-delay="0.4s">
        <div class="process-step-item">
            <div class="process-step-item-box">
                <span class="process-step-item-box-bfr bg-medium-gray"></span>
                <div class="process-step-icon">
                    <span class="process-step-number text-extra-dark-gray font-weight-500">
                        <span class="process-step-number-bfr bg-gradient-red-violet-purple"></span>2<span class="process-step-number-afr bg-white box-shadow-small"></span>
                    </span>
                </div>
                <div class="process-content last-paragraph-no-margin">
                    <span class="alt-font d-inline-block font-weight-600 text-gradient-red-violet-purple letter-spacing-1px text-uppercase margin-10px-bottom">Sketches</span>
                    <p>Lorem ipsum dolor consectetur adipiscing eiusmod tempor</p>
                </div>
            </div>
        </div>
    </div>
    <!-- end process step item -->
    <!-- start process step item -->
    <div class="col-10 col-lg-3 col-sm-6 text-center process-step-style-03 xs-margin-5-rem-bottom wow animate__fadeIn" data-wow-delay="0.6s">
        <div class="process-step-item">
            <div class="process-step-item-box">
                <span class="process-step-item-box-bfr bg-medium-gray"></span>
                <div class="process-step-icon">
                    <span class="process-step-number text-extra-dark-gray font-weight-500">
                        <span class="process-step-number-bfr bg-gradient-red-violet-purple"></span>3<span class="process-step-number-afr bg-white box-shadow-small"></span>
                    </span>
                </div>
                <div class="process-content last-paragraph-no-margin">
                    <span class="alt-font d-inline-block font-weight-600 text-gradient-red-violet-purple letter-spacing-1px text-uppercase margin-10px-bottom">Concept</span>
                    <p>Lorem ipsum dolor consectetur adipiscing eiusmod tempor</p>
                </div>
            </div>
        </div>
    </div>
    <!-- end process step item -->
    <!-- start process step item -->
    <div class="col-10 col-lg-3 col-sm-6 text-center process-step-style-03 wow animate__fadeIn" data-wow-delay="0.8s">
        <div class="process-step-item">
            <div class="process-step-item-box">
                <span class="process-step-item-box-bfr bg-medium-gray"></span>
                <div class="process-step-icon">
                    <span class="process-step-number text-extra-dark-gray font-weight-500">
                        <span class="process-step-number-bfr bg-gradient-red-violet-purple"></span>4<span class="process-step-number-afr bg-white box-shadow-small"></span>
                    </span>
                </div>
                <div class="process-content last-paragraph-no-margin">
                    <span class="alt-font d-inline-block font-weight-600 text-gradient-red-violet-purple letter-spacing-1px text-uppercase margin-10px-bottom">Presentation</span>
                    <p>Lorem ipsum dolor consectetur adipiscing eiusmod tempor</p>
                </div>
            </div>
        </div>
    </div>
    <!-- end process step item -->
</div>
NoteFor demo, You can please check this in process-steps.html page.
Retina image
When your users load a page, retina.js checks each image on the page to see if there is a high-resolution version of that image on your server. If a high-resolution variant exists, the script will swap in that image in-place.
For example, if you have an image on your page that looks like this:
<img src="/images/my_image.png" />
The script will check your server to see if an alternative image exists at this path:
"/images/my_image@2x.png"
NoteYou can check the reference on retinajs.
Rotate Box
Attractive and useful rotate box for your website. See below image and code for more information.
<div class="row justify-content-center">
<!-- start rotate box item -->
<div class="col-12 col-lg-4 col-md-6 col-sm-8 md-margin-30px-bottom">
    <div class="rm-rotate-box text-center">
        <div class="flipper to-left">
            <div class="thumb-wrap">
                <div class="front overflow-hidden h-480px border-radius-4px overflow-hidden lg-h-450px" style="background-image:url('image path')">
                    <div class="opacity-medium-2 bg-gradient-extra-dark-gray-transparent"></div>
                    <div class="content-wrap padding-15px-lr">
                        <span class="text-white text-large letter-spacing-1px margin-10px-bottom text-uppercase alt-font d-inline-block font-weight-500">Ayurvedic</span>
                        <span class="text-white opacity-6 text-medium text-uppercase letter-spacing-1-half alt-font d-block">Starting from $50</span>
                    </div>
                </div>
                <div class="back border-radius-4px overflow-hidden">
                    <div class="overlay-bg bg-gradient-tan-geraldine"></div>
                    <div class="content-wrap padding-60px-all lg-padding-30px-lr md-padding-40px-lr xs-padding-30px-all">
                        <i class="line-icon-Environmental-3 icon-large text-white margin-35px-bottom"></i>
                        <span class="text-white text-extra-medium letter-spacing-1px font-weight-500 text-uppercase alt-font d-block margin-10px-bottom">Ayurvedic</span>
                        <p class="text-white opacity-7">Lorem ipsum dolor sit amet consectetur do eiusmod tempor incididunt labore ut enim</p>
                        <a href="#" class="btn btn-link thin btn-extra-large text-extra-dark-gray">Discover more</a>
                    </div>
                </div>
            </div>
        </div>
    </div>
</div>
<!-- end rotate box item -->
<!-- start rotate box item -->
<div class="col-12 col-lg-4 col-md-6 col-sm-8 md-margin-30px-bottom">
    <div class="rm-rotate-box text-center">
        <div class="flipper to-left">
            <div class="thumb-wrap">
                <div class="front overflow-hidden h-480px border-radius-4px overflow-hidden lg-h-450px" style="background-image:url('image path')">
                    <div class="opacity-medium-2 bg-gradient-extra-dark-gray-transparent"></div>
                    <div class="content-wrap padding-15px-lr">
                        <span class="text-white text-large letter-spacing-1px margin-10px-bottom text-uppercase alt-font d-inline-block font-weight-500">Fairness</span>
                        <span class="text-white opacity-6 text-medium text-uppercase letter-spacing-1-half alt-font d-block">Starting from $90</span>
                    </div>
                </div>
                <div class="back border-radius-4px overflow-hidden">
                    <div class="overlay-bg bg-gradient-tan-geraldine"></div>
                    <div class="content-wrap padding-60px-all lg-padding-30px-lr md-padding-40px-lr xs-padding-30px-all">
                        <i class="line-icon-Crown icon-large text-white margin-35px-bottom"></i>
                        <span class="text-white text-extra-medium letter-spacing-1px font-weight-500 text-uppercase alt-font d-block margin-10px-bottom">Fairness</span>
                        <p class="text-white opacity-7">Lorem ipsum dolor sit amet consectetur do eiusmod tempor incididunt labore ut enim</p>
                        <a href="#" class="btn btn-link thin btn-extra-large text-extra-dark-gray">Discover more</a>
                    </div>
                </div>
            </div>
        </div>
    </div>
</div>
<!-- end rotate box item -->
<!-- start rotate box item -->
<div class="col-12 col-lg-4 col-md-6 col-sm-8">
    <div class="rm-rotate-box text-center">
        <div class="flipper to-left">
            <div class="thumb-wrap">
                <div class="front overflow-hidden h-480px border-radius-4px overflow-hidden lg-h-450px" style="background-image:url('image path')">
                    <div class="opacity-medium-2 bg-gradient-extra-dark-gray-transparent"></div>
                    <div class="content-wrap padding-15px-lr">
                        <span class="text-white text-large letter-spacing-1px margin-10px-bottom text-uppercase alt-font d-inline-block font-weight-500">Herbal</span>
                        <span class="text-white opacity-6 text-medium text-uppercase letter-spacing-1-half alt-font d-block">Starting from $75</span>
                    </div>
                </div>
                <div class="back border-radius-4px overflow-hidden">
                    <div class="overlay-bg bg-gradient-tan-geraldine"></div>
                    <div class="content-wrap padding-60px-all lg-padding-30px-lr md-padding-40px-lr xs-padding-30px-all">
                        <i class="line-icon-Daylight icon-large text-white margin-35px-bottom"></i>
                        <span class="text-white text-extra-medium letter-spacing-1px font-weight-500 text-uppercase alt-font d-block margin-10px-bottom">Herbal</span>
                        <p class="text-white opacity-7">Lorem ipsum dolor sit amet consectetur do eiusmod tempor incididunt labore ut enim</p>
                        <a href="#" class="btn btn-link thin btn-extra-large text-extra-dark-gray">Discover more</a>
                    </div>
                </div>
            </div>
        </div>
    </div>
</div>
<!-- end rotate box item -->
</div>
NoteFor demo, You can please check this in rotate-box.html page.
Separators
Add separators in content or in between blocks or sections. See below code for more information.
<!-- start separator line -->
<div class="bg-extra-light-gray h-1px"></div>
<!-- end separator line -->
<!-- start separator line -->
<div class="bg-extra-light-gray h-2px"></div>
<!-- end separator line -->
<!-- start separator line -->
<div class="bg-extra-light-gray h-3px"></div>
<!-- end separator line -->
<!-- start separator line -->
<div class="bg-extra-light-gray h-5px"></div>
<!-- end separator line -->
<!-- start separator line -->
<div class="bg-extra-light-gray h-6px"></div>
<!-- end separator line -->
NoteFor demo, You can please check this in seperators.html page.
Services
Services element with creative look. See below image and code for more information.

<div class="row row-cols-1 row-cols-lg-3 row-cols-sm-2 justify-content-center">
    <!-- start services item -->
    <div class="col md-margin-30px-bottom sm-margin-30px-bottom">
        <div class="services-box-style-01 bg-extra-dark-gray box-shadow-large">
            <div class="imagex-box position-relative overflow-hidden">
                <img src="image path" alt="" />
                <div class="services-box-hover align-items-center justify-content-center d-flex">
                    <div class="services-icon">
                        <a href="#" class="rounded-circle bg-white"><i class="fas fa-arrow-right text-dark-charcoal"></i></a>
                    </div>
                </div>
            </div>
            <div class="position-relative text-center bg-white last-paragraph-no-margin padding-3-rem-tb padding-3-half-rem-lr">
                <span class="alt-font font-weight-500 text-dark-charcoal text-uppercase d-block margin-5px-bottom">Finance services</span>
                <p>Lorem ipsum consectetur adipiscing elit do eiusmod tempor incididunt.</p>
                <div class="w-100 h-4px bg-fast-blue position-absolute left-0px bottom-0px d-block"></div>
            </div>
        </div>
    </div>
    <!-- end services item -->
    <!-- start services item -->
    <div class="col md-margin-30px-bottom sm-margin-30px-bottom">
        <div class="services-box-style-01 bg-extra-dark-gray  box-shadow-large">
            <div class="imagex-box position-relative overflow-hidden">
                <img src="image path" alt="" />
                <div class="services-box-hover align-items-center justify-content-center d-flex">
                    <div class="services-icon">
                        <a href="#" class="rounded-circle bg-white"><i class="fas fa-arrow-right text-dark-charcoal"></i></a>
                    </div>
                </div>
            </div>
            <div class="position-relative text-center bg-white last-paragraph-no-margin padding-3-rem-tb padding-3-half-rem-lr">
                <span class="alt-font font-weight-500 text-dark-charcoal text-uppercase d-block margin-5px-bottom">Business planning</span>
                <p>Lorem ipsum consectetur adipiscing elit do eiusmod tempor incididunt.</p>
                <div class="w-100 h-4px bg-fast-blue position-absolute left-0px bottom-0px d-block"></div>
            </div>
        </div>
    </div>
    <!-- end services item -->
    <!-- start services item -->
    <div class="col">
        <div class="services-box-style-01 bg-extra-dark-gray  box-shadow-large">
            <div class="imagex-box position-relative overflow-hidden">
                <img src="image path" alt="" />
                <div class="services-box-hover align-items-center justify-content-center d-flex">
                    <div class="services-icon">
                        <a href="#" class="rounded-circle bg-white"><i class="fas fa-arrow-right text-dark-charcoal"></i></a>
                    </div>
                </div>
            </div>
            <div class="position-relative text-center bg-white last-paragraph-no-margin padding-3-rem-tb padding-3-half-rem-lr">
                <span class="alt-font font-weight-500 text-dark-charcoal text-uppercase d-block margin-5px-bottom">Marketing strategy</span>
                <p>Lorem ipsum consectetur adipiscing elit do eiusmod tempor incididunt.</p>
                <div class="w-100 h-4px bg-fast-blue position-absolute left-0px bottom-0px d-block"></div>
            </div>
        </div>
    </div>
    <!-- end services item -->
</div>
NoteFor demo, You can please check this in services.html page.
Social icons
Social icons with different styles. See below image and code for more information.
<!-- start social icons  -->
<div class="row justify-content-center">
    <div class="col-lg-12 col-md-10 col-sm-12 text-center elements-social social-icon-style-04">
        <ul class="large-icon">
            <li><a class="facebook" href="https://www.facebook.com/" target="_blank"><i class="fab fa-facebook-f"></i></a></li>
            <li><a class="twitter" href="http://www.twitter.com" target="_blank"><i class="fab fa-twitter"></i></a></li>
            <li><a class="google" href="http://plus.google.com" target="_blank"><i class="fab fa-google-plus-g"></i></a></li>
            <li><a class="dribbble" href="http://www.dribbble.com" target="_blank"><i class="fab fa-dribbble"></i></a></li>
            <li><a class="linkedin" href="http://www.linkedin.com" target="_blank"><i class="fab fa-linkedin-in"></i></a></li>
            <li><a class="instagram" href="http://www.instagram.com" target="_blank"><i class="fab fa-instagram"></i></a></li>
            <li><a class="behance" href="http://www.behance.com/" target="_blank"><i class="fab fa-behance"></i></a></li>
        </ul>
    </div>
</div>
<!-- end social icons  -->
NoteFor demo, You can please check this in social-icons.html page.
Subscribe
Provide a full component for subscribe form with action button and instruction tag line with privacy policy links etc... See below image and code for more information.
<!-- start subscribe section -->
<div class="row justify-content-center">
    <div class="col-12 col-md-7 col-lg-6 text-center">
        <span class="d-block text-fast-blue margin-15px-bottom text-large">Love to work together</span>
        <h5 class="text-extra-dark-gray alt-font font-weight-500 d-inline-block letter-spacing-minus-1">Are you ready to work with us? Let's grow your business.</h5>
    </div>
</div>
<div class="row justify-content-center">
    <div class="col-12 col-md-8 text-center">
        <div class="newsletter-style-01 position-relative d-inline-block w-80 alt-font margin-2-half-rem-top md-w-100 sm-margin-15px-top">
            <form action="email-templates/subscribe-newsletter.php" method="post">
                <input class="border-radius-100px medium-input border-all border-color-black-transparent m-0 padding-30px-left required" name="email" placeholder="Enter your email address" type="email">
                <input type="hidden" name="redirect" value="">
                <button type="submit" class="submit btn text-small text-white bg-fast-blue">Start a Project</button>
                <div class="form-results border-radius-100px d-none position-absolute"></div>
            </form>
        </div>
    </div>
</div>
<!-- end subscribe section -->
NotePlease check more details under Contact Form element to setup email receiver or Mailchimp integration. For demo, You can please check this in subscribe.html page.
Tab
Add quick, dynamic tab functionality to transition through panes of local content, even via dropdown menus. You can activate a tab navigation without writing any JavaScript by simply specifying data-bs-toggle="tab" on an element. Adding the nav and nav-tabs classes to the tab ul will apply the Bootstrap tab styling.

<div class="row">
<div class="col-12 tab-style-01 without-number wow animate__fadeIn">
    <!-- start tab navigation -->
    <ul class="nav nav-tabs text-uppercase justify-content-center text-center alt-font font-weight-500 margin-7-rem-bottom md-margin-5-rem-bottom sm-margin-20px-bottom">
        <li class="nav-item"><a class="nav-link active" data-bs-toggle="tab" href="#planning-tab">Planning</a><span class="tab-border bg-extra-dark-gray"></span></li>
        <li class="nav-item"><a class="nav-link" data-bs-toggle="tab" href="#research-tab">Research</a><span class="tab-border bg-extra-dark-gray"></span></li>
        <li class="nav-item"><a class="nav-link" data-bs-toggle="tab" href="#target-tab">Target</a><span class="tab-border bg-extra-dark-gray"></span></li>
        <li class="nav-item"><a class="nav-link" data-bs-toggle="tab" href="#campaign-tab">Campaign</a><span class="tab-border bg-extra-dark-gray"></span></li>
    </ul>
    <!-- end tab navigation -->
    <div class="tab-content">
        <!-- start tab item -->
        <div id="planning-tab" class="tab-pane fade in active show">
            <div class="row align-items-center">
                <div class="col-12 col-md-6 text-end sm-margin-40px-bottom">
                    <img src="image path" alt="" />
                </div>
                <div class="col-12 col-lg-5 offset-lg-1 col-md-6 text-center text-sm-start">
                    <span class="alt-font text-medium text-gradient-sky-blue-pink text-uppercase font-weight-500 margin-15px-bottom d-inline-block">Modernized redesign</span>
                    <h5 class="alt-font font-weight-600 text-extra-dark-gray margin-35px-bottom md-margin-30px-bottom">Business planning</h5>
                    <p class="w-85 lg-w-100">Lorem ipsum dolor sit amet consectetur adipiscing elit do eiusmod tempor incididunt ut labore et dolore magna ut enim ad minim veniam nostrud exercitation ullamco laboris nisi ut aliquip ex ea commodo consequat.</p>
                    <a href="#" class="btn btn-fancy btn-medium btn-dark-gray margin-20px-top">Discover litho</a>
                </div>
            </div>
        </div>
        <!-- end tab item -->
        <!-- start tab item -->
        <div id="research-tab" class="tab-pane fade">
            <div class="row align-items-center">
                <div class="col-12 col-md-6 text-end sm-margin-40px-bottom">
                    <img src="image path" alt="" />
                </div>
                <div class="col-12 col-lg-5 offset-lg-1 col-md-6">
                    <span class="alt-font text-medium text-gradient-sky-blue-pink text-uppercase font-weight-500 margin-15px-bottom d-inline-block">Innovative solutions</span>
                    <h5 class="alt-font font-weight-600 text-extra-dark-gray margin-35px-bottom md-margin-30px-bottom">Business research</h5>
                    <p class="w-85 lg-w-100">Lorem ipsum dolor sit amet consectetur adipiscing elit do eiusmod tempor incididunt ut labore et dolore magna ut enim ad minim veniam nostrud exercitation ullamco laboris nisi ut aliquip ex ea commodo consequat.</p>
                    <a href="#" class="btn btn-fancy btn-medium btn-dark-gray margin-20px-top">Discover litho</a>
                </div>
            </div>
        </div>
        <!-- end tab item -->
        <!-- start tab item -->
        <div id="target-tab" class="tab-pane fade">
            <div class="row align-items-center">
                <div class="col-12 col-md-6 text-end sm-margin-40px-bottom">
                    <img src="image path" alt="" />
                </div>
                <div class="col-12 col-lg-5 offset-lg-1 col-md-6">
                    <span class="alt-font text-medium text-gradient-sky-blue-pink text-uppercase font-weight-500 margin-15px-bottom d-inline-block">Modernized redesign</span>
                    <h5 class="alt-font font-weight-600 text-extra-dark-gray margin-35px-bottom md-margin-30px-bottom">Business target</h5>
                    <p class="w-85 lg-w-100">Lorem ipsum dolor sit amet consectetur adipiscing elit do eiusmod tempor incididunt ut labore et dolore magna ut enim ad minim veniam nostrud exercitation ullamco laboris nisi ut aliquip ex ea commodo consequat.</p>
                    <a href="#" class="btn btn-fancy btn-medium btn-dark-gray margin-20px-top">Discover litho</a>
                </div>
            </div>
        </div>
        <!-- end tab item -->
        <!-- start tab item -->
        <div id="campaign-tab" class="tab-pane fade">
            <div class="row align-items-center">
                <div class="col-12 col-md-6 text-end sm-margin-40px-bottom">
                    <img src="image path" alt="" />
                </div>
                <div class="col-12 col-lg-5 offset-lg-1 col-md-6">
                    <span class="alt-font text-medium text-gradient-sky-blue-pink text-uppercase font-weight-500 margin-15px-bottom d-inline-block">Innovative solutions</span>
                    <h5 class="alt-font font-weight-600 text-extra-dark-gray margin-35px-bottom md-margin-30px-bottom">Business campaign</h5>
                    <p class="w-85 lg-w-100">Lorem ipsum dolor sit amet consectetur adipiscing elit do eiusmod tempor incididunt ut labore et dolore magna ut enim ad minim veniam nostrud exercitation ullamco laboris nisi ut aliquip ex ea commodo consequat.</p>
                    <a href="#" class="btn btn-fancy btn-medium btn-dark-gray margin-20px-top">Discover litho</a>
                </div>
            </div>
        </div>
        <!-- end tab item -->
    </div>
</div>
</div>
NoteFor demo, You can please check this in tab.html page.
Team
Team members view with image and social links and description. See below image and code for more information.

<div class="row row-cols-1 row-cols-lg-4 row-cols-sm-2 justify-content-center">
    <!-- start team member -->
    <div class="col team-style-01 text-center md-margin-30px-bottom xs-margin-15px-bottom">
        <figure class="border-radius-5px">
            <div class="team-member-image">
                <img alt="" src="image path">
                <div class="team-overlay bg-transparent-gradient-shamrock-green-light-orange border-radius-5px"></div>
            </div>
            <figcaption class="align-items-center justify-content-center d-flex flex-column padding-20px-lr padding-30px-tb">
                <span class="team-title d-block alt-font text-white">Alexander Harvard</span>
                <span class="team-sub-title text-small d-block text-white text-uppercase">Co Founder</span>
                <div class="social-icon w-100 position-absolute bottom-30px left-0px">
                    <a href="https://www.facebook.com/" target="_blank" class="text-white"><i class="fab fa-facebook-f"></i></a>
                    <a href="https://www.instagram.com" target="_blank" class="text-white"><i class="fab fa-instagram"></i></a>
                    <a href="https://twitter.com/" target="_blank" class="text-white"><i class="fab fa-twitter"></i></a>
                </div>
            </figcaption>
        </figure>
    </div>
    <!-- end team member -->
    <!-- start team member -->
    <div class="col team-style-01 text-center md-margin-30px-bottom xs-margin-15px-bottom">
        <figure class="border-radius-5px">
            <div class="team-member-image">
                <img alt="" src="image path">
                <div class="team-overlay bg-transparent-gradient-shamrock-green-light-orange border-radius-5px"></div>
            </div>
            <figcaption class="align-items-center justify-content-center d-flex flex-column padding-20px-lr padding-30px-tb">
                <span class="team-title d-block alt-font text-white">Bryan Jonhson</span>
                <span class="team-sub-title text-small d-block text-white text-uppercase">Manager</span>
                <div class="social-icon w-100 position-absolute bottom-30px left-0px">
                    <a href="https://www.facebook.com/" target="_blank" class="text-white"><i class="fab fa-facebook-f"></i></a>
                    <a href="https://www.instagram.com" target="_blank" class="text-white"><i class="fab fa-instagram"></i></a>
                    <a href="https://twitter.com/" target="_blank" class="text-white"><i class="fab fa-twitter"></i></a>
                </div>
            </figcaption>
        </figure>
    </div>
    <!-- end team member -->
    <!-- start team member -->
    <div class="col team-style-01 text-center xs-margin-15px-bottom">
        <figure class="border-radius-5px">
            <div class="team-member-image">
                <img alt="" src="image path">
                <div class="team-overlay bg-transparent-gradient-shamrock-green-light-orange border-radius-5px"></div>
            </div>
            <figcaption class="align-items-center justify-content-center d-flex flex-column padding-20px-lr padding-30px-tb">
                <span class="team-title d-block alt-font text-white">Jemmy Watson</span>
                <span class="team-sub-title text-small d-block text-white text-uppercase">Designer</span>
                <div class="social-icon w-100 position-absolute bottom-30px left-0px">
                    <a href="https://www.facebook.com/" target="_blank" class="text-white"><i class="fab fa-facebook-f"></i></a>
                    <a href="https://www.instagram.com" target="_blank" class="text-white"><i class="fab fa-instagram"></i></a>
                    <a href="https://twitter.com/" target="_blank" class="text-white"><i class="fab fa-twitter"></i></a>
                </div>
            </figcaption>
        </figure>
    </div>
    <!-- end team member -->
    <!-- start team member -->
    <div class="col team-style-01 text-center">
        <figure class="border-radius-5px">
            <div class="team-member-image">
                <img alt="" src="image path">
                <div class="team-overlay bg-transparent-gradient-shamrock-green-light-orange border-radius-5px"></div>
            </div>
            <figcaption class="align-items-center justify-content-center d-flex flex-column padding-20px-lr padding-30px-tb">
                <span class="team-title d-block alt-font text-white">Jeremy Dupont</span>
                <span class="team-sub-title text-small d-block text-white text-uppercase">Manager</span>
                <div class="social-icon w-100 position-absolute bottom-30px left-0px">
                    <a href="https://www.facebook.com/" target="_blank" class="text-white"><i class="fab fa-facebook-f"></i></a>
                    <a href="https://www.instagram.com" target="_blank" class="text-white"><i class="fab fa-instagram"></i></a>
                    <a href="https://twitter.com/" target="_blank" class="text-white"><i class="fab fa-twitter"></i></a>
                </div>
            </figcaption>
        </figure>
    </div>
    <!-- end team member -->
</div>
NoteFor demo, You can please check this in team.html page.
Team carousel
Team carousel is simply a team view in slider mode. See below image and code for more information.

<div class="swiper-container black-move swiper-pagination-bottom" data-slider-options='{ "loop": true, "slidesPerView": 1, "spaceBetween": 30, "observer": true, "observeParents": true, "autoplay": { "delay": 4500, "disableOnInteraction": false }, "pagination": { "el": ".swiper-pagination", "clickable": true, "dynamicBullets": true }, "keyboard": { "enabled": true, "onlyInViewport": true }, "breakpoints": { "1200": { "slidesPerView": 4 }, "992": { "slidesPerView": 3 }, "768": { "slidesPerView": 2 } } }'>
    <div class="swiper-wrapper">
        <!-- start team member slider item -->
        <div class="swiper-slide">
            <div class="team-style-01 text-center">
                <figure class="border-radius-5px">
                    <div class="team-member-image">
                        <img alt="" src="image path">
                        <div class="team-overlay bg-transparent-gradient-sky-blue-pink"></div>
                    </div>
                    <figcaption class="align-items-center justify-content-center d-flex flex-column padding-20px-lr padding-30px-tb">
                        <span class="team-title d-block alt-font text-white">Alexander Harvard</span>
                        <span class="team-sub-title text-small d-block text-white text-uppercase">Co Founder</span>
                        <div class="social-icon w-100 position-absolute bottom-30px left-0px">
                            <a href="https://www.facebook.com/" target="_blank" class="text-white"><i class="fab fa-facebook-f"></i></a>
                            <a href="https://www.instagram.com" target="_blank" class="text-white"><i class="fab fa-instagram"></i></a>
                            <a href="https://twitter.com/" target="_blank" class="text-white"><i class="fab fa-twitter"></i></a>
                        </div>
                    </figcaption>
                </figure>
            </div>
        </div>
        <!-- end team member slider item -->
        <!-- start team member slider item -->
        <div class="swiper-slide">
            <div class="team-style-01 text-center">
                <figure class="border-radius-5px">
                    <div class="team-member-image">
                        <img alt="" src="image path">
                        <div class="team-overlay bg-transparent-gradient-sky-blue-pink"></div>
                    </div>
                    <figcaption class="align-items-center justify-content-center d-flex flex-column padding-20px-lr padding-30px-tb">
                        <span class="team-title d-block alt-font text-white">Bryan Jonhson</span>
                        <span class="team-sub-title text-small d-block text-white text-uppercase">Manager</span>
                        <div class="social-icon w-100 position-absolute bottom-30px left-0px">
                            <a href="https://www.facebook.com/" target="_blank" class="text-white"><i class="fab fa-facebook-f"></i></a>
                            <a href="https://www.instagram.com" target="_blank" class="text-white"><i class="fab fa-instagram"></i></a>
                            <a href="https://twitter.com/" target="_blank" class="text-white"><i class="fab fa-twitter"></i></a>
                        </div>
                    </figcaption>
                </figure>
            </div>
        </div>
        <!-- end team member slider item -->
        <!-- start team member slider item -->
        <div class="swiper-slide">
            <div class="team-style-01 text-center">
                <figure class="border-radius-5px">
                    <div class="team-member-image">
                        <img alt="" src="image path">
                        <div class="team-overlay bg-transparent-gradient-sky-blue-pink"></div>
                    </div>
                    <figcaption class="align-items-center justify-content-center d-flex flex-column padding-20px-lr padding-30px-tb">
                        <span class="team-title d-block alt-font text-white">Jemmy Watson</span>
                        <span class="team-sub-title text-small d-block text-white text-uppercase">Designer</span>
                        <div class="social-icon w-100 position-absolute bottom-30px left-0px">
                            <a href="https://www.facebook.com/" target="_blank" class="text-white"><i class="fab fa-facebook-f"></i></a>
                            <a href="https://www.instagram.com" target="_blank" class="text-white"><i class="fab fa-instagram"></i></a>
                            <a href="https://twitter.com/" target="_blank" class="text-white"><i class="fab fa-twitter"></i></a>
                        </div>
                    </figcaption>
                </figure>
            </div>
        </div>
        <!-- end team member slider item -->
        <!-- start team member slider item -->
        <div class="swiper-slide">
            <div class="team-style-01 text-center">
                <figure class="border-radius-5px">
                    <div class="team-member-image">
                        <img alt="" src="image path">
                        <div class="team-overlay bg-transparent-gradient-sky-blue-pink"></div>
                    </div>
                    <figcaption class="align-items-center justify-content-center d-flex flex-column padding-20px-lr padding-30px-tb">
                        <span class="team-title d-block alt-font text-white">Jeremy Dupont</span>
                        <span class="team-sub-title text-small d-block text-white text-uppercase">Manager</span>
                        <div class="social-icon w-100 position-absolute bottom-30px left-0px">
                            <a href="https://www.facebook.com/" target="_blank" class="text-white"><i class="fab fa-facebook-f"></i></a>
                            <a href="https://www.instagram.com" target="_blank" class="text-white"><i class="fab fa-instagram"></i></a>
                            <a href="https://twitter.com/" target="_blank" class="text-white"><i class="fab fa-twitter"></i></a>
                        </div>
                    </figcaption>
                </figure>
            </div>
        </div>
        <!-- end team member slider item -->
        <!-- start team member slider item -->
        <div class="swiper-slide">
            ...
        </div>
        <!-- end team member slider item -->
    </div>
    <!-- start slider pagination -->
    <div class="swiper-pagination"></div>
    <!-- end slider pagination -->
</div>
NoteFor demo, You can please check this in team-carousel.html page.
Text slider
Functionality to make slider of any text content with attractive look. See below image and code for more information.
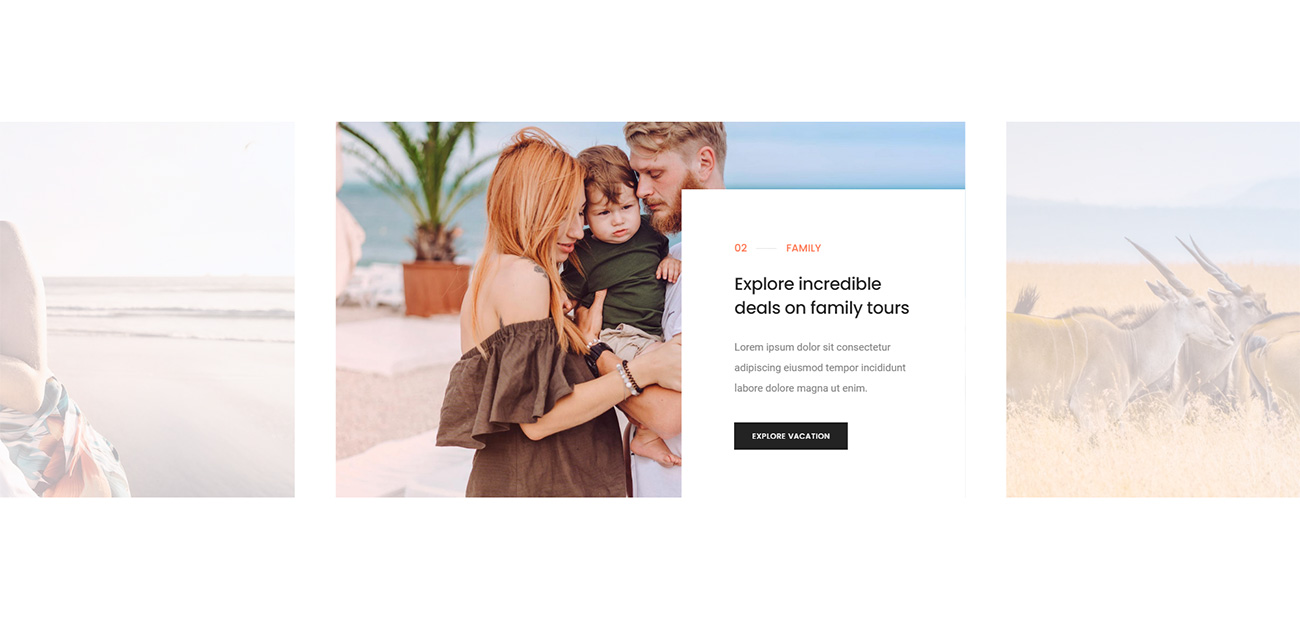
<div class="row">
    <div class="swiper-container slider-zoom-slide black-move" data-slider-options='{ "centeredSlides": true, "spaceBetween": 60, "loop": true, "navigation": { "nextEl": ".swiper-button-next-nav-2", "prevEl": ".swiper-button-previous-nav-2" }, "autoplay": { "delay": "4500", "disableOnInteraction": false }, "keyboard": { "enabled": true, "onlyInViewport": true }, "breakpoints": { "991": { "slidesPerView": 2 }, "767": { "slidesPerView": 1 } }, "effect": "slide" }'>
        <div class="swiper-wrapper">
            <!-- start slider item -->
            <div class="swiper-slide">
                <div class="col-12 h-550px p-0 cover-background align-items-end d-flex justify-content-end lg-h-500px sm-h-600px" style="background: url(image path)">
                    <div class="w-45 bg-white padding-5-rem-tb padding-5-half-rem-lr slider-zoom-content xl-w-55 xl-padding-3-rem-all lg-w-70 md-w-50 md-padding-5-rem-all sm-w-60 xs-w-95">
                        <div class="col-12 p-0 margin-20px-bottom d-md-inline-block align-items-center justify-content-center">
                            <span class="alt-font text-neon-orange d-inline-block font-weight-500 align-middle">01</span>
                            <span class="w-30px h-1px d-inline-block align-middle bg-medium-gray margin-10px-left margin-10px-right"></span>
                            <span class="d-inline-block alt-font text-neon-orange text-uppercase font-weight-500 align-middle">Romantic</span>
                        </div>
                        <h6 class="alt-font align-self-center text-extra-dark-gray font-weight-500">Romantic getaways around the world</h6>
                        <p class="margin-35px-bottom">Lorem ipsum dolor sit consectetur adipiscing eiusmod tempor incididunt labore dolore magna ut enim.</p>
                        <a href="#" class="btn btn-fancy btn-small btn-dark-gray">Explore vacation</a>
                    </div>
                </div>
            </div>
            <!-- end slider item -->
            <!-- start slider item -->
            <div class="swiper-slide">
                <div class="col-12 h-550px p-0 cover-background align-items-end d-flex justify-content-end lg-h-500px sm-h-600px" style="background: url(image path)">
                    <div class="w-45 bg-white padding-5-rem-tb padding-5-half-rem-lr slider-zoom-content xl-w-55 xl-padding-3-rem-all lg-w-70 md-w-50 md-padding-5-rem-all sm-w-60 xs-w-95">
                        <div class="col-12 p-0 margin-20px-bottom d-md-inline-block align-items-center justify-content-center">
                            <span class="alt-font text-neon-orange d-inline-block font-weight-500 align-middle">02</span>
                            <span class="w-30px h-1px d-inline-block align-middle bg-medium-gray margin-10px-left margin-10px-right"></span>
                            <span class="d-inline-block alt-font text-neon-orange text-uppercase font-weight-500 align-middle">Family</span>
                        </div>
                        <h6 class="alt-font align-self-center text-extra-dark-gray font-weight-500">Explore incredible deals on family tours</h6>
                        <p class="margin-35px-bottom">Lorem ipsum dolor sit consectetur adipiscing eiusmod tempor incididunt labore dolore magna ut enim.</p>
                        <a href="#" class="btn btn-fancy btn-small btn-dark-gray">explore vacation</a>
                    </div>
                </div>
            </div>
            <!-- end slider item -->
            <!-- start slider item -->
            <div class="swiper-slide">
                <div class="col-12 h-550px p-0 cover-background align-items-end d-flex justify-content-end lg-h-500px sm-h-600px" style="background: url(image path)">
                    <div class="w-45 bg-white padding-5-rem-tb padding-5-half-rem-lr slider-zoom-content xl-w-55 xl-padding-3-rem-all lg-w-70 md-w-50 md-padding-5-rem-all sm-w-60 xs-w-95">
                        <div class="col-12 p-0 margin-20px-bottom d-md-inline-block align-items-center justify-content-center">
                            <span class="alt-font text-neon-orange d-inline-block font-weight-500 align-middle">03</span>
                            <span class="w-30px h-1px d-inline-block align-middle bg-medium-gray margin-10px-left margin-10px-right"></span>
                            <span class="d-inline-block alt-font text-neon-orange text-uppercase font-weight-500 align-middle">Wildlife</span>
                        </div>
                        <h6 class="alt-font align-self-center text-extra-dark-gray font-weight-500">Explore a wide range of wildlife packages</h6>
                        <p class="margin-35px-bottom">Lorem ipsum dolor sit consectetur adipiscing eiusmod tempor incididunt labore dolore magna ut enim.</p>
                        <a href="#" class="btn btn-fancy btn-small btn-dark-gray">explore vacation</a>
                    </div>
                </div>
            </div>
            <!-- end slider item -->
        </div>
        <!-- start slider navigation -->
        <!--<div class="swiper-button-next-nav-2 swiper-button-next rounded-circle slider-navigation-style-07"><i class="feather icon-feather-arrow-right"></i></div>
        <div class="swiper-button-previous-nav-2 swiper-button-prev rounded-circle slider-navigation-style-07"><i class="feather icon-feather-arrow-left"></i></div> -->
        <!-- end slider navigation -->
    </div>
</div>
NoteFor demo, You can please check this in text-slider.html page.
Text box
Text box with attractive look. See below image and code for more information.

<div class="row row-cols-1 row-cols-md-3 row-cols-sm-2 justify-content-center">
    <!-- start text box item -->
    <div class="col sm-margin-30px-bottom xs-margin-15px-bottom">
        <div class="feature-box text-center padding-2-rem-all lg-padding-1-rem-lr sm-padding-2-rem-lr">
            <div class="feature-box-icon">
                <h2 class="font-weight-300 text-fast-blue letter-spacing-minus-2px margin-25px-bottom">765+</h2>
            </div>
            <div class="feature-box-content last-paragraph-no-margin">
                <span class="alt-font font-weight-500 margin-5px-bottom d-block text-extra-dark-gray">Effective strategy</span>
                <p>Lorem ipsum dolor amet consectetur adipiscing eiusmod tempor.</p>
            </div>
        </div>
    </div>
    <!-- end text box item -->
    <!-- start text box item -->
    <div class="col sm-margin-30px-bottom xs-margin-15px-bottom">
        <div class="feature-box text-center padding-2-rem-all lg-padding-1-rem-lr sm-padding-2-rem-lr">
            <div class="feature-box-icon">
                <h2 class="font-weight-300 text-fast-blue letter-spacing-minus-2px margin-25px-bottom">1250+</h2>
            </div>
            <div class="feature-box-content last-paragraph-no-margin">
                <span class="alt-font font-weight-500 margin-5px-bottom d-block text-extra-dark-gray">Customer satisfaction</span>
                <p>Lorem ipsum dolor amet consectetur adipiscing eiusmod tempor.</p>
            </div>
        </div>
    </div>
    <!-- end text box item -->
    <!-- start text box item -->
    <div class="col">
        <div class="feature-box text-center padding-2-rem-all lg-padding-1-rem-lr sm-padding-2-rem-lr">
            <div class="feature-box-icon">
                <h2 class="font-weight-300 text-fast-blue letter-spacing-minus-2px margin-25px-bottom">260+</h2>
            </div>
            <div class="feature-box-content last-paragraph-no-margin">
                <span class="alt-font font-weight-500 margin-5px-bottom d-block text-extra-dark-gray">Consulting strategies</span>
                <p>Lorem ipsum dolor amet consectetur adipiscing eiusmod tempor.</p>
            </div>
        </div>
    </div>
    <!-- end text box item -->
</div>
NoteFor demo, You can please check this in text-box.html page.
Testimonials
Different testimonials style with awesome look. See below image and code for more information.
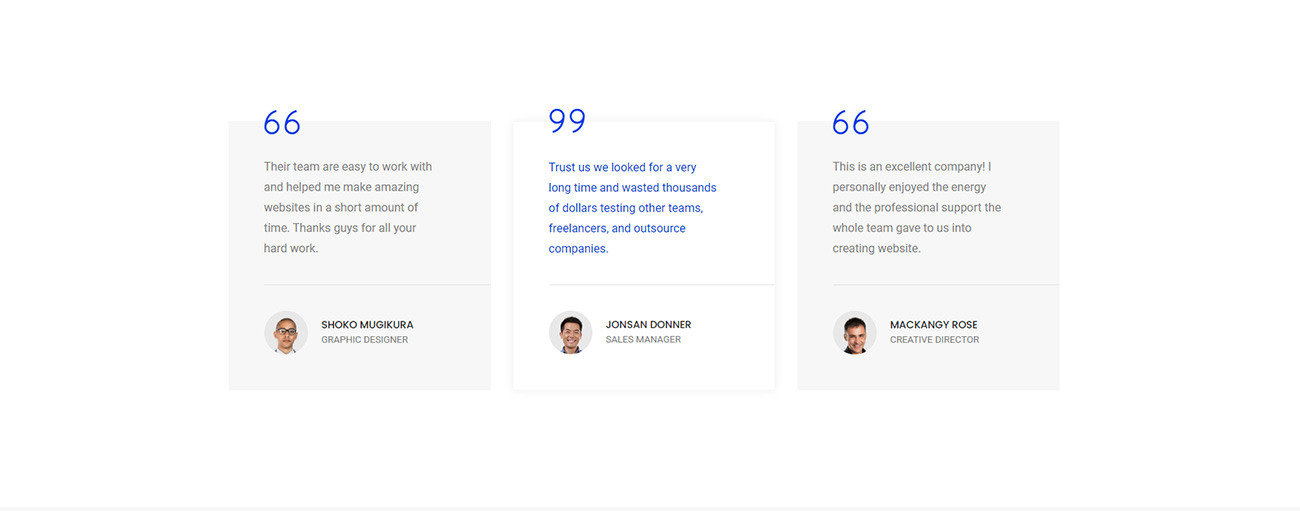
<div class="row justify-content-center">
    <!-- start testimonial item -->
    <div class="col-12 col-lg-4 col-md-6 col-sm-8 md-margin-50px-bottom xs-margin-35px-bottom">
        <div class="testimonials testimonials-style-01 bg-light-gray padding-3-half-rem-all pe-0 lg-padding-3-rem-all sm-padding-4-rem-all">
            <i class="testimonials-quotes ti-quote-left icon-large text-fast-blue"></i>
            <div class="testimonials-bubble text-extra-medium d-block w-75 lg-w-85">Their team are easy to work with and helped me make amazing websites in a short amount of time. Thanks guys for all your hard work.</div>
            <div class="w-100 h-1px bg-medium-gray margin-35px-tb lg-margin-30px-tb"></div>
            <div class="author">
                <img class="rounded-circle w-60px h-60px margin-15px-right" src="image path" alt="">
                <div class="d-inline-block align-middle">
                    <span class="alt-font text-medium font-weight-500 line-height-20px text-extra-dark-gray d-block text-uppercase">Shoko Mugikura</span>
                    <span class="d-block text-small text-uppercase">Graphic designer</span>
                </div>
            </div>
        </div>
    </div>
    <!-- end testimonial item -->
    <!-- start testimonial item -->
    <div class="col-12 col-lg-4 col-md-6 col-sm-8 md-margin-50px-bottom xs-margin-35px-bottom">
        <div class="testimonials testimonials-style-01 bg-light-gray padding-3-half-rem-all pe-0 lg-padding-3-rem-all sm-padding-4-rem-all">
            <i class="testimonials-quotes ti-quote-left icon-large text-fast-blue"></i>
            <div class="testimonials-bubble text-extra-medium d-block w-75 lg-w-85">Trust us we looked for a very long time and wasted thousands of dollars testing other teams, freelancers, and outsource companies.</div>
            <div class="w-100 h-1px bg-medium-gray margin-35px-tb lg-margin-30px-tb"></div>
            <div class="author">
                <img class="rounded-circle w-60px h-60px margin-15px-right" src="image path" alt="">
                <div class="d-inline-block align-middle">
                    <span class="alt-font text-medium font-weight-500 line-height-20px text-extra-dark-gray d-block text-uppercase">Jonsan Donner</span>
                    <span class="d-block text-small text-uppercase">Sales manager</span>
                </div>
            </div>
        </div>
    </div>
    <!-- end testimonial item -->
    <!-- start testimonial item -->
    <div class="col-12 col-lg-4 col-md-6 col-sm-8">
        <div class="testimonials testimonials-style-01 bg-light-gray padding-3-half-rem-all pe-0 lg-padding-3-rem-all sm-padding-4-rem-all">
            <i class="testimonials-quotes ti-quote-left icon-large text-fast-blue"></i>
            <div class="testimonials-bubble text-extra-medium d-block w-75 lg-w-85">This is an excellent company! I personally enjoyed the energy and the professional support the whole team gave to us into creating website.</div>
            <div class="w-100 h-1px bg-medium-gray margin-35px-tb lg-margin-30px-tb"></div>
            <div class="author">
                <img class="rounded-circle w-60px h-60px margin-15px-right" src="image path" alt="">
                <div class="d-inline-block align-middle">
                    <span class="alt-font text-medium font-weight-500 line-height-20px text-extra-dark-gray d-block text-uppercase">Mackangy Rose</span>
                    <span class="d-block text-small text-uppercase">Creative director</span>
                </div>
            </div>
        </div>
    </div>
    <!-- end testimonial item -->
</div>
NoteFor demo, You can please check this in testimonials.html page.
Testimonial carousel
Testimonial with attractive look in carousel mode. See below image and code for more information.
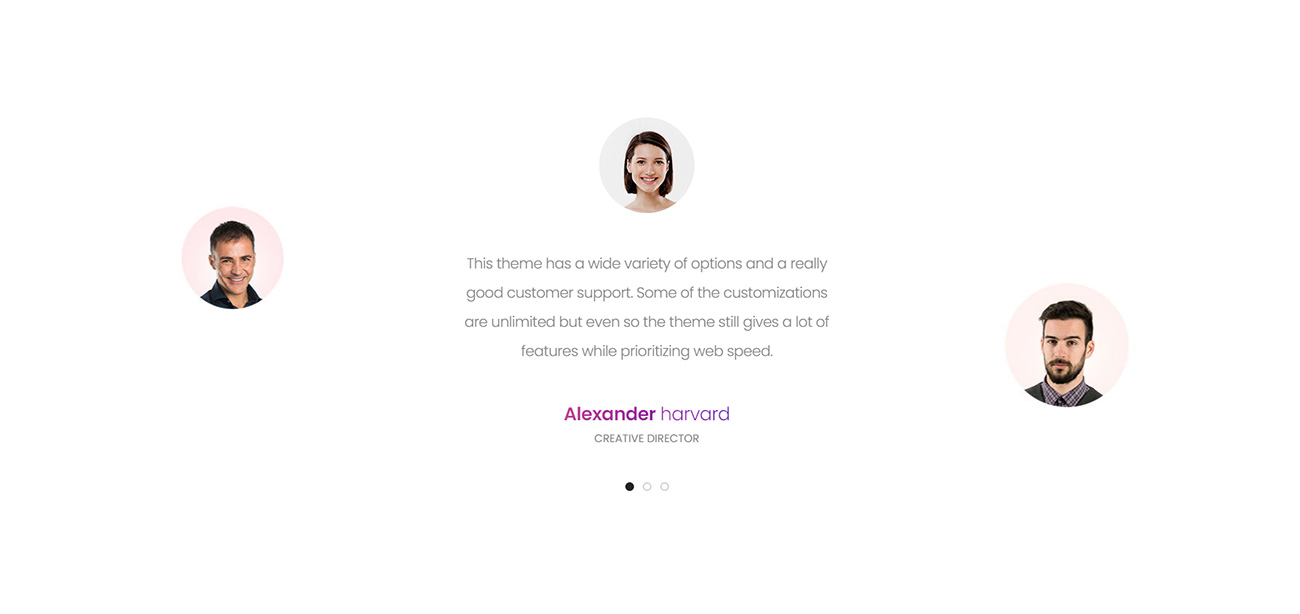
<div class="row justify-content-center">
    <div class="col-12 col-xl-6 col-lg-7 col-md-9">
        <div class="swiper-container swiper-pagination-bottom black-move" data-slider-options='{ "slidesPerView": 1, "loop": true, "pagination": { "el": ".swiper-pagination", "clickable": true }, "autoplay": { "delay": 4500, "disableOnInteraction": false }, "navigation": { "nextEl": ".swiper-button-next-nav", "prevEl": ".swiper-button-previous-nav" }, "keyboard": { "enabled": true, "onlyInViewport": true }, "effect": "slide" }'>
            <div class="swiper-wrapper">
                <!-- start testimonial item -->
                <div class="swiper-slide text-center">
                    <img alt="" class="d-inline-block rounded-circle margin-3-half-rem-bottom sm-margin-4-rem-bottom" src="image path">
                    <span class="alt-font text-extra-large line-height-40px font-weight-300 letter-spacing-minus-1-half d-inline-block w-95 margin-3-half-rem-bottom">This theme has a wide variety of options and a really good customer support. Some of the customizations are unlimited but even so the theme still gives a lot of features while prioritizing web speed.</span>
                    <h6 class="alt-font font-weight-300 text-gradient-red-violet-purple mb-0 d-inline-block"><span class="font-weight-600">Alexander</span> harvard</h6>
                    <span class="alt-font text-uppercase d-block">Creative director</span>
                </div>
                <!-- end testimonial item -->
                <!-- start testimonial item -->
                <div class="swiper-slide text-center">
                    <img alt="" class="d-inline-block rounded-circle margin-3-half-rem-bottom" src="image path">
                    <span class="alt-font text-extra-large line-height-40px font-weight-300 letter-spacing-minus-1-half d-inline-block w-95 margin-3-half-rem-bottom">Absolutely amazing theme, flexible and awesome design with possibilities. It's so very easy to use and to customize. Simply the great designs and best theme for WooCommerce, loading fast, customisable.</span>
                    <h6 class="alt-font font-weight-300 text-gradient-red-violet-purple mb-0 d-inline-block"><span class="font-weight-600">Jeremy</span> dupont</h6>
                    <span class="alt-font text-uppercase d-block">Creative director</span>
                </div>
                <!-- end testimonial item -->
                <!-- start testimonial item -->
                <div class="swiper-slide text-center">
                    <img alt="" class="d-inline-block rounded-circle margin-3-half-rem-bottom" src="image path">
                    <span class="alt-font text-extra-large line-height-40px font-weight-300 letter-spacing-minus-1-half d-inline-block w-95 margin-3-half-rem-bottom">There are design companies and then there are user experience, design, consulting, interface design. Simply the great designs and best theme for WooCommerce, loading fast, customisable and easy to use.</span>
                    <h6 class="alt-font font-weight-300 text-gradient-red-violet-purple mb-0 d-inline-block"><span class="font-weight-600">Lindsay</span> swanson</h6>
                    <span class="alt-font text-uppercase d-block">Creative director</span>
                </div>
                <!-- end testimonial item -->
            </div>
            <!-- start slider pagination -->
            <div class="swiper-pagination"></div>
            <!-- end slider pagination -->
        </div>
        <!-- start slider navigation -->
        <!--<div class="swiper-button-next-nav swiper-button-next rounded-circle slider-navigation-style-04"><i class="line-icon-Arrow-OutRight icon-large text-extra-light-gray"></i></div>
        <div class="swiper-button-previous-nav swiper-button-prev rounded-circle slider-navigation-style-04"><i class="line-icon-Arrow-OutLeft icon-large text-extra-light-gray"></i></div>  -->
        <!-- end slider navigation -->
    </div>
</div>
NoteFor demo, You can please check this in testimonials-carousel page.
Video
Add / embed video to your page. See below image and code for more information.

<!-- start vimeo video -->

<iframe src="video url" id="fitvid0"></iframe>

<!-- end vimeo video -->
NoteFor demo, You can please check this in video.html page.
WOW Animation
Reveal CSS animation as you scroll down a page. By default, you can use it to trigger animate.css animations. But you can easily change the settings to your favorite animation library.
Advantages
- Smaller than other JavaScript parallax plugins, like Scrollorama (they do fantastic things, but can be too heavy for simple needs)
- Super simple to install, and works with animate.css, so if you already use it, that will be very fast to setup
- Fast execution and lightweight code: the browser will like it ;-)
<section class="wow animate__slideInLeft" data-wow-duration="2s" data-wow-delay="5s"></section>
<section class="wow animate__slideInRight" data-wow-offset="10"  data-wow-iteration="10"></section>
NotePlease check the reference on WOW.
Portfolio
LITHO provides a very elegant way to showcase your work. Setting up Portfolio is simple and easy. Please see below code and informations.
Setting up portfolio filter
<!-- start filter navigation -->
<ul class="portfolio-filter grid-filter nav nav-tabs justify-content-center border-0 text-uppercase font-weight-500 alt-font padding-6-rem-bottom md-padding-4-half-rem-bottom sm-padding-2-rem-bottom">
    <li class="nav active"><a data-filter="*" href="#">All</a></li>
    <li class="nav"><a data-filter=".branding" href="#">Branding</a></li>
    <li class="nav"><a data-filter=".graphics" href="#">Graphics</a></li>
    <li class="nav"><a data-filter=".logos" href="#">Logos</a></li>
    <li class="nav"><a data-filter=".photography" href="#">Photography</a></li>
</ul>
<!-- end filter navigation -->
Setting up portfolio columns and items:
You can change portfolio columns by changing class of portfolio main ul to .grid-2col, .grid-3col, .grid-4col and .grid-5col as per the columns you need. You can manage number of items to display in a row in different device width as explained in image gallery element. You can add data filter class name in portfolio li item as per the filter category above. Below is the portfolio section code for your reference:
<div class="col-12 filter-content">
    <ul class="portfolio-classic portfolio-wrapper grid grid-3col xl-grid-3col lg-grid-3col md-grid-2col sm-grid-2col xs-grid-1col gutter-extra-large text-center">
        <li class="grid-sizer"></li>
        <!-- start portfolio item -->
        <li class="grid-item wow animate__fadeIn">
            <div class="portfolio-box border-radius-6px box-shadow-large">
                <div class="portfolio-image bg-gradient-fast-blue-purple">
                    <img src="image path" alt="" />
                    <div class="portfolio-hover align-items-center justify-content-center d-flex h-100">
                        <div class="portfolio-icon">
                            <a href="image path" data-group="portfolio-items" class="lightbox-group-gallery-item text-slate-blue text-slate-blue-hover rounded-circle bg-white"><i class="fas fa-search icon-very-small" aria-hidden="true"></i></a>
                            <a href="#" class="text-slate-blue text-slate-blue-hover rounded-circle bg-white"><i class="fas fa-link icon-very-small" aria-hidden="true"></i></a>
                        </div>
                    </div>
                </div>
                <div class="portfolio-caption bg-white padding-30px-tb lg-padding-20px-tb">
                    <a href="#"><span class="alt-font text-extra-dark-gray font-weight-500">Magazine Cover</span></a>
                    <span class="text-medium d-block margin-one-bottom">Photography</span>
                </div>
            </div>
        </li>
        <!-- end portfolio item -->
        <!-- start portfolio item -->
        <li class="grid-item branding wow animate__fadeIn" data-wow-delay="0.2s">
            <div class="portfolio-box border-radius-6px box-shadow-large">
                <div class="portfolio-image bg-gradient-fast-blue-purple">
                    <img src="image path" alt="" />
                    <div class="portfolio-hover align-items-center justify-content-center d-flex h-100">
                        <div class="portfolio-icon">
                            <a href="image path" data-group="portfolio-items" class="lightbox-group-gallery-item text-slate-blue text-slate-blue-hover rounded-circle bg-white"><i class="fas fa-search icon-very-small" aria-hidden="true"></i></a>
                            <a href="#" class="text-slate-blue text-slate-blue-hover rounded-circle bg-white"><i class="fas fa-link icon-very-small" aria-hidden="true"></i></a>
                        </div>
                    </div>
                </div>
                <div class="portfolio-caption bg-white padding-30px-tb lg-padding-20px-tb">
                    <a href="#"><span class="alt-font text-extra-dark-gray font-weight-500">Biolator Series</span></a>
                    <span class="text-medium d-block margin-one-bottom">Identity</span>
                </div>
            </div>
        </li>
        <!-- end portfolio item -->
        <!-- start portfolio item -->
        <li class="grid-item branding logos wow animate__fadeIn" data-wow-delay="0.4s">
            <div class="portfolio-box border-radius-6px box-shadow-large">
                <div class="portfolio-image bg-gradient-fast-blue-purple">
                    <img src="image path" alt="" />
                    <div class="portfolio-hover align-items-center justify-content-center d-flex h-100">
                        <div class="portfolio-icon">
                            <a href="image path" data-group="portfolio-items" class="lightbox-group-gallery-item text-slate-blue text-slate-blue-hover rounded-circle bg-white"><i class="fas fa-search icon-very-small" aria-hidden="true"></i></a>
                            <a href="#" class="text-slate-blue text-slate-blue-hover rounded-circle bg-white"><i class="fas fa-link icon-very-small" aria-hidden="true"></i></a>
                        </div>
                    </div>
                </div>
                <div class="portfolio-caption bg-white padding-30px-tb lg-padding-20px-tb">
                    <a href="#"><span class="alt-font text-extra-dark-gray font-weight-500">Potato Oslands</span></a>
                    <span class="text-medium d-block margin-one-bottom">Branding</span>
                </div>
            </div>
        </li>
        <!-- end portfolio item -->
    </ul>
</div>
Setting up responsive portfolio columns:
You can set responsive columns by adding class into portfolio main ul. .xl-grid-, .lg-grid-, .md-grid-,.sm-grid- and .xs-grid- classes are available as per the columns you need in responsive. Below is the portfolio section code for your reference:
<div class="col-12 filter-content">
    <ul class="portfolio-classic portfolio-wrapper grid grid-3col xl-grid-3col lg-grid-3col md-grid-2col sm-grid-2col xs-grid-1col gutter-extra-large text-center">
        <li class="grid-sizer"></li>
        <!-- start portfolio item -->
        <li class="grid-item wow animate__fadeIn">
            <div class="portfolio-box border-radius-6px box-shadow-large">
                <div class="portfolio-image bg-gradient-fast-blue-purple">
                    ...
                </div>
                <div class="portfolio-caption bg-white padding-30px-tb lg-padding-20px-tb">
                    ...
                </div>
            </div>
        </li>
        <!-- end portfolio item -->
        <!-- start portfolio item -->
        <li class="grid-item branding wow animate__fadeIn" data-wow-delay="0.2s">
            <div class="portfolio-box border-radius-6px box-shadow-large">
                <div class="portfolio-image bg-gradient-fast-blue-purple">
                    ...
                </div>
                <div class="portfolio-caption bg-white padding-30px-tb lg-padding-20px-tb">
                    ...
                </div>
            </div>
        </li>
        <!-- end portfolio item -->
        <!-- start portfolio item -->
        <li class="grid-item branding logos wow animate__fadeIn" data-wow-delay="0.4s">
            <div class="portfolio-box border-radius-6px box-shadow-large">
                <div class="portfolio-image bg-gradient-fast-blue-purple">
                    ...
                </div>
                <div class="portfolio-caption bg-white padding-30px-tb lg-padding-20px-tb">
                    ...
                </div>
            </div>
        </li>
        <!-- end portfolio item -->
    </ul>
</div>
See how aspects of the Portfolio column system work across multiple devices with a handy table.
| Extra Large ≤1600px |
Large ≤1199px |
Medium ≤991px |
Small ≤767px |
Extra small ≤575px |
|
|---|---|---|---|---|---|
| Max container width | 1170px | 960px | 720px | 540px | None(auto) |
| Class prefix | .xl-grid- |
.lg-grid- |
.md-grid- |
.sm-grid- |
.xs-grid- |
Setting up gutter length:
You can set gutter length by changing class in portfolio main ul to .gutter-very-small, .gutter-small, .gutter-medium,.gutter-large, .gutter-extra-large and .gutter-double-extra-large as per the space you need. Below is the section code for your reference:
<div class="col-12 filter-content">
    <ul class="portfolio-classic portfolio-wrapper grid grid-3col xl-grid-3col lg-grid-3col md-grid-2col sm-grid-2col xs-grid-1col gutter-extra-large text-center">
        <li class="grid-sizer"></li>
        <!-- start portfolio item -->
        <li class="grid-item wow animate__fadeIn">
            <div class="portfolio-box border-radius-6px box-shadow-large">
                <div class="portfolio-image bg-gradient-fast-blue-purple">
                    ...
                </div>
                <div class="portfolio-caption bg-white padding-30px-tb lg-padding-20px-tb">
                    ...
                </div>
            </div>
        </li>
        <!-- end portfolio item -->
        <!-- start portfolio item -->
        <li class="grid-item branding wow animate__fadeIn" data-wow-delay="0.2s">
            <div class="portfolio-box border-radius-6px box-shadow-large">
                <div class="portfolio-image bg-gradient-fast-blue-purple">
                    ...
                </div>
                <div class="portfolio-caption bg-white padding-30px-tb lg-padding-20px-tb">
                    ...
                </div>
            </div>
        </li>
        <!-- end portfolio item -->
        <!-- start portfolio item -->
        <li class="grid-item branding logos wow animate__fadeIn" data-wow-delay="0.4s">
            <div class="portfolio-box border-radius-6px box-shadow-large">
                <div class="portfolio-image bg-gradient-fast-blue-purple">
                    ...
                </div>
                <div class="portfolio-caption bg-white padding-30px-tb lg-padding-20px-tb">
                    ...
                </div>
            </div>
        </li>
        <!-- end portfolio item -->
    </ul>
</div>
Portfolio layout
LITHO includes different types of portfolio layout as mentioned below to setup your own portfolio as per your requirement:
- Portfolio classic
- Portfolio boxed
- Portfolio colorful
- Portfolio bordered
- Portfolio overlay
- Portfolio switch image
Portfolio classic
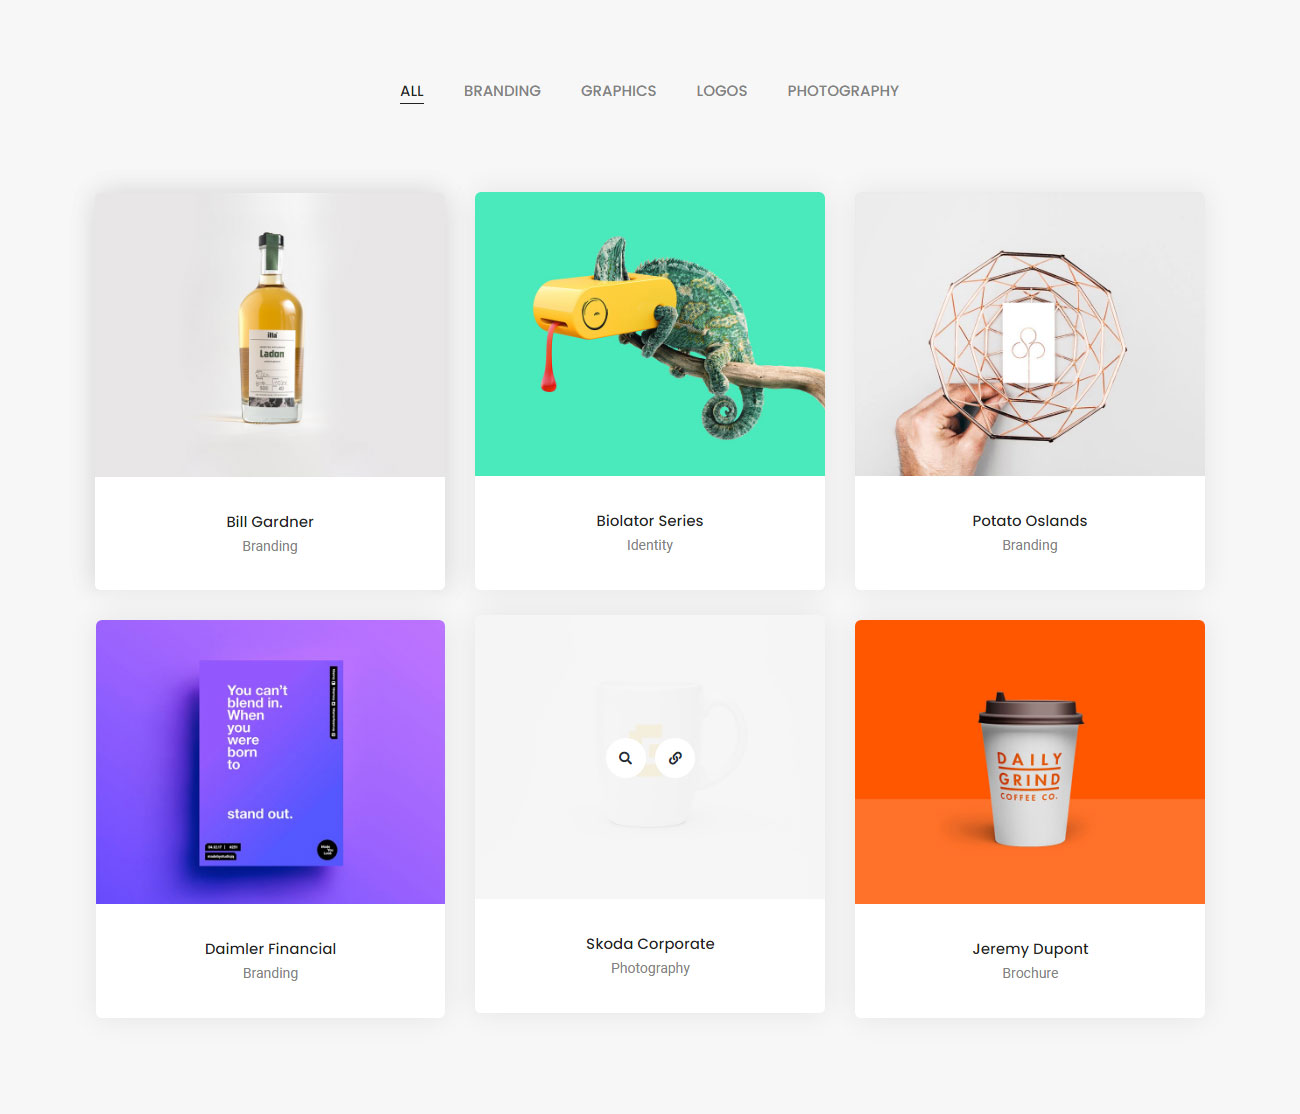
<ul class="portfolio-classic portfolio-wrapper grid grid-3col xl-grid-3col lg-grid-3col md-grid-2col sm-grid-2col xs-grid-1col gutter-extra-large text-center">
    <li class="grid-sizer"></li>
    <!-- start portfolio item -->
    <li class="grid-item wow animate__fadeIn">
        <div class="portfolio-box border-radius-6px box-shadow-large">
            <div class="portfolio-image bg-gradient-fast-blue-purple">
                <img src="image path" alt="" />
                <div class="portfolio-hover align-items-center justify-content-center d-flex h-100">
                    <div class="portfolio-icon">
                        <a href="image path" data-group="portfolio-items" class="lightbox-group-gallery-item text-slate-blue text-slate-blue-hover rounded-circle bg-white"><i class="fas fa-search icon-very-small" aria-hidden="true"></i></a>
                        <a href="#" class="text-slate-blue text-slate-blue-hover rounded-circle bg-white"><i class="fas fa-link icon-very-small" aria-hidden="true"></i></a>
                    </div>
                </div>
            </div>
            <div class="portfolio-caption bg-white padding-30px-tb lg-padding-20px-tb">
                <a href="#"><span class="alt-font text-extra-dark-gray font-weight-500">Magazine Cover</span></a>
                <span class="text-medium d-block margin-one-bottom">Photography</span>
            </div>
        </div>
    </li>
    <!-- end portfolio item -->
    <!-- start portfolio item -->
    <li class="grid-item branding wow animate__fadeIn" data-wow-delay="0.2s">
        <div class="portfolio-box border-radius-6px box-shadow-large">
            <div class="portfolio-image bg-gradient-fast-blue-purple">
                <img src="image path" alt="" />
                <div class="portfolio-hover align-items-center justify-content-center d-flex h-100">
                    <div class="portfolio-icon">
                        <a href="image path" data-group="portfolio-items" class="lightbox-group-gallery-item text-slate-blue text-slate-blue-hover rounded-circle bg-white"><i class="fas fa-search icon-very-small" aria-hidden="true"></i></a>
                        <a href="#" class="text-slate-blue text-slate-blue-hover rounded-circle bg-white"><i class="fas fa-link icon-very-small" aria-hidden="true"></i></a>
                    </div>
                </div>
            </div>
            <div class="portfolio-caption bg-white padding-30px-tb lg-padding-20px-tb">
                <a href="#"><span class="alt-font text-extra-dark-gray font-weight-500">Biolator Series</span></a>
                <span class="text-medium d-block margin-one-bottom">Identity</span>
            </div>
        </div>
    </li>
    <!-- end portfolio item -->
    <!-- start portfolio item -->
    <li class="grid-item branding logos wow animate__fadeIn" data-wow-delay="0.4s">
        <div class="portfolio-box border-radius-6px box-shadow-large">
            <div class="portfolio-image bg-gradient-fast-blue-purple">
                <img src="image path" alt="" />
                <div class="portfolio-hover align-items-center justify-content-center d-flex h-100">
                    <div class="portfolio-icon">
                        <a href="image path" data-group="portfolio-items" class="lightbox-group-gallery-item text-slate-blue text-slate-blue-hover rounded-circle bg-white"><i class="fas fa-search icon-very-small" aria-hidden="true"></i></a>
                        <a href="#" class="text-slate-blue text-slate-blue-hover rounded-circle bg-white"><i class="fas fa-link icon-very-small" aria-hidden="true"></i></a>
                    </div>
                </div>
            </div>
            <div class="portfolio-caption bg-white padding-30px-tb lg-padding-20px-tb">
                <a href="#"><span class="alt-font text-extra-dark-gray font-weight-500">Potato Oslands</span></a>
                <span class="text-medium d-block margin-one-bottom">Branding</span>
            </div>
        </div>
    </li>
    <!-- end portfolio item -->
</ul>
NoteFor demo, You can please check this in portfolio-classic-three-column.html page.
Portfolio boxed
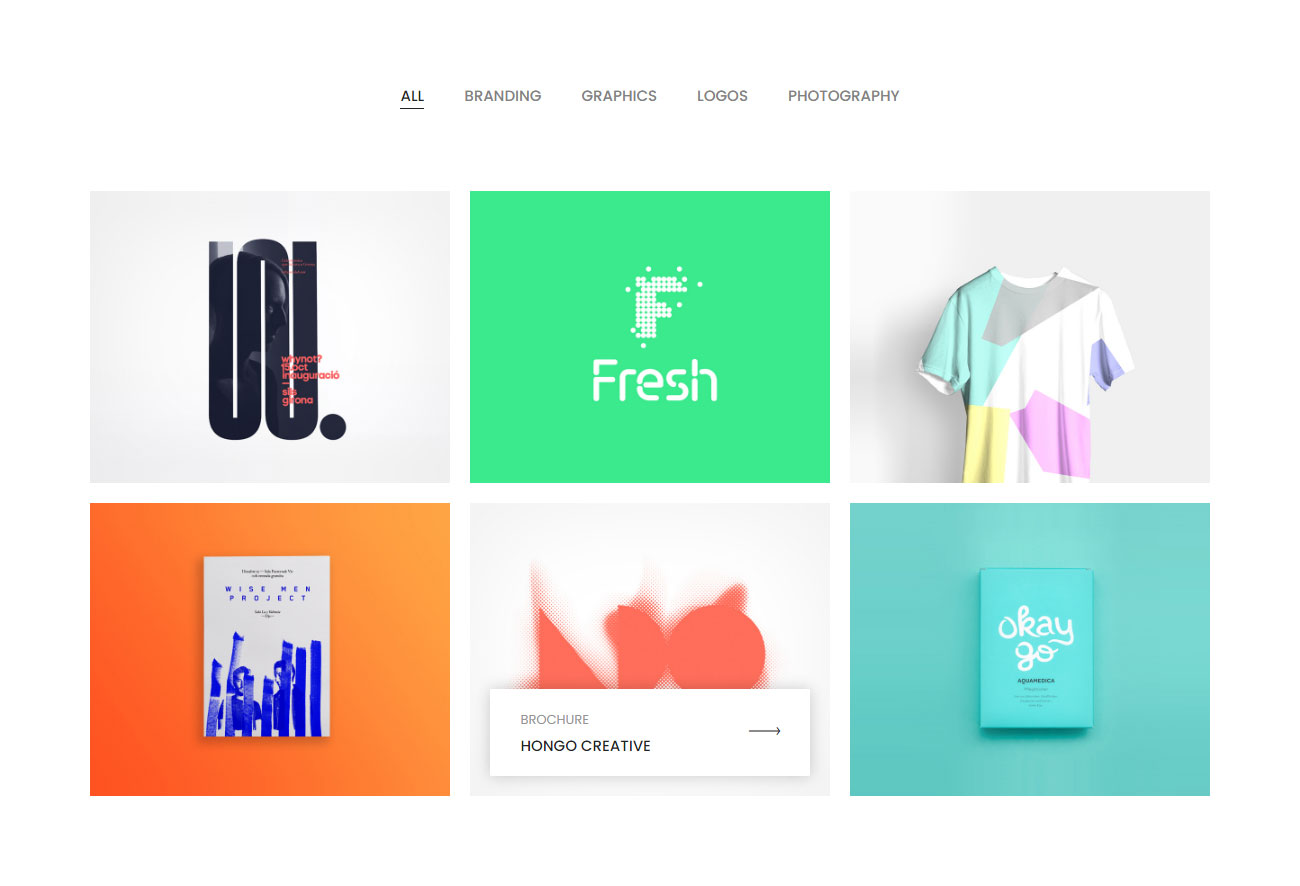
<ul class="portfolio-boxed portfolio-wrapper grid grid-3col xl-grid-3col lg-grid-3col md-grid-2col sm-grid-2col xs-grid-1col gutter-large text-center">
    <li class="grid-sizer"></li>
    <!-- start portfolio item -->
    <li class="grid-item wow animate__fadeIn">
        <a href="#">
            <div class="portfolio-box">
                <div class="portfolio-image">
                    <img src="image path" alt="" />
                    <div class="portfolio-hover justify-content-end d-flex flex-column">
                        <div class="bg-white padding-30px-lr padding-15px-tb w-100 d-flex align-items-center align-self-end text-start border-radius-3px xl-padding-20px-lr">
                            <div class="me-auto">
                                <div class="text-medium-gray alt-font margin-5px-top text-small text-uppercase">Photography</div>
                                <div class="font-weight-500 alt-font text-extra-dark-gray text-uppercase">Love Fashion</div>
                            </div>
                            <div class="ms-auto"><i class="line-icon-Arrow-OutRight icon-extra-medium text-extra-dark-gray  position-relative top-3px"></i></div>
                        </div>
                    </div>
                </div>
            </div>
        </a>
    </li>
    <!-- end portfolio item -->
    <!-- start portfolio item -->
    <li class="grid-item branding wow animate__fadeIn" data-wow-delay="0.2s">
        <a href="#">
            <div class="portfolio-box">
                <div class="portfolio-image">
                    <img src="image path" alt="" />
                    <div class="portfolio-hover justify-content-end d-flex flex-column">
                        <div class="bg-white padding-30px-lr padding-15px-tb w-100 d-flex align-items-center align-self-end text-start border-radius-3px xl-padding-20px-lr">
                            <div class="me-auto">
                                <div class="text-medium-gray alt-font margin-5px-top text-small text-uppercase">Branding</div>
                                <div class="font-weight-500 alt-font text-extra-dark-gray text-uppercase">Creative Tropical</div>
                            </div>
                            <div class="ms-auto"><i class="line-icon-Arrow-OutRight icon-extra-medium text-extra-dark-gray  position-relative top-3px"></i></div>
                        </div>
                    </div>
                </div>
            </div>
        </a>
    </li>
    <!-- end portfolio item -->
    <!-- start portfolio item -->
    <li class="grid-item photography wow animate__fadeIn" data-wow-delay="0.4s">
        <a href="#">
            <div class="portfolio-box">
                <div class="portfolio-image">
                    <img src="image path" alt="" />
                    <div class="portfolio-hover justify-content-end d-flex flex-column">
                        <div class="bg-white padding-30px-lr padding-15px-tb w-100 d-flex align-items-center align-self-end text-start border-radius-3px xl-padding-20px-lr">
                            <div class="me-auto">
                                <div class="text-medium-gray alt-font margin-5px-top text-small text-uppercase">Branding</div>
                                <div class="font-weight-500 alt-font text-extra-dark-gray text-uppercase">Foodlly Cafe</div>
                            </div>
                            <div class="ms-auto"><i class="line-icon-Arrow-OutRight icon-extra-medium text-extra-dark-gray  position-relative top-3px"></i></div>
                        </div>
                    </div>
                </div>
            </div>
        </a>
    </li>
    <!-- end portfolio item -->
</ul>
NoteFor demo, You can please check this in portfolio-boxed-three-column.html page.
Portfolio colorful
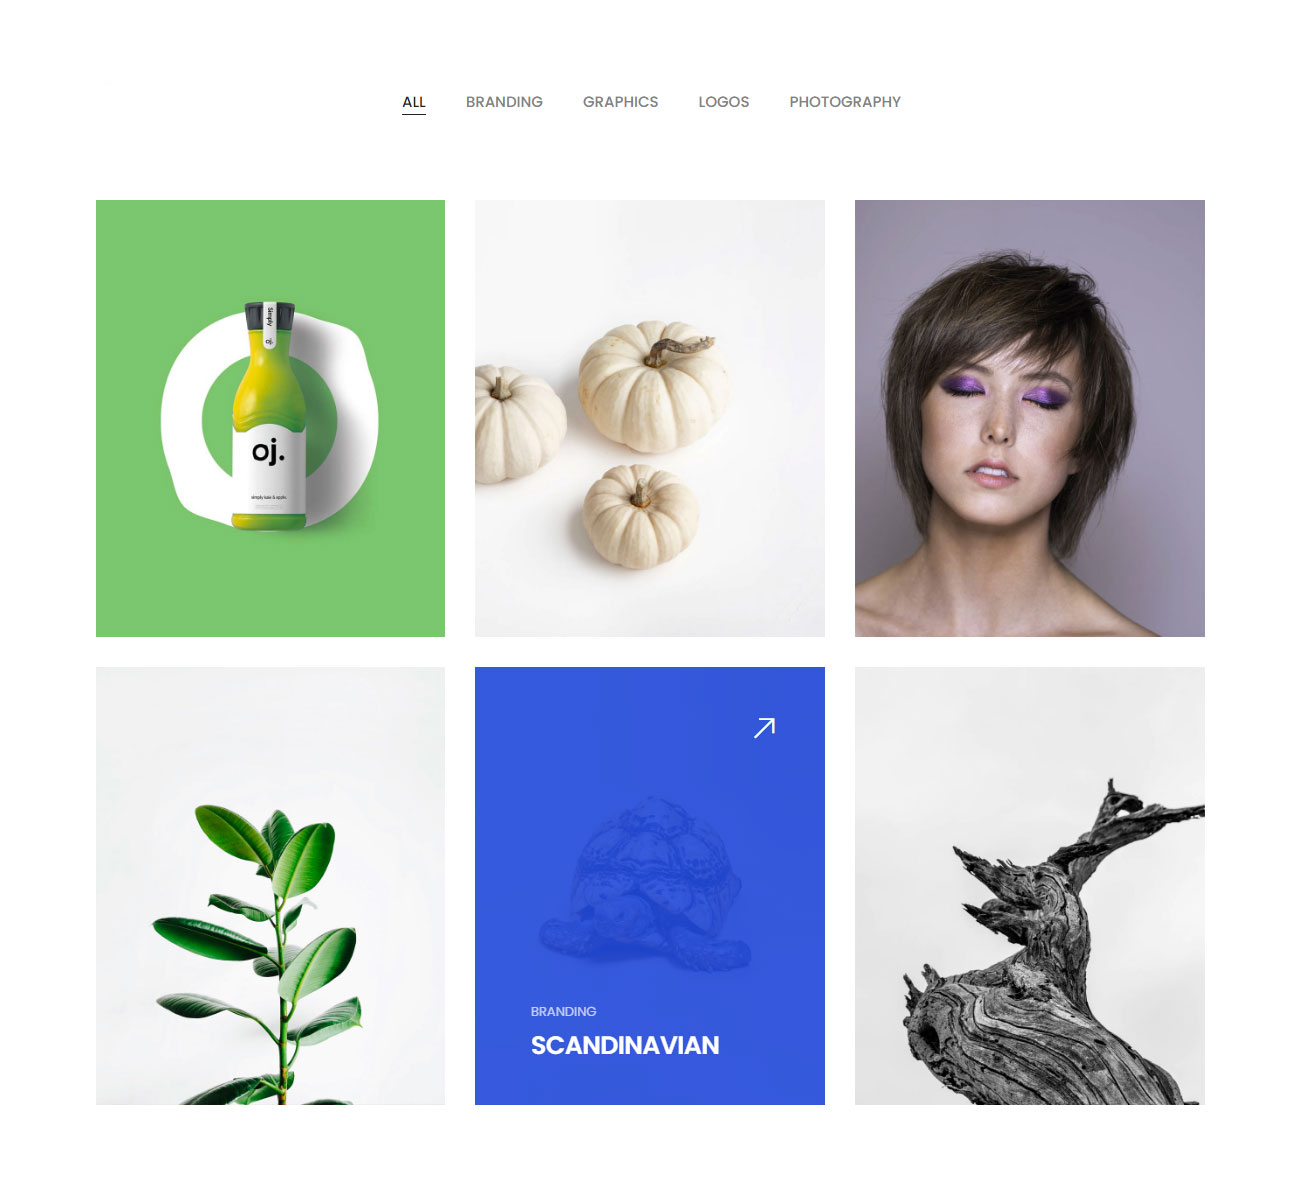
<ul class="portfolio-colorful portfolio-wrapper grid grid-3col xl-grid-3col lg-grid-3col md-grid-2col sm-grid-2col xs-grid-1col gutter-extra-large text-center" data-opacity="0.9" data-backgroundcolor="#58bc4b,#d9a026,#813ea9,#82bc13,#214bdf,#e28e1a,#04c05c,#e52d8c,#029bd3,#e77345,#0575c4,#e2731a,">
    <li class="grid-sizer"></li>
    <!-- start portfolio item -->
    <li class="grid-item wow animate__fadeIn">
        <a href="#">
            <div class="portfolio-box">
                <div class="portfolio-image">
                    <img src="image path" alt="" />
                    <div class="portfolio-hover bg-transparent-white justify-content-between d-flex flex-row align-items-end padding-3-rem-tb padding-4-rem-lr xl-padding-2-rem-all">
                        <div class="text-start">
                            <div class="alt-font text-small text-white text-uppercase margin-5px-bottom opacity-7 move-top-bottom-self"><span>Branding</span></div>
                            <h6 class="font-weight-600 alt-font text-white text-uppercase no-margin-bottom move-bottom-top-self"><span>Mongolish</span></h6>
                        </div>
                        <span class="position-absolute top-50px right-50px move-right-left lg-top-30px lg-right-30px sm-top-20px sm-right-20px"><i class="ti-arrow-top-right icon-small text-white"></i></span>
                    </div>
                </div>
            </div>
        </a>
    </li>
    <!-- end portfolio item -->
    <!-- start portfolio item -->
    <li class="grid-item graphics wow animate__fadeIn" data-wow-delay="0.2s">
        <a href="#">
            <div class="portfolio-box">
                <div class="portfolio-image bg-extra-dark-gray">
                    <img src="image path" alt="" />
                    <div class="portfolio-hover bg-transparent-white justify-content-between d-flex flex-row align-items-end padding-3-rem-tb padding-4-rem-lr xl-padding-2-rem-all">
                        <div class="text-start">
                            <div class="alt-font text-small text-white text-uppercase margin-5px-bottom opacity-7 move-top-bottom-self"><span>Photography</span></div>
                            <h6 class="font-weight-600 alt-font text-white text-uppercase no-margin-bottom move-bottom-top-self"><span>Masscoating</span></h6>
                        </div>
                        <span class="position-absolute top-50px right-50px move-right-left lg-top-30px lg-right-30px sm-top-20px sm-right-20px"><i class="ti-arrow-top-right icon-small text-white"></i></span>
                    </div>
                </div>
            </div>
        </a>
    </li>
    <!-- end portfolio item -->
    <!-- start portfolio item -->
    <li class="grid-item branding graphics wow animate__fadeIn" data-wow-delay="0.4s">
        <a href="#">
            <div class="portfolio-box">
                <div class="portfolio-image bg-extra-dark-gray">
                    <img src="image path" alt="" />
                    <div class="portfolio-hover bg-transparent-white justify-content-between d-flex flex-row align-items-end padding-3-rem-tb padding-4-rem-lr xl-padding-2-rem-all">
                        <div class="text-start">
                            <div class="alt-font text-small text-white text-uppercase margin-5px-bottom opacity-7 move-top-bottom-self"><span>Brochure</span></div>
                            <h6 class="font-weight-600 alt-font text-white text-uppercase no-margin-bottom move-bottom-top-self"><span>Cortifiel</span></h6>
                        </div>
                        <span class="position-absolute top-50px right-50px move-right-left lg-top-30px lg-right-30px sm-top-20px sm-right-20px"><i class="ti-arrow-top-right icon-small text-white"></i></span>
                    </div>
                </div>
            </div>
        </a>
    </li>
    <!-- end portfolio item -->
</ul>
NoteFor demo, You can please check this in portfolio-colorful-three-column.html page.
Portfolio bordered
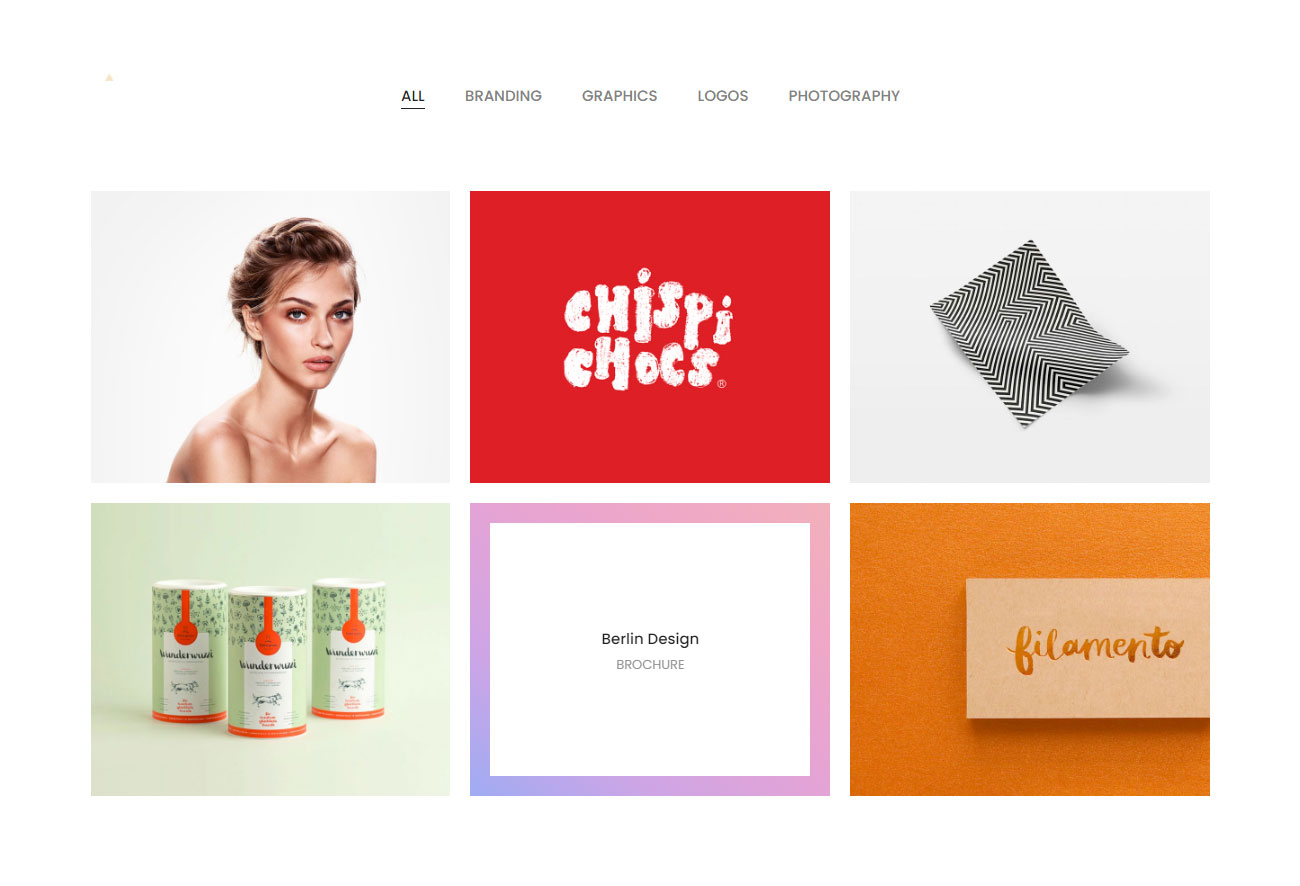
<ul class="portfolio-bordered portfolio-wrapper grid grid-3col xl-grid-3col lg-grid-3col md-grid-2col sm-grid-2col xs-grid-1col gutter-large text-center">
    <li class="grid-sizer"></li>
    <!-- start portfolio item -->
    <li class="grid-item wow animate__fadeIn">
        <a href="#">
            <div class="portfolio-box">
                <div class="portfolio-image bg-gradient-sky-blue-pink">
                    <img src="image path" alt="" />
                    <div class="portfolio-hover bg-white justify-content-center d-flex flex-column">
                        <div class="scale">
                            <div class="alt-font text-extra-dark-gray font-weight-500 d-block">Motion Picture</div>
                            <div class="text-uppercase text-medium-gray text-small alt-font d-block">Branding</div>
                        </div>
                    </div>
                </div>
            </div>
        </a>
    </li>
    <!-- end portfolio item -->
    <!-- start portfolio item -->
    <li class="grid-item branding wow animate__fadeIn" data-wow-delay="0.2s">
        <a href="#">
            <div class="portfolio-box">
                <div class="portfolio-image bg-gradient-sky-blue-pink">
                    <img src="image path" alt="" />
                    <div class="portfolio-hover bg-white justify-content-center d-flex flex-column">
                        <div class="scale">
                            <div class="alt-font text-extra-dark-gray font-weight-500 d-block">Waterlly Lake</div>
                            <div class="text-uppercase text-medium-gray text-small alt-font d-block">Branding</div>
                        </div>
                    </div>
                </div>
            </div>
        </a>
    </li>
    <!-- end portfolio item -->
    <!-- start portfolio item -->
    <li class="grid-item graphics wow animate__fadeIn" data-wow-delay="0.4s">
        <a href="#">
            <div class="portfolio-box">
                <div class="portfolio-image bg-gradient-sky-blue-pink">
                    <img src="image path" alt="" />
                    <div class="portfolio-hover bg-white justify-content-center d-flex flex-column">
                        <div class="scale">
                            <div class="alt-font text-extra-dark-gray font-weight-500 d-block">Hipster Land</div>
                            <div class="text-uppercase text-medium-gray text-small alt-font d-block">Photography</div>
                        </div>
                    </div>
                </div>
            </div>
        </a>
    </li>
    <!-- end portfolio item -->
</ul>
NoteFor demo, You can please check this in portfolio-bordered-three-column.html page.
Portfolio overlay
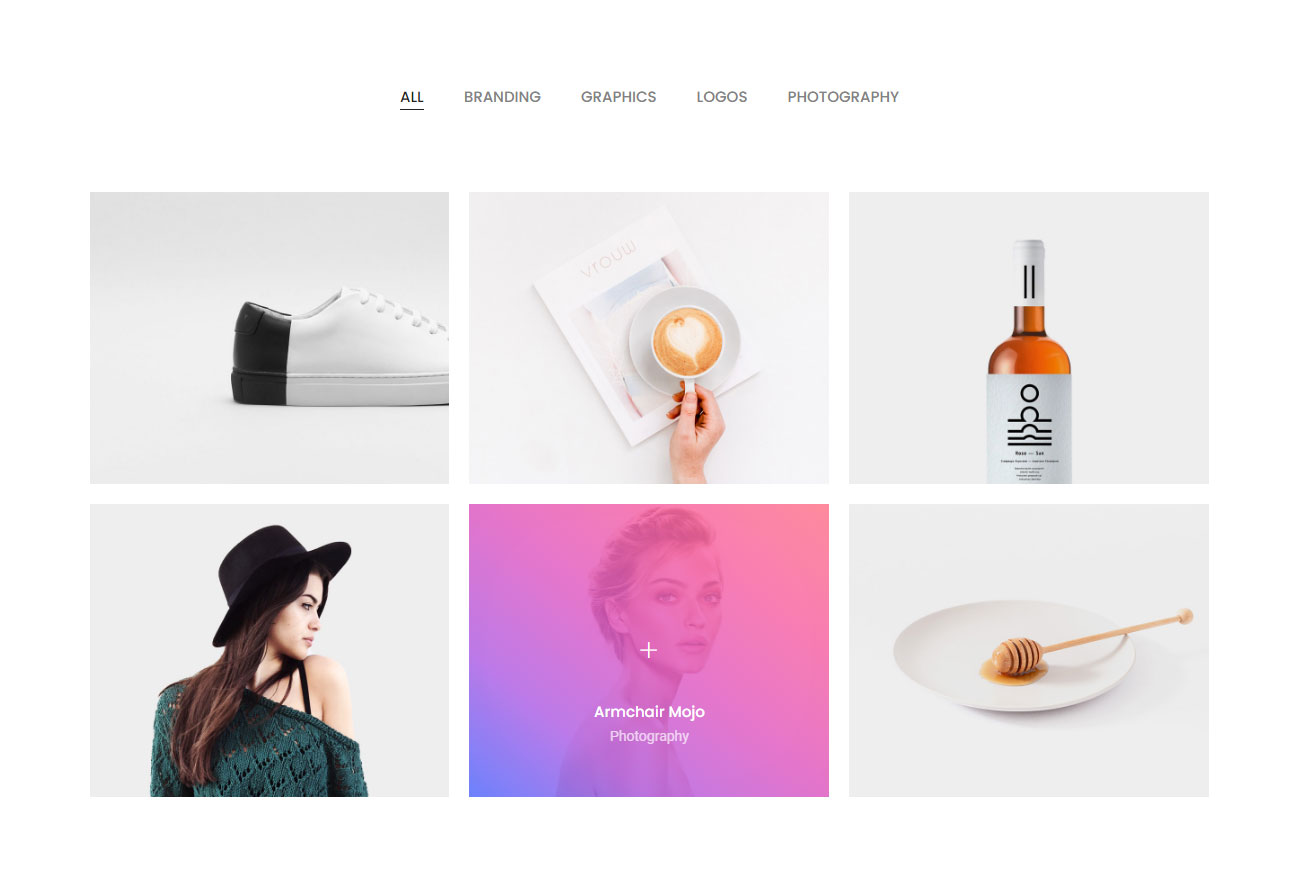
<ul class="portfolio-overlay portfolio-wrapper grid grid-3col xl-grid-3col lg-grid-3col md-grid-2col sm-grid-2col xs-grid-1col gutter-large text-center">
    <li class="grid-sizer"></li>
    <!-- start portfolio item -->
    <li class="grid-item wow animate__fadeIn">
        <a href="#">
            <div class="portfolio-box">
                <div class="portfolio-image bg-gradient-sky-blue-pink">
                    <img src="image path" alt="" />
                    <div class="portfolio-hover justify-content-end d-flex flex-column padding-50px-tb xl-padding-30px-tb">
                        <i class="ti-plus portfolio-plus-icon font-weight-300 text-white absolute-middle-center icon-extra-small move-top-bottom"></i>
                        <div class="alt-font text-white font-weight-500 d-block">Daimler Financial</div>
                        <div class="text-medium d-block text-white opacity-7">Brochure</div>
                    </div>
                </div>
            </div>
        </a>
    </li>
    <!-- end portfolio item -->
    <!-- start portfolio item -->
    <li class="grid-item branding wow animate__fadeIn" data-wow-delay="0.2s">
        <a href="#">
            <div class="portfolio-box">
                <div class="portfolio-image bg-gradient-sky-blue-pink">
                    <img src="image path" alt="" />
                    <div class="portfolio-hover justify-content-end d-flex flex-column padding-50px-tb xl-padding-30px-tb">
                        <i class="ti-plus portfolio-plus-icon font-weight-300 text-white absolute-middle-center icon-extra-small move-top-bottom"></i>
                        <div class="alt-font text-white font-weight-500 d-block">Waterlly Lake</div>
                        <div class="text-medium d-block text-white opacity-7">Branding</div>
                    </div>
                </div>
            </div>
        </a>
    </li>
    <!-- end portfolio item -->
    <!-- start portfolio item -->
    <li class="grid-item branding graphics wow animate__fadeIn" data-wow-delay="0.4s">
        <a href="#">
            <div class="portfolio-box">
                <div class="portfolio-image bg-gradient-sky-blue-pink">
                    <img src="image path" alt="" />
                    <div class="portfolio-hover justify-content-end d-flex flex-column padding-50px-tb xl-padding-30px-tb">
                        <i class="ti-plus portfolio-plus-icon font-weight-300 text-white absolute-middle-center icon-extra-small move-top-bottom"></i>
                        <div class="alt-font text-white font-weight-500 d-block">Jeremy Dupont</div>
                        <div class="text-medium d-block text-white opacity-7">Photography</div>
                    </div>
                </div>
            </div>
        </a>
    </li>
    <!-- end portfolio item -->
</ul>
NoteFor demo, You can please check this in portfolio-overlay-three-column.html page.
Portfolio switch image
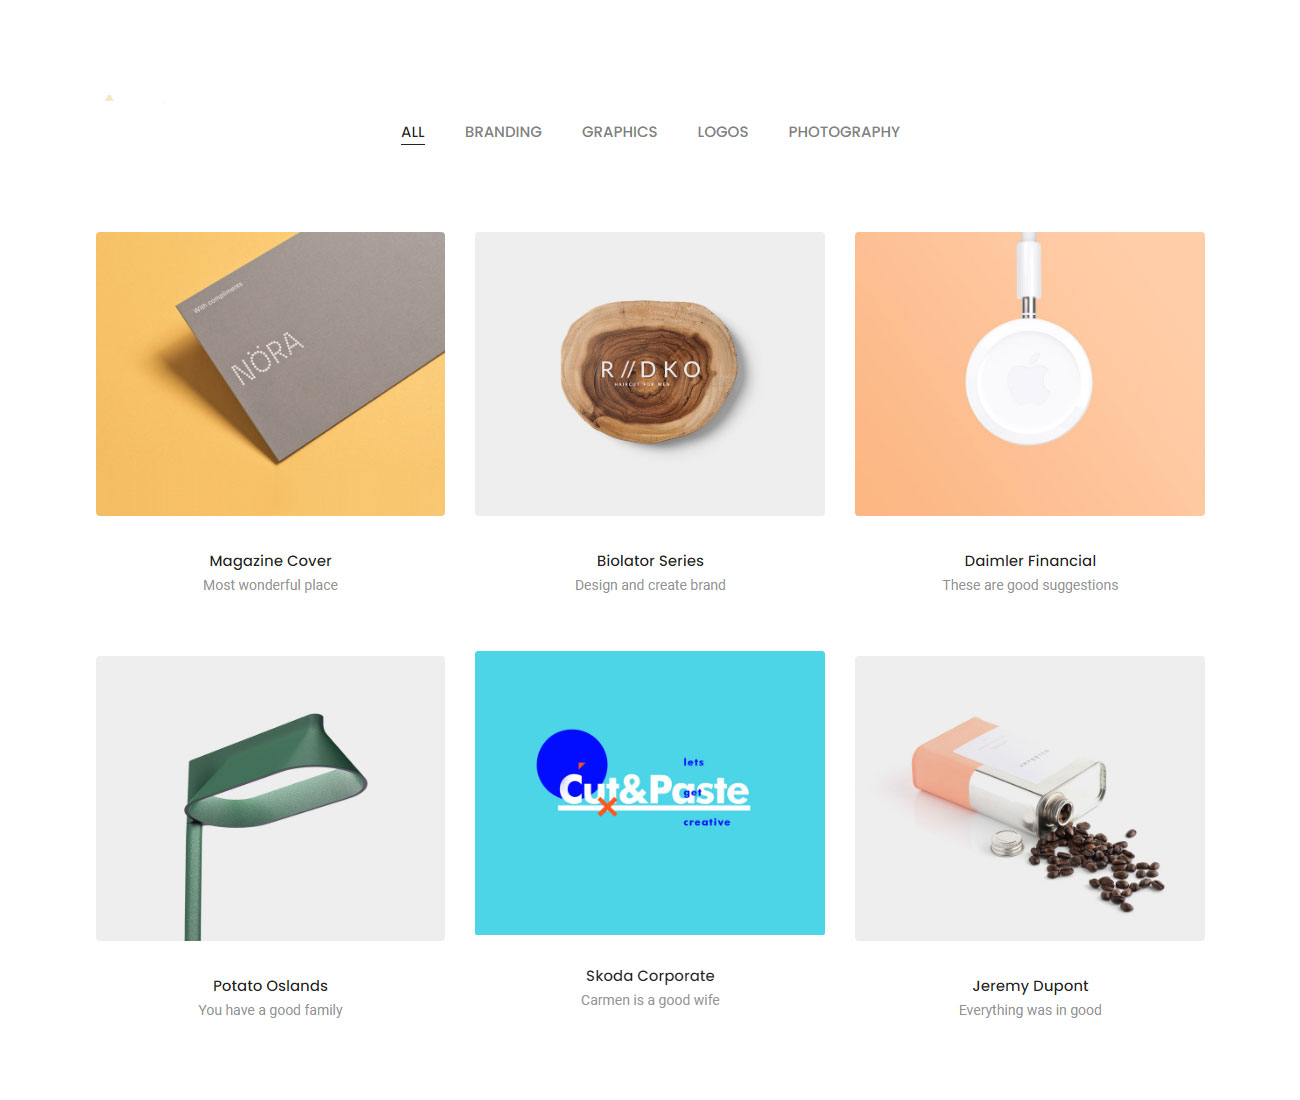
<ul class="portfolio-switch-image portfolio-wrapper grid grid-3col xl-grid-3col lg-grid-3col md-grid-2col sm-grid-2col xs-grid-1col gutter-extra-large text-center">
    <li class="grid-sizer"></li>
    <!-- start portfolio item -->
    <li class="grid-item wow animate__fadeIn">
        <a href="#">
            <div class="portfolio-box">
                <div class="portfolio-image border-radius-4px">
                    <img src="image path" alt="" />
                    <img class="portfolio-switch-image" src="image path" alt="" />
                </div>
                <div class="portfolio-caption padding-30px-tb lg-padding-20px-tb xs-padding-15px-tb">
                    <span class="alt-font text-extra-dark-gray font-weight-500">Magazine Cover</span>
                    <span class="text-medium d-block text-medium-gray">Most wonderful place</span>
                </div>
            </div>
        </a>
    </li>
    <!-- end portfolio item -->
    <!-- start portfolio item -->
    <li class="grid-item branding wow animate__fadeIn" data-wow-delay="0.2s">
        <a href="#">
            <div class="portfolio-box">
                <div class="portfolio-image border-radius-4px">
                    <img src="image path" alt="" />
                    <img class="portfolio-switch-image" src="image path" alt="" />
                </div>
                <div class="portfolio-caption padding-30px-tb lg-padding-20px-tb xs-padding-15px-tb">
                    <span class="alt-font text-extra-dark-gray font-weight-500">Biolator Series</span>
                    <span class="text-medium d-block text-medium-gray">Design and create brand</span>
                </div>
            </div>
        </a>
    </li>
    <!-- end portfolio item -->
    <!-- start portfolio item -->
    <li class="grid-item branding graphics wow animate__fadeIn" data-wow-delay="0.4s">
        <a href="#">
            <div class="portfolio-box">
                <div class="portfolio-image border-radius-4px">
                    <img src="image path" alt="" />
                    <img class="portfolio-switch-image" src="image path" alt="" />
                </div>
                <div class="portfolio-caption padding-30px-tb lg-padding-20px-tb xs-padding-15px-tb">
                    <span class="alt-font text-extra-dark-gray font-weight-500">Daimler Financial</span>
                    <span class="text-medium d-block text-medium-gray">These are good suggestions</span>
                </div>
            </div>
        </a>
    </li>
    <!-- end portfolio item -->
</ul>
NoteFor demo, You can please check this in portfolio-switch-image-three-column.html page.
Portfolio item link
There are different types of portfolio item linking available in LITHO as mentioned below:
Open external page
<!-- start portfolio item -->
<li class="grid-item wow animate__fadeIn">
    <a href="#">
        <div class="portfolio-box">
            <div class="portfolio-image">
                <img src="image path" alt="" />
                <div class="portfolio-hover justify-content-end d-flex flex-column">
                    <div class="bg-white padding-30px-lr padding-15px-tb w-100 d-flex align-items-center align-self-end text-start border-radius-3px xl-padding-20px-lr">
                        <div class="me-auto">
                            <div class="text-medium-gray alt-font margin-5px-top text-small text-uppercase">Photography</div>
                            <div class="font-weight-500 alt-font text-extra-dark-gray text-uppercase">Love Fashion</div>
                        </div>
                        <div class="ms-auto"><i class="line-icon-Arrow-OutRight icon-extra-medium text-extra-dark-gray  position-relative top-3px"></i></div>
                    </div>
                </div>
            </div>
        </div>
    </a>
</li>
<!-- end portfolio item -->
NoteFor demo, You can please check this in portfolio-boxed-three-column.html page.
Lightbox photo gallery
<ul class="portfolio-overlay portfolio-wrapper grid grid-4col xl-grid-4col lg-grid-4col md-grid-2col sm-grid-2col xs-grid-1col gutter-extra-large text-center">
    <li class="grid-sizer"></li>
    <!-- start lightbox gallery item -->
    <li class="grid-item wow animate__fadeIn">
        <a href="image path" title="Lightbox gallery image title..." data-group="lightbox-gallery" class="lightbox-group-gallery-item">
            <div class="portfolio-box">
                <div class="portfolio-image bg-gradient-sky-blue-pink">
                    <img src="image path" alt="" />
                    <div class="portfolio-hover justify-content-end d-flex flex-column padding-50px-tb lg-padding-30px-tb xs-padding-15px-tb">
                        <i class="feather icon-feather-zoom-in portfolio-plus-icon font-weight-300 text-white absolute-middle-center icon-small move-top-bottom"></i>
                    </div>
                </div>
            </div>
        </a>
    </li>
    <!-- end lightbox gallery item -->
</ul>
NoteFor demo, You can please check this in image-gallery.html page.
Video lightbox
<div class="col-12 col-lg-8 position-relative md-margin-50px-bottom wow animate__fadeIn" data-wow-delay="0.1s">
    <img src="image path" alt="" />
    <a href="video path/link" class="popup-youtube absolute-middle-center video-icon-box video-icon-large">
        <span>
            <span class="video-icon bg-white box-shadow-extra-large">
                <i class="icon-simple-line-control-play text-neon-orange"></i>
            </span>
        </span>
    </a>
</div>
Notefor demo visit page video.html page.
Portfolio details page
LITHO offers different layouts of portfolio item dedicated pages as mentioned below:
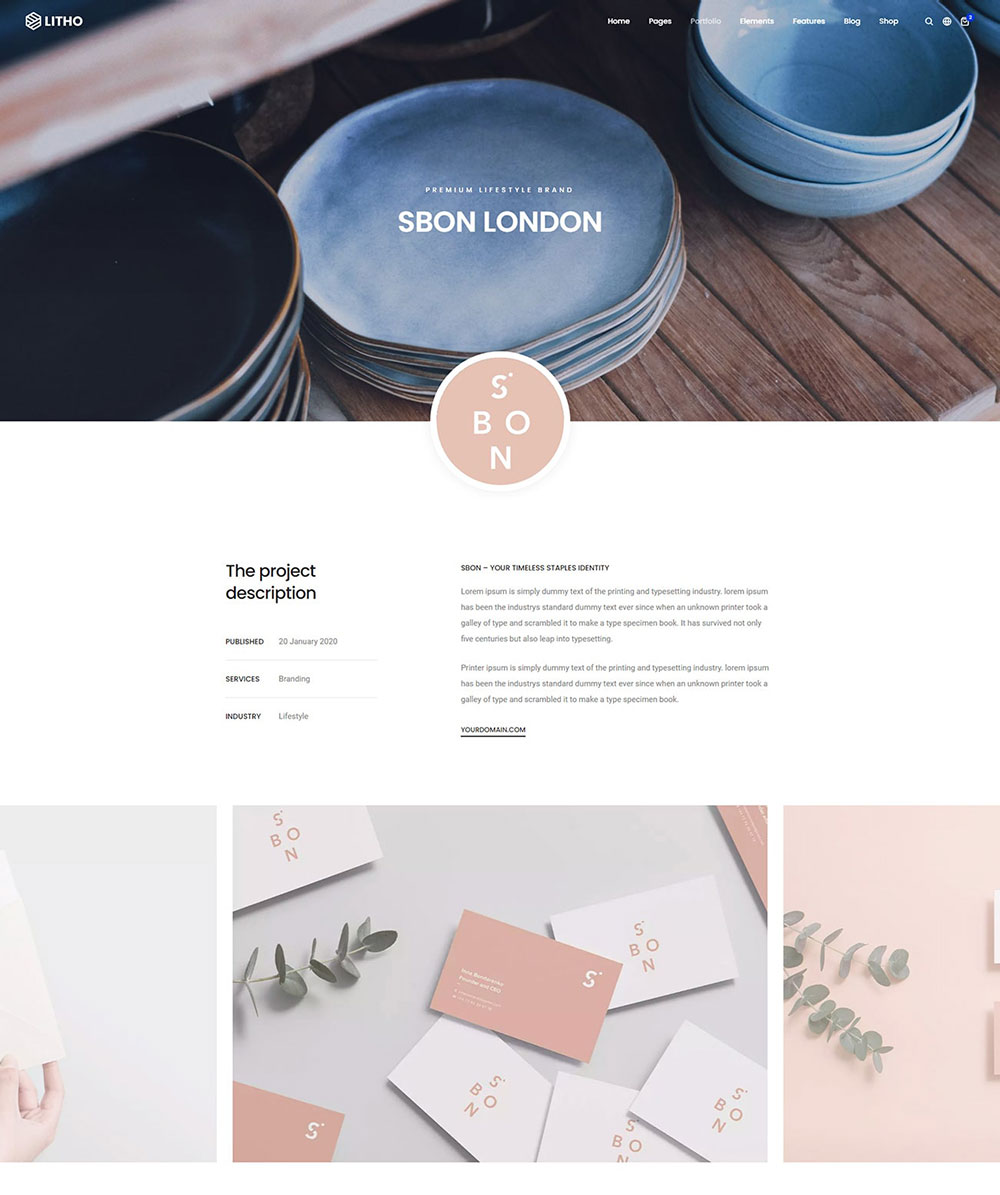


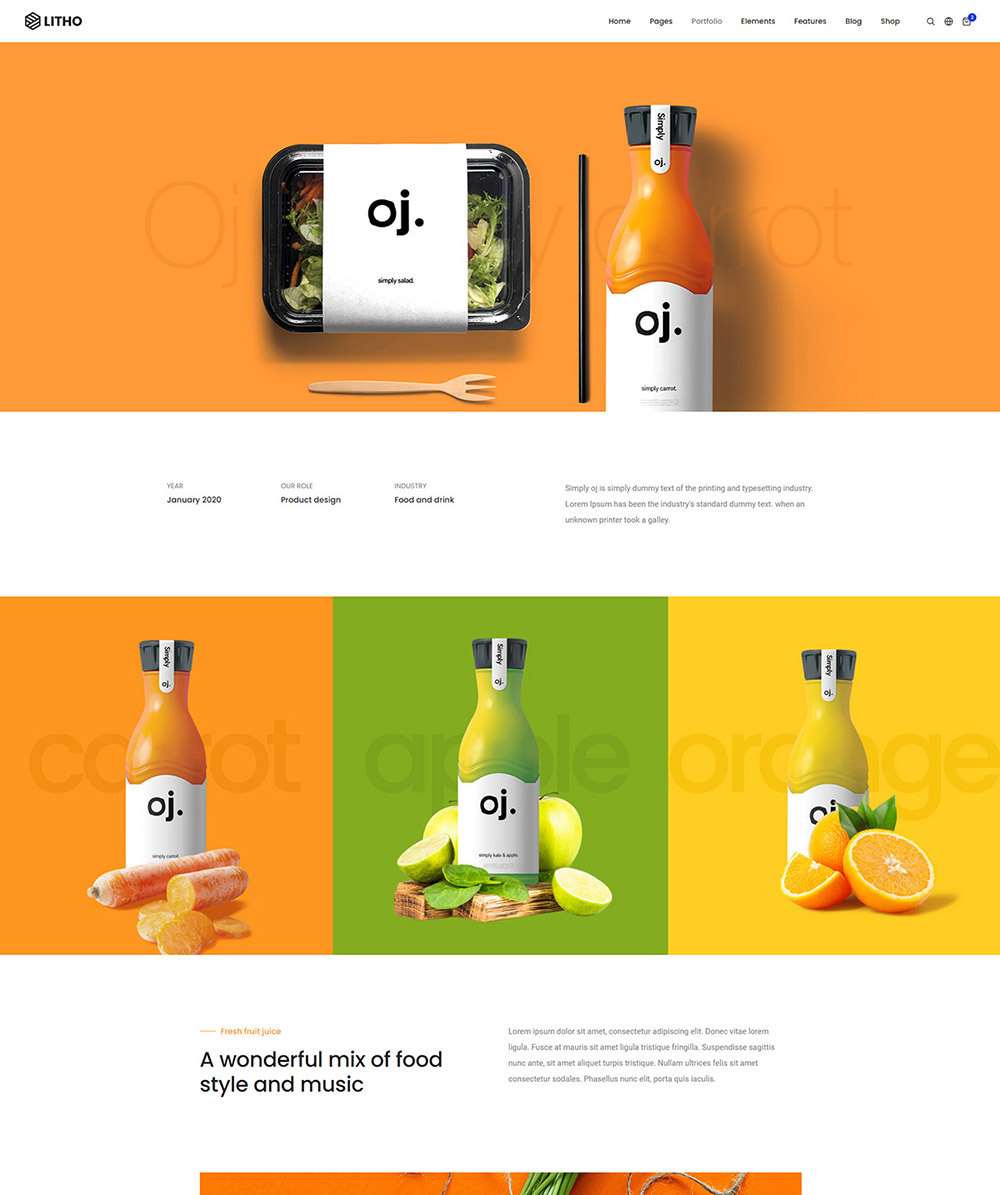

Blog
Our template contains all required pages to create fully working and oriented blog using the provided templates and implement backend programming with features to make it dynamic with database as per your need. Approx 11 pages for blog were html-coded and represented for using. Blog list presented in several forms: masonry, fullwidth, with sidebars. Also we added many types of posts, standard blog.
Blog setup
<div class="col-12 blog-content">
    <div class="col-12 blog-post-content border-all border-color-medium-gray border-radius-6px overflow-hidden text-center p-0 margin-4-half-rem-bottom wow animate__fadeIn">
        <div class="blog-image"><a href="#"><img src="image path" alt=""/></a></div>
        <div class="blog-text d-inline-block w-100">
            ...
        </div>
    </div>
    <!-- start pagination -->
    <div class="col-12 d-flex justify-content-center margin-7-half-rem-top md-margin-5-rem-top wow animate__fadeIn">
        <ul class="pagination pagination-style-01 text-small font-weight-500 align-items-center">
            <li class="page-item"><a class="page-link" href="#"><i class="feather icon-feather-arrow-left icon-extra-small d-xs-none"></i></a></li>
            <li class="page-item"><a class="page-link" href="#">01</a></li>
            <li class="page-item active"><a class="page-link" href="#">02</a></li>
            <li class="page-item"><a class="page-link" href="#">03</a></li>
            <li class="page-item"><a class="page-link" href="#">04</a></li>
            <li class="page-item"><a class="page-link" href="#"><i class="feather icon-feather-arrow-right icon-extra-small  d-xs-none"></i></a></li>
        </ul>
    </div>
    <!-- end pagination -->
</div>
<!-- start sidebar -->
<aside class="col-12 col-xl-3 offset-xl-1 col-lg-4 col-md-7 blog-sidebar lg-padding-4-rem-left md-padding-15px-left">
    ...
</aside>
<!-- end sidebar -->
Note you can add aside section before or after the main section if you don't want to add aside panel then simply remove the aside code and make main section to full width
Blog layout
LITHO includes different types of blog layout as mentioned below to setup your own blog listing as per your requirement:
- Blog grid
- Blog masonry
- Blog classic
- Blog simple
- Blog side image
- Blog metro
- Blog overlay image
- Blog modern
- Blog clean
- Blog widget
- Blog standard
Blog grid
<ul class="blog-grid blog-wrapper grid grid-4col xl-grid-4col lg-grid-3col md-grid-2col sm-grid-2col xs-grid-1col gutter-extra-large">
    <li class="grid-sizer"></li>
    <!-- start blog item -->
    <li class="grid-item wow animate__fadeIn">
        <div class="blog-post border-radius-5px bg-white box-shadow-medium">
            <div class="blog-post-image bg-medium-slate-blue">
                <a href="#" title=""><img src="image path" alt=""></a>
                <a href="#" class="blog-category alt-font">Creative</a>
            </div>
            <div class="post-details padding-3-rem-lr padding-2-half-rem-tb">
                <a href="#" class="alt-font text-small d-inline-block margin-10px-bottom">18 February 2020</a>
                <a href="#" class="alt-font font-weight-500 text-extra-medium text-extra-dark-gray margin-15px-bottom d-block">Creativity is nothing but a mind set free</a>
                <p>Lorem ipsum is simply dummy text printing typesetting industry lorem ipsum been dummy...</p>
                <div class="d-flex align-items-center">
                    <img class="avtar-image" src="image path" alt=""/>
                    <span class="alt-font text-small me-auto">By <a href="#">Torrie asai</a></span>
                    <a href="#" class="blog-like alt-font text-extra-small"><i class="far fa-heart"></i><span>28</span></a>
                </div>
            </div>
        </div>
    </li>
    <!-- end blog item -->
    <!-- start blog item -->
    <li class="grid-item wow animate__fadeIn" data-wow-delay="0.2s">
        <div class="blog-post border-radius-5px bg-white box-shadow-medium">
            <div class="blog-post-image bg-medium-slate-blue">
                <a href="#" title=""><img src="image path" alt=""></a>
                <a href="#" class="blog-category alt-font">Concept</a>
            </div>
            <div class="post-details padding-3-rem-lr padding-2-half-rem-tb">
                <a href="#" class="alt-font text-small d-inline-block margin-10px-bottom">09 January 2020</a>
                <a href="#" class="alt-font font-weight-500 text-extra-medium text-extra-dark-gray margin-15px-bottom d-block">Simplicity is the ultimate sophistication</a>
                <p>Lorem ipsum is simply dummy text printing typesetting industry lorem ipsum been dummy...</p>
                <div class="d-flex align-items-center">
                    <img class="avtar-image" src="image path" alt=""/>
                    <span class="alt-font text-small me-auto">By <a href="#" class="text-sky-blue-hover">Walton smith</a></span>
                    <a href="#" class="blog-like alt-font text-extra-small"><i class="far fa-heart"></i><span>30</span></a>
                </div>
            </div>
        </div>
    </li>
    <!-- end blog item -->
    <!-- start blog item -->
    <li class="grid-item wow animate__fadeIn" data-wow-delay="0.4s">
        <div class="blog-post border-radius-5px bg-white box-shadow-medium">
            <div class="blog-post-image bg-medium-slate-blue">
                <a href="#" title=""><img src="image path" alt=""></a>
                <a href="#" class="blog-category alt-font">Nature</a>
            </div>
            <div class="post-details padding-3-rem-lr padding-2-half-rem-tb">
                <a href="#" class="alt-font text-small d-inline-block margin-10px-bottom">12 December 2020</a>
                <a href="#" class="alt-font font-weight-500 text-extra-medium text-extra-dark-gray margin-15px-bottom d-block">People ignore designs that ignore people</a>
                <p>Lorem ipsum is simply dummy text printing typesetting industry lorem ipsum been dummy...</p>
                <div class="d-flex align-items-center">
                    <img class="avtar-image" src="image path" alt=""/>
                    <span class="alt-font text-small me-auto">By <a href="#" class="text-sky-blue-hover">Bill gardner</a></span>
                    <a href="#" class="blog-like alt-font text-extra-small"><i class="far fa-heart"></i><span>23</span></a>
                </div>
            </div>
        </div>
    </li>
    <!-- end blog item -->
    <!-- start blog item -->
    <li class="grid-item wow animate__fadeIn" data-wow-delay="0.6s">
        <div class="blog-post border-radius-5px bg-white box-shadow-medium">
            <div class="blog-post-image bg-medium-slate-blue">
                <a href="#" title=""><img src="image path" alt=""></a>
                <a href="#" class="blog-category alt-font">Modern</a>
            </div>
            <div class="post-details padding-3-rem-lr padding-2-half-rem-tb">
                <a href="#" class="alt-font text-small d-inline-block margin-10px-bottom">23 November 2020</a>
                <a href="#" class="alt-font font-weight-500 text-extra-medium text-extra-dark-gray margin-15px-bottom d-block">Look at usual things with unusual eyes</a>
                <p>Lorem ipsum is simply dummy text printing typesetting industry lorem ipsum been dummy...</p>
                <div class="d-flex align-items-center">
                    <img class="avtar-image" src="image path" alt=""/>
                    <span class="alt-font text-small me-auto">By <a href="#" class="text-sky-blue-hover">Vico magistre</a></span>
                    <a href="#" class="blog-like alt-font text-extra-small"><i class="far fa-heart"></i><span>35</span></a>
                </div>
            </div>
        </div>
    </li>
    <!-- end blog item -->
</ul>
NoteFor demo, You can please check this in blog-grid.html page.
Blog masonry
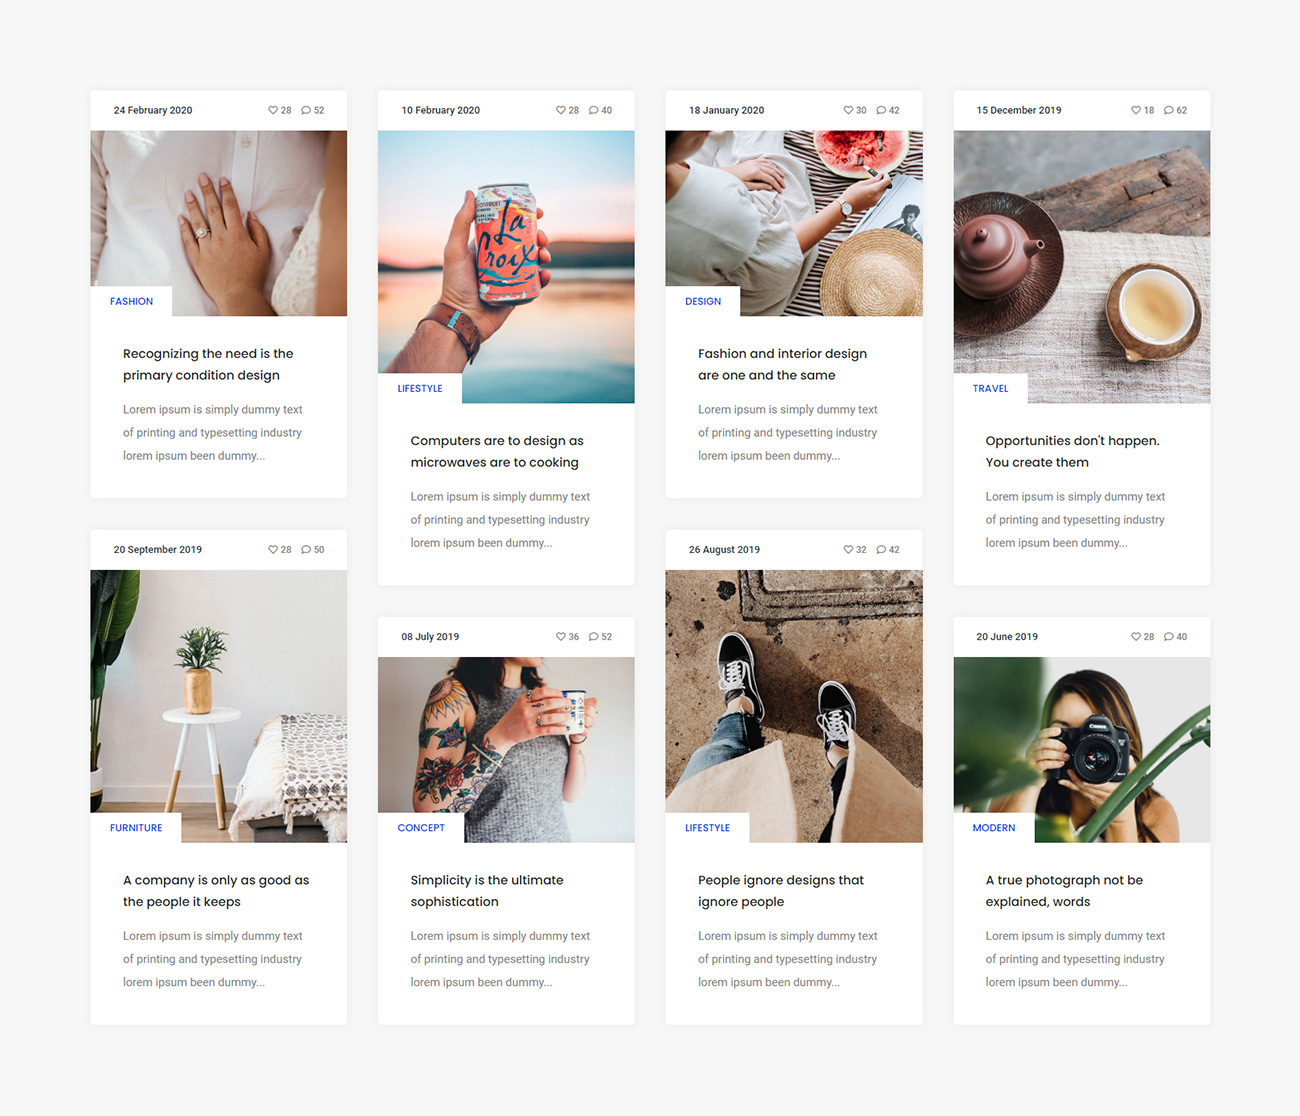
<ul class="blog-masonry blog-wrapper grid grid-4col xl-grid-4col lg-grid-3col md-grid-2col sm-grid-2col xs-grid-1col gutter-double-extra-large">
    <li class="grid-sizer"></li>
    <!-- start blog item -->
    <li class="grid-item wow animate__fadeIn">
        <div class="blog-post border-radius-5px bg-white">
            <div class="d-flex align-items-center font-weight-500 padding-30px-lr padding-15px-tb">
                <a href="#" class="text-small me-auto text-slate-blue">24 February 2020</a>
                <a href="#" class="blog-like text-extra-small"><i class="far fa-heart"></i><span>28</span></a>
                <a href="#" class="blog-comment text-extra-small"><i class="far fa-comment"></i><span>52</span></a>
            </div>
            <div class="blog-post-image">
                <a href="#" title=""><img src="image path" alt=""></a>
                <div class="alt-font blog-category"><a href="#" class="text-uppercase text-fast-blue">Fashion</a></div>
            </div>
            <div class="post-details padding-3-rem-lr padding-2-half-rem-tb lg-padding-2-rem-all md-padding-2-half-rem-tb md-padding-3-rem-lr">
                <a href="#" class="alt-font font-weight-500 text-extra-medium text-extra-dark-gray d-block margin-15px-bottom">Recognizing the need is the primary condition design</a>
                <p>Lorem ipsum is simply dummy text of printing and typesetting industry lorem ipsum been dummy...</p>
            </div>
        </div>
    </li>
    <!-- end blog item -->
    <!-- start blog item -->
    <li class="grid-item wow animate__fadeIn">
        <div class="blog-post border-radius-5px bg-white">
            <div class="d-flex align-items-center font-weight-500 padding-30px-lr padding-15px-tb">
                <a href="#" class="text-small me-auto text-slate-blue">10 February 2020</a>
                <a href="#" class="blog-like text-extra-small"><i class="far fa-heart"></i><span>28</span></a>
                <a href="#" class="blog-comment text-extra-small"><i class="far fa-comment"></i><span>40</span></a>
            </div>
            <div class="blog-post-image">
                <a href="#" title=""><img src="image path" alt=""></a>
                <div class="alt-font blog-category"><a href="#" class="text-uppercase text-fast-blue">Lifestyle</a></div>
            </div>
            <div class="post-details padding-3-rem-lr padding-2-half-rem-tb lg-padding-2-rem-all md-padding-2-half-rem-tb md-padding-3-rem-lr">
                <a href="#" class="alt-font font-weight-500 text-extra-medium text-extra-dark-gray d-block margin-15px-bottom">Computers are to design as microwaves are to cooking</a>
                <p>Lorem ipsum is simply dummy text of printing and typesetting industry lorem ipsum been dummy...</p>
            </div>
        </div>
    </li>
    <!-- end blog item -->
    <!-- start blog item -->
    <li class="grid-item wow animate__fadeIn">
        <div class="blog-post border-radius-5px bg-white">
            <div class="d-flex align-items-center font-weight-500 padding-30px-lr padding-15px-tb">
                <a href="#" class="text-small me-auto text-slate-blue">18 January 2020</a>
                <a href="#" class="blog-like text-extra-small"><i class="far fa-heart"></i><span>30</span></a>
                <a href="#" class="blog-comment text-extra-small"><i class="far fa-comment"></i><span>42</span></a>
            </div>
            <div class="blog-post-image">
                <a href="#" title=""><img src="image path" alt=""></a>
                <div class="alt-font blog-category"><a href="#" class="text-uppercase text-fast-blue">Design</a></div>
            </div>
            <div class="post-details padding-3-rem-lr padding-2-half-rem-tb lg-padding-2-rem-all md-padding-2-half-rem-tb md-padding-3-rem-lr">
                <a href="#" class="alt-font font-weight-500 text-extra-medium text-extra-dark-gray d-block margin-15px-bottom">Fashion and interior design are one and the same</a>
                <p>Lorem ipsum is simply dummy text of printing and typesetting industry lorem ipsum been dummy...</p>
            </div>
        </div>
    </li>
    <!-- end blog item -->
    <!-- start blog item -->
    <li class="grid-item wow animate__fadeIn">
        <div class="blog-post border-radius-5px bg-white">
            <div class="d-flex align-items-center font-weight-500 padding-30px-lr padding-15px-tb">
                <a href="#" class="text-small me-auto text-slate-blue">15 December 2019</a>
                <a href="#" class="blog-like text-extra-small"><i class="far fa-heart"></i><span>18</span></a>
                <a href="#" class="blog-comment text-extra-small"><i class="far fa-comment"></i><span>62</span></a>
            </div>
            <div class="blog-post-image">
                <a href="#" title=""><img src="image path" alt=""></a>
                <div class="alt-font blog-category"><a href="#" class="text-uppercase text-fast-blue">Travel</a></div>
            </div>
            <div class="post-details padding-3-rem-lr padding-2-half-rem-tb lg-padding-2-rem-all md-padding-2-half-rem-tb md-padding-3-rem-lr">
                <a href="#" class="alt-font font-weight-500 text-extra-medium text-extra-dark-gray d-block margin-15px-bottom">Opportunities don't happen. You create them</a>
                <p>Lorem ipsum is simply dummy text of printing and typesetting industry lorem ipsum been dummy...</p>
            </div>
        </div>
    </li>
    <!-- end blog item -->
</ul>
NoteFor demo, You can please check this in blog-masonry.html page.
Blog classic
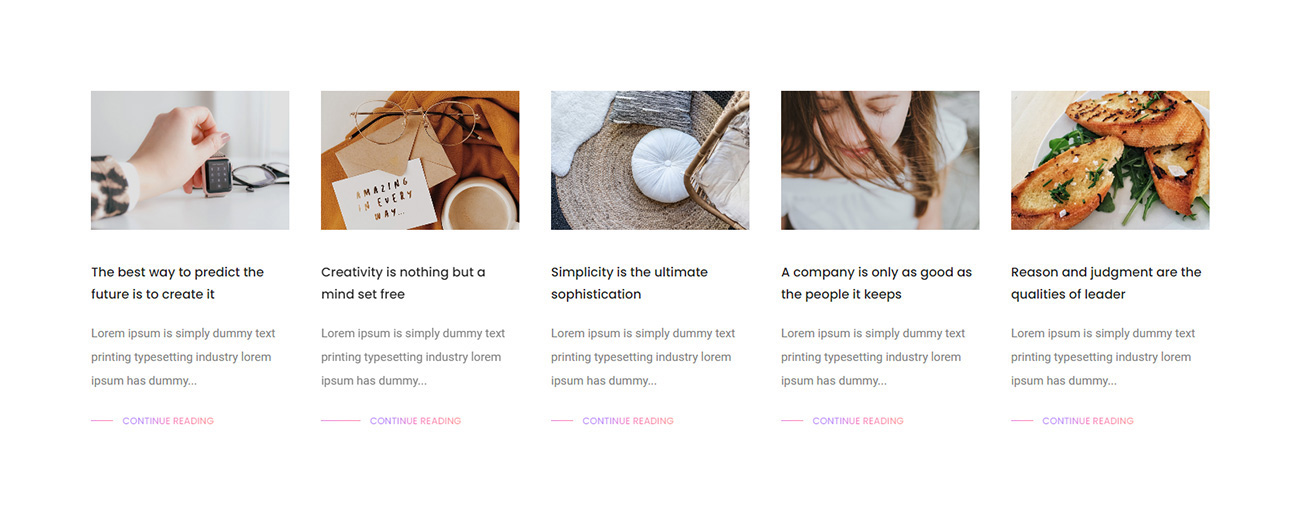
<ul class="blog-classic blog-wrapper grid grid-5col xl-grid-4col lg-grid-3col md-grid-2col sm-grid-2col xs-grid-1col gutter-double-extra-large">
    <li class="grid-sizer"></li>
    <!-- start blog item -->
    <li class="grid-item wow animate__fadeIn">
        <div class="blog-post">
            <div class="blog-post-image margin-40px-bottom md-margin-35px-bottom xs-margin-25px-bottom">
                <a href="#"><img src="image path" alt=""/></a>
            </div>
            <div class="post-details margin-30px-bottom md-margin-10px-bottom xs-no-margin-bottom">
                <a href="#" class="alt-font font-weight-500 text-extra-medium text-extra-dark-gray d-block margin-20px-bottom xs-margin-10px-bottom">The best way to predict the future is to create it</a>
                <p class="w-95">Lorem ipsum is simply dummy text printing typesetting industry lorem ipsum has dummy...</p>
                <span class="separator bg-gradient-light-purple-light-orange"></span>
                <a href="#" class="alt-font font-weight-500 text-extra-small text-uppercase text-gradient-light-purple-light-orange">Continue reading</a>
            </div>
        </div>
    </li>
    <!-- end blog item -->
    <!-- start blog item -->
    <li class="grid-item wow animate__fadeIn" data-wow-delay="0.2s">
        <div class="blog-post">
            <div class="blog-post-image margin-40px-bottom md-margin-35px-bottom xs-margin-25px-bottom">
                <a href="#"><img src="image path" alt=""/></a>
            </div>
            <div class="post-details margin-30px-bottom md-margin-10px-bottom xs-no-margin-bottom">
                <a href="#" class="alt-font font-weight-500 text-extra-medium text-extra-dark-gray d-block margin-20px-bottom xs-margin-10px-bottom">Creativity is nothing but a mind set free</a>
                <p class="w-95">Lorem ipsum is simply dummy text printing typesetting industry lorem ipsum has dummy...</p>
                <span class="separator bg-gradient-light-purple-light-orange"></span>
                <a href="#" class="alt-font font-weight-500 text-extra-small text-uppercase text-gradient-light-purple-light-orange">Continue reading</a>
            </div>
        </div>
    </li>
    <!-- end blog item -->
    <!-- start blog item -->
    <li class="grid-item wow animate__fadeIn" data-wow-delay="0.4s">
        <div class="blog-post">
            <div class="blog-post-image margin-40px-bottom md-margin-35px-bottom xs-margin-25px-bottom">
                <a href="#"><img src="image path" alt=""/></a>
            </div>
            <div class="post-details margin-30px-bottom md-margin-10px-bottom xs-no-margin-bottom">
                <a href="#" class="alt-font font-weight-500 text-extra-medium text-extra-dark-gray d-block margin-20px-bottom xs-margin-10px-bottom">Simplicity is the ultimate sophistication</a>
                <p class="w-95">Lorem ipsum is simply dummy text printing typesetting industry lorem ipsum has dummy...</p>
                <span class="separator bg-gradient-light-purple-light-orange"></span>
                <a href="#" class="alt-font font-weight-500 text-extra-small text-uppercase text-gradient-light-purple-light-orange">Continue reading</a>
            </div>
        </div>
    </li>
    <!-- end blog item -->
    <!-- start blog item -->
    <li class="grid-item wow animate__fadeIn" data-wow-delay="0.6s">
        <div class="blog-post">
            <div class="blog-post-image margin-40px-bottom md-margin-35px-bottom xs-margin-25px-bottom">
                <a href="#"><img src="image path" alt=""/></a>
            </div>
            <div class="post-details margin-30px-bottom md-margin-10px-bottom xs-no-margin-bottom">
                <a href="#" class="alt-font font-weight-500 text-extra-medium text-extra-dark-gray d-block margin-20px-bottom xs-margin-10px-bottom"> A company is only as good as the people it keeps</a>
                <p class="w-95">Lorem ipsum is simply dummy text printing typesetting industry lorem ipsum has dummy...</p>
                <span class="separator bg-gradient-light-purple-light-orange"></span>
                <a href="#" class="alt-font font-weight-500 text-extra-small text-uppercase text-gradient-light-purple-light-orange">Continue reading</a>
            </div>
        </div>
    </li>
    <!-- end blog item -->
</ul>
NoteFor demo, You can please check this in blog-classic.html page.
Blog simple
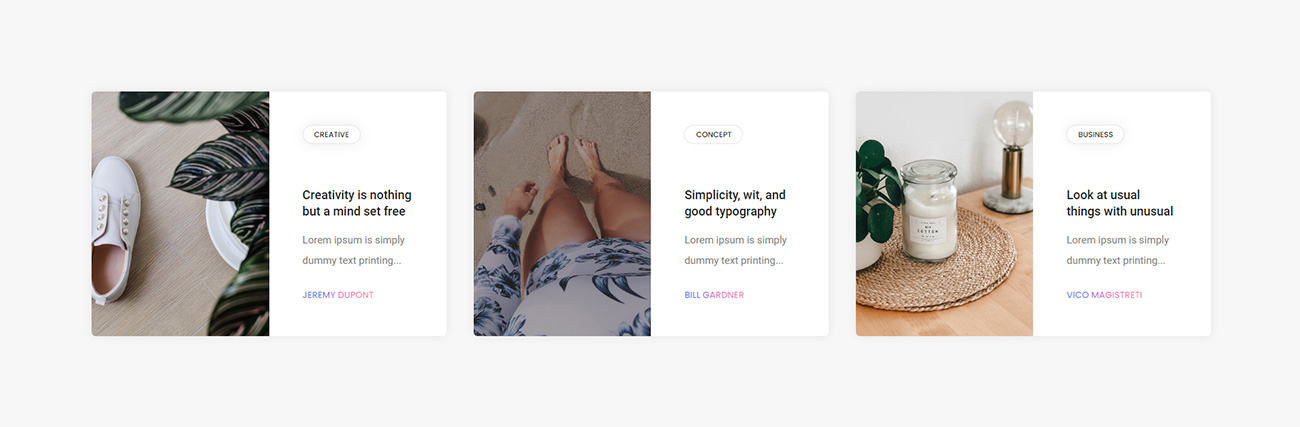
<ul class="blog-simple blog-wrapper grid grid-3col xl-grid-2col lg-grid-2col md-grid-1col sm-grid-1col xs-grid-1col gutter-double-extra-large">
    <li class="grid-sizer"></li>
    <!-- start blog item -->
    <li class="grid-item wow animate__fadeIn">
        <div class="blog-post box-shadow-small border-radius-6px">
            <div class="blog-post-image cover-background xs-h-250px" style="background-image: url('image path')">
                <a href="#" class="blog-post-image-overlay bg-dark-slate-blue"></a>
            </div>
            <div class="post-details bg-white padding-3-half-rem-all lg-padding-2-half-rem-all md-padding-3-half-rem-all">
                <a href="#" class="blog-category alt-font text-extra-dark-gray border-color-black-transparent bg-white align-self-start margin-4-half-rem-bottom xs-margin-2-half-rem-bottom">Creative</a>
                <a href="#" class="font-weight-500 text-large line-height-24px text-extra-dark-gray margin-15px-bottom xs-margin-10px-bottom">Creativity is nothing but a mind set free</a>
                <p>Lorem ipsum is simply dummy text printing...</p>
                <a href="#" class="alt-font font-weight-500 text-small text-gradient-sky-blue-pink text-uppercase align-self-start">Jeremy dupont</a>
            </div>
        </div>
    </li>
    <!-- end blog item -->
    <!-- start blog item -->
    <li class="grid-item wow animate__fadeIn" data-wow-delay="0.2s">
        <div class="blog-post box-shadow-small border-radius-6px">
            <div class="blog-post-image cover-background xs-h-250px" style="background-image: url('image path')">
                <a href="#" class="blog-post-image-overlay bg-dark-slate-blue"></a>
            </div>
            <div class="post-details bg-white padding-3-half-rem-all lg-padding-2-half-rem-all md-padding-3-half-rem-all">
                <a href="#" class="blog-category alt-font text-extra-dark-gray border-color-black-transparent bg-white align-self-start margin-4-half-rem-bottom xs-margin-2-half-rem-bottom">Concept</a>
                <a href="#" class="font-weight-500 text-large line-height-24px text-extra-dark-gray margin-15px-bottom xs-margin-10px-bottom">Simplicity, wit, and good typography</a>
                <p>Lorem ipsum is simply dummy text printing...</p>
                <a href="#" class="alt-font font-weight-500 text-small text-gradient-sky-blue-pink text-uppercase align-self-start">Bill gardner</a>
            </div>
        </div>
    </li>
    <!-- end blog item -->
    <!-- start blog item -->
    <li class="grid-item wow animate__fadeIn" data-wow-delay="0.4s">
        <div class="blog-post box-shadow-small border-radius-6px">
            <div class="blog-post-image cover-background xs-h-250px" style="background-image: url('image path')">
                <a href="#" class="blog-post-image-overlay bg-dark-slate-blue"></a>
            </div>
            <div class="post-details bg-white padding-3-half-rem-all lg-padding-2-half-rem-all md-padding-3-half-rem-all">
                <a href="#" class="blog-category alt-font text-extra-dark-gray border-color-black-transparent bg-white align-self-start margin-4-half-rem-bottom xs-margin-2-half-rem-bottom">Business</a>
                <a href="#" class="font-weight-500 text-large line-height-24px text-extra-dark-gray margin-15px-bottom xs-margin-10px-bottom">Look at usual things with unusual</a>
                <p>Lorem ipsum is simply dummy text printing...</p>
                <a href="#" class="alt-font font-weight-500 text-small text-gradient-sky-blue-pink text-uppercase align-self-start">Vico magistreti</a>
            </div>
        </div>
    </li>
    <!-- end blog item -->
    <!-- start blog item -->
    <li class="grid-item wow animate__fadeIn">
        <div class="blog-post box-shadow-small border-radius-6px">
            <div class="blog-post-image cover-background xs-h-250px" style="background-image: url('image path')">
                <a href="#" class="blog-post-image-overlay bg-dark-slate-blue"></a>
            </div>
            <div class="post-details bg-white padding-3-half-rem-all lg-padding-2-half-rem-all md-padding-3-half-rem-all">
                <a href="#" class="blog-category alt-font text-extra-dark-gray border-color-black-transparent bg-white align-self-start margin-4-half-rem-bottom xs-margin-2-half-rem-bottom">Modern</a>
                <a href="#" class="font-weight-500 text-large line-height-24px text-extra-dark-gray margin-15px-bottom xs-margin-10px-bottom">Make it simple, but significant</a>
                <p>Lorem ipsum is simply dummy text printing...</p>
                <a href="#" class="alt-font font-weight-500 text-small text-gradient-sky-blue-pink text-uppercase align-self-start">Don draper</a>
            </div>
        </div>
    </li>
    <!-- end blog item -->
</ul>
NoteFor demo, You can please check this in blog-simple.html page.
Blog side image

<div class="blog-list blog-side-image">
    <!-- start blog item -->
    <div class="blog-post bg-white box-shadow-medium margin-30px-bottom wow animate__fadeIn">
        <div class="d-flex flex-column flex-md-row align-items-center">
            <div class="blog-post-image sm-margin-25px-bottom">
                <a href="#" title=""><img src="image path" alt="" /></a>
            </div>
            <div class="post-details padding-4-half-rem-lr md-padding-2-half-rem-lr sm-no-padding">
                <a href="#" class="alt-font text-small text-fast-blue font-weight-500 text-uppercase d-inline-block margin-15px-bottom sm-margin-10px-bottom">18 March 2020</a>
                <a href="#" class="alt-font font-weight-500 text-extra-large text-extra-dark-gray d-block margin-20px-bottom sm-margin-10px-bottom">Recognizing the need the primary condition design</a>
                <p class="margin-seventeen-bottom sm-margin-25px-bottom">Lorem ipsum is simply dummy text of the printing and typesetting industry lorem ipsum has been dummy text...</p>
                <div class="alt-font text-extra-small text-uppercase d-flex align-items-center sm-margin-10px-bottom">
                    <img class="avtar-image" src="image path" alt="">
                    <span>
                        <span class="d-inline-block">By <a href="#" class="text-extra-dark-gray">Joe sparano</a></span>
                        <span class="separator bg-medium-gray"></span>
                        <span class="d-inline-block">In <a href="#" class="text-extra-dark-gray">Creative</a></span>
                    </span>
                </div>
            </div>
        </div>
    </div>
    <!-- end blog item -->
    <!-- start blog item -->
    <div class="blog-post bg-white box-shadow-medium margin-30px-bottom wow animate__fadeIn">
        <div class="d-flex flex-column flex-md-row align-items-center">
            <div class="blog-post-image sm-margin-25px-bottom">
                <a href="#" title=""><img src="image path" alt="" /></a>
            </div>
            <div class="post-details padding-4-half-rem-lr md-padding-2-half-rem-lr sm-no-padding">
                <a href="#" class="alt-font text-small text-fast-blue font-weight-500 text-uppercase d-inline-block margin-15px-bottom sm-margin-10px-bottom">25 February 2020</a>
                <a href="#" class="alt-font font-weight-500 text-extra-large text-extra-dark-gray d-block margin-20px-bottom sm-margin-10px-bottom">Good design is obvious great design transparent</a>
                <p class="margin-seventeen-bottom sm-margin-25px-bottom">Lorem ipsum is simply dummy text of the printing and typesetting industry lorem ipsum has been dummy text...</p>
                <div class="alt-font text-extra-small text-uppercase d-flex align-items-center sm-margin-10px-bottom">
                    <img class="avtar-image" src="image path" alt="">
                    <span>
                        <span class="d-inline-block">By <a href="#" class="text-extra-dark-gray">Lindsey bucki</a></span>
                        <span class="separator bg-medium-gray"></span>
                        <span class="d-inline-block">In <a href="#" class="text-extra-dark-gray">Business</a></span>
                    </span>
                </div>
            </div>
        </div>
    </div>
    <!-- end blog item -->
    <!-- start blog item -->
    <div class="blog-post bg-white box-shadow-medium margin-30px-bottom wow animate__fadeIn">
        <div class="d-flex flex-column flex-md-row align-items-center">
            <div class="blog-post-image sm-margin-25px-bottom">
                <a href="#" title=""><img src="image path" alt="" /></a>
            </div>
            <div class="post-details padding-4-half-rem-lr md-padding-2-half-rem-lr sm-no-padding">
                <a href="#" class="alt-font text-small text-fast-blue font-weight-500 text-uppercase d-inline-block margin-15px-bottom sm-margin-10px-bottom">30 January 2020</a>
                <a href="#" class="alt-font font-weight-500 text-extra-large text-extra-dark-gray d-block margin-20px-bottom sm-margin-10px-bottom">Any product that needs manual to work is broken</a>
                <p class="margin-seventeen-bottom sm-margin-25px-bottom">Lorem ipsum is simply dummy text of the printing and typesetting industry lorem ipsum has been dummy text...</p>
                <div class="alt-font text-extra-small text-uppercase d-flex align-items-center sm-margin-10px-bottom">
                    <img class="avtar-image" src="image path" alt="">
                    <span>
                        <span class="d-inline-block">By <a href="#" class="text-extra-dark-gray">Bill gardner</a></span>
                        <span class="separator bg-medium-gray"></span>
                        <span class="d-inline-block">In <a href="#" class="text-extra-dark-gray">Modern</a></span>
                    </span>
                </div>
            </div>
        </div>
    </div>
    <!-- end blog item -->
    <!-- start blog item -->
    <div class="blog-post bg-white box-shadow-medium margin-30px-bottom wow animate__fadeIn">
        <div class="d-flex flex-column flex-md-row align-items-center">
            <div class="blog-post-image sm-margin-25px-bottom">
                <a href="#" title=""><img src="image path" alt="" /></a>
            </div>
            <div class="post-details padding-4-half-rem-lr md-padding-2-half-rem-lr sm-no-padding">
                <a href="#" class="alt-font text-small text-fast-blue font-weight-500 text-uppercase d-inline-block margin-15px-bottom sm-margin-10px-bottom">23 December 2019</a>
                <a href="#" class="alt-font font-weight-500 text-extra-large text-extra-dark-gray d-block margin-20px-bottom sm-margin-10px-bottom">Everything is designed for things are the designed</a>
                <p class="margin-seventeen-bottom sm-margin-25px-bottom">Lorem ipsum is simply dummy text of the printing and typesetting industry lorem ipsum has been dummy text...</p>
                <div class="alt-font text-extra-small text-uppercase d-flex align-items-center sm-margin-10px-bottom">
                    <img class="avtar-image" src="image path" alt="">
                    <span>
                        <span class="d-inline-block">By <a href="#" class="text-extra-dark-gray">Mark lamb</a></span>
                        <span class="separator bg-medium-gray"></span>
                        <span class="d-inline-block">In <a href="#" class="text-extra-dark-gray">Lifestyle</a></span>
                    </span>
                </div>
            </div>
        </div>
    </div>
    <!-- end blog item -->
</div>
NoteFor demo, You can please check this in blog-side-image.html page.
Blog metro
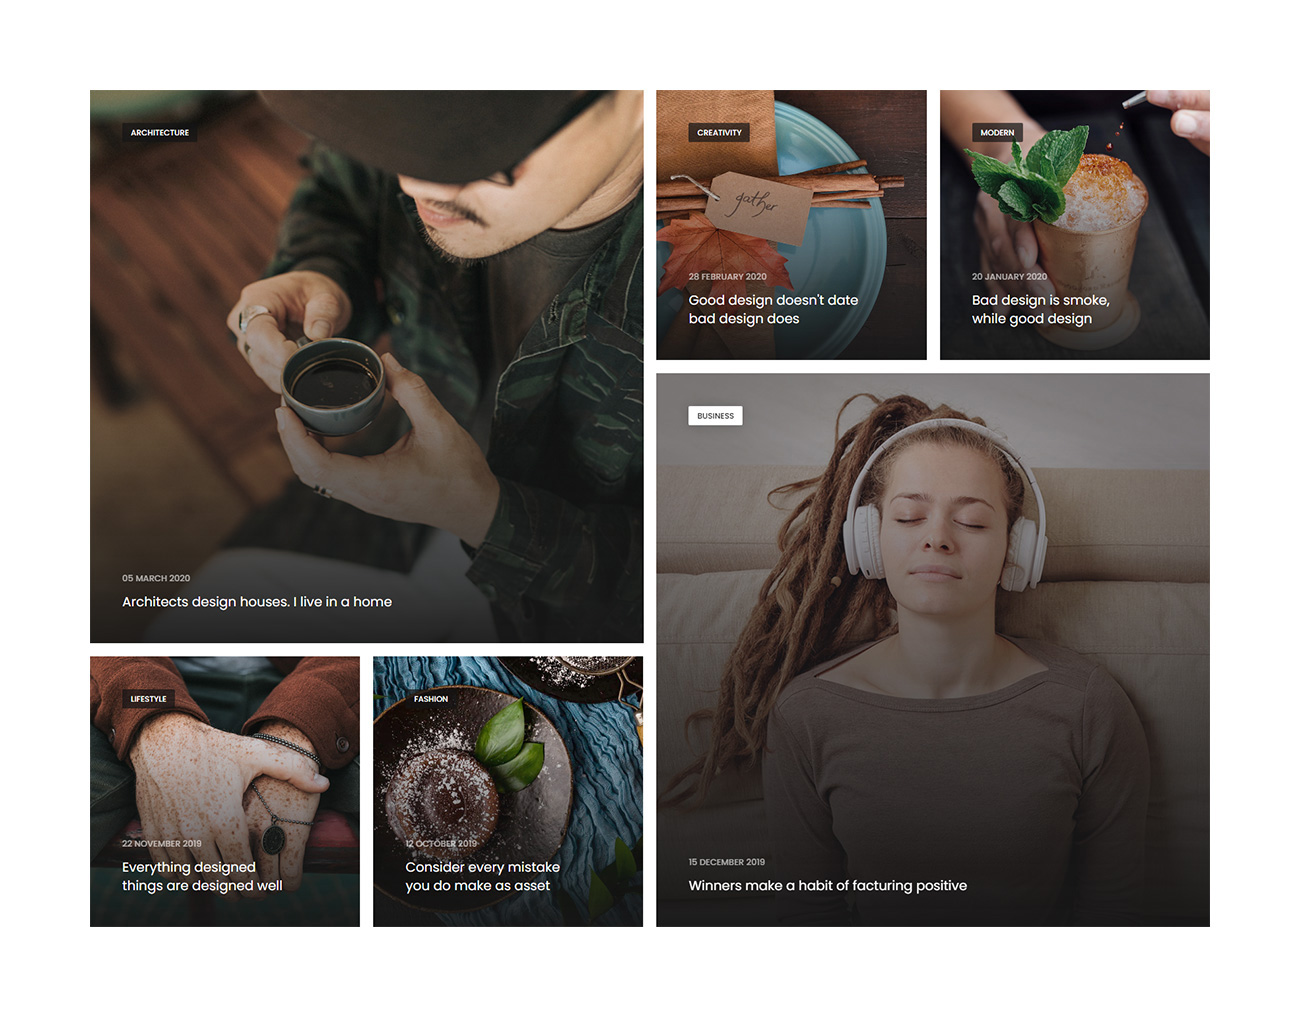
<ul class="blog-metro blog-wrapper grid grid-4col xl-grid-4col lg-grid-3col md-grid-2col sm-grid-2col xs-grid-1col gutter-large">
    <li class="grid-sizer"></li>
    <!-- start blog item -->
    <li class="grid-item grid-item-double last-paragraph-no-margin wow animate__fadeIn">
        <div class="blog-post">
            <div class="blog-post-image bg-dark-slate-blue">
                <img src="image path" alt="">
                <div class="blog-overlay"></div>
            </div>
            <div class="post-details d-flex flex-column align-item-start padding-3-half-rem-all xl-padding-3-rem-all">
                <div class="mb-auto w-100">
                    <a href="#" class="blog-category alt-font">Architecture</a>
                </div>
                <div class="align-self-end w-100">
                    <a href="#" class="alt-font font-weight-500 text-small d-inline-block text-white text-uppercase opacity-6 margin-10px-bottom">05 March 2020</a>
                    <a href="#" class="alt-font text-white text-extra-large mb-0 d-block w-85 xl-w-100">Architects design houses. I live in a home</a>
                </div>
            </div>
        </div>
    </li>
    <!-- end blog item -->
    <!-- start blog item -->
    <li class="grid-item last-paragraph-no-margin wow animate__fadeIn">
        <div class="blog-post">
            <div class="blog-post-image bg-dark-slate-blue">
                <img src="image path" alt="">
                <div class="blog-overlay"></div>
            </div>
            <div class="post-details d-flex flex-column align-item-start padding-3-half-rem-all xl-padding-3-rem-all">
                <div class="mb-auto w-100">
                    <a href="#" class="blog-category alt-font">Creativity</a>
                </div>
                <div class="align-self-end w-100">
                    <a href="#" class="alt-font font-weight-500 text-small d-inline-block text-white text-uppercase opacity-6 margin-10px-bottom">28 February 2020</a>
                    <a href="#" class="alt-font text-white text-extra-large mb-0 d-block w-85 xl-w-100">Good design doesn't date bad design does</a>
                </div>
            </div>
        </div>
    </li>
    <!-- end blog item -->
    <!-- start blog item -->
    <li class="grid-item last-paragraph-no-margin wow animate__fadeIn">
        <div class="blog-post">
            <div class="blog-post-image bg-dark-slate-blue">
                <img src="image path" alt="">
                <div class="blog-overlay"></div>
            </div>
            <div class="post-details d-flex flex-column align-item-start padding-3-half-rem-all xl-padding-3-rem-all">
                <div class="mb-auto w-100">
                    <a href="#" class="blog-category alt-font">Modern</a>
                </div>
                <div class="align-self-end w-100">
                    <a href="#" class="alt-font font-weight-500 text-small d-inline-block text-white text-uppercase opacity-6 margin-10px-bottom">20 January 2020</a>
                    <a href="#" class="alt-font text-white text-extra-large mb-0 d-block w-85 xl-w-100">Bad design is smoke, while good design</a>
                </div>
            </div>
        </div>
    </li>
    <!-- end blog item -->
    <!-- start blog item -->
    <li class="grid-item grid-item-double wow animate__fadeIn last-paragraph-no-margin">
        <div class="blog-post">
            <div class="blog-post-image bg-dark-slate-blue">
                <img src="image path" alt="">
                <div class="blog-overlay"></div>
            </div>
            <div class="post-details d-flex flex-column align-item-start padding-3-half-rem-all xl-padding-3-rem-all">
                <div class="mb-auto w-100">
                    <a href="#" class="blog-category alt-font">Business</a>
                </div>
                <div class="align-self-end w-100">
                    <a href="#" class="alt-font font-weight-500 text-small d-inline-block text-white text-uppercase opacity-6 margin-10px-bottom">15 December 2019</a>
                    <a href="#" class="alt-font text-white text-extra-large mb-0 d-block w-85 xl-w-100">Winners make a habit of facturing positive</a>
                </div>
            </div>
        </div>
    </li>
    <!-- end blog item -->
</ul>
NoteFor demo, You can please check this in blog-metro.html page.
Blog overlay image
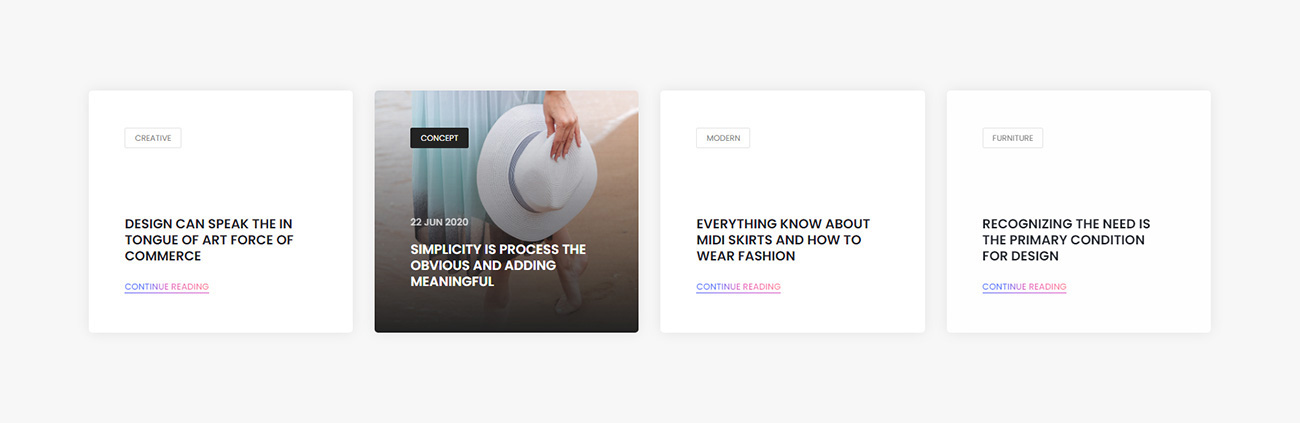
<ul class="blog-overlay-image blog-wrapper grid grid-4col xl-grid-3col lg-grid-3col md-grid-2col sm-grid-2col xs-grid-1col gutter-extra-large">
    <li class="grid-sizer"></li>
    <!-- start blog item -->
    <li class="grid-item wow animate__fadeIn">
        <div class="blog-post bg-white box-shadow-medium border-radius-5px padding-3-half-rem-all xl-padding-2-half-rem-all">
            <div class="blog-post-image">
                <div class="cover-background h-100 w-100" style="background-image: url('image path')"></div>
                <div class="blog-overlay-image bg-transparent-gradiant-black"></div>
            </div>
            <div class="post-details">
                <a href="#" class="blog-category alt-font border-color-medium-gray margin-6-half-rem-bottom">Creative</a>
                <a href="#" class="post-date alt-font font-weight-500 text-small text-uppercase d-block">18 May 2020</a>
                <a href="#" class="post-title alt-font text-large font-weight-600 text-dark-slate-blue text-uppercase d-block margin-15px-bottom w-95 sm-w-100">Design can speak the in tongue of art force of commerce</a>
                <a href="#" class="post-read alt-font font-weight-500 text-extra-small text-uppercase text-gradient-sky-blue-pink border-bottom border-gradient-sky-blue-pink d-inline-block">Continue reading</a>
            </div>
        </div>
    </li>
    <!-- end blog item -->
    <!-- start blog item -->
    <li class="grid-item wow animate__fadeIn" data-wow-delay="0.2s">
        <div class="blog-post bg-white box-shadow-medium border-radius-5px padding-3-half-rem-all xl-padding-2-half-rem-all">
            <div class="blog-post-image">
                <div class="cover-background h-100 w-100" style="background-image: url('image path')"></div>
                <div class="blog-overlay-image bg-transparent-gradiant-black"></div>
            </div>
            <div class="post-details">
                <a href="#" class="blog-category alt-font border-color-medium-gray margin-6-half-rem-bottom">Concept</a>
                <a href="#" class="post-date alt-font font-weight-500 text-small text-uppercase d-block" title="">22 Jun 2020</a>
                <a href="#" class="post-title alt-font text-large font-weight-600 text-dark-slate-blue text-uppercase d-block margin-15px-bottom w-95 sm-w-100">Simplicity is process the obvious and adding meaningful</a>
                <a href="#" class="post-read alt-font font-weight-500 text-extra-small text-uppercase text-gradient-sky-blue-pink border-bottom border-gradient-sky-blue-pink d-inline-block">Continue reading</a>
            </div>
        </div>
    </li>
    <!-- end blog item -->
    <!-- start blog item -->
    <li class="grid-item wow animate__fadeIn" data-wow-delay="0.4s">
        <div class="blog-post bg-white box-shadow-medium border-radius-5px padding-3-half-rem-all xl-padding-2-half-rem-all">
            <div class="blog-post-image">
                <div class="cover-background h-100 w-100" style="background-image: url('image path')"></div>
                <div class="blog-overlay-image bg-transparent-gradiant-black"></div>
            </div>
            <div class="post-details">
                <a href="#" class="blog-category alt-font border-color-medium-gray margin-6-half-rem-bottom">Modern</a>
                <a href="#" class="post-date alt-font font-weight-500 text-small text-uppercase d-block" title="">05 Aug 2020</a>
                <a href="#" class="post-title alt-font text-large font-weight-600 text-dark-slate-blue text-uppercase d-block margin-15px-bottom w-95 sm-w-100">Everything know about midi skirts and how to wear fashion</a>
                <a href="#" class="post-read alt-font font-weight-500 text-extra-small text-uppercase text-gradient-sky-blue-pink border-bottom border-gradient-sky-blue-pink d-inline-block">Continue reading</a>
            </div>
        </div>
    </li>
    <!-- end blog item -->
    <!-- start blog item -->
    <li class="grid-item wow animate__fadeIn" data-wow-delay="0.6s">
        <div class="blog-post bg-white box-shadow-medium border-radius-5px padding-3-half-rem-all xl-padding-2-half-rem-all">
            <div class="blog-post-image">
                <div class="cover-background h-100 w-100" style="background-image: url('image path')"></div>
                <div class="blog-overlay-image bg-transparent-gradiant-black"></div>
            </div>
            <div class="post-details">
                <a href="#" class="blog-category alt-font border-color-medium-gray margin-6-half-rem-bottom">Furniture</a>
                <a href="#" class="post-date alt-font font-weight-500 text-small text-uppercase d-block" title="">15 Apr 2020</a>
                <a href="#" class="post-title alt-font text-large font-weight-600 text-dark-slate-blue text-uppercase d-block margin-15px-bottom w-95 sm-w-100">Recognizing the need is the primary condition for design</a>
                <a href="#" class="post-read alt-font font-weight-500 text-extra-small text-uppercase text-gradient-sky-blue-pink border-bottom border-gradient-sky-blue-pink d-inline-block">Continue reading</a>
            </div>
        </div>
    </li>
    <!-- end blog item -->
</ul>
NoteFor demo, You can please check this in blog-overlay-image.html page.
Blog modern
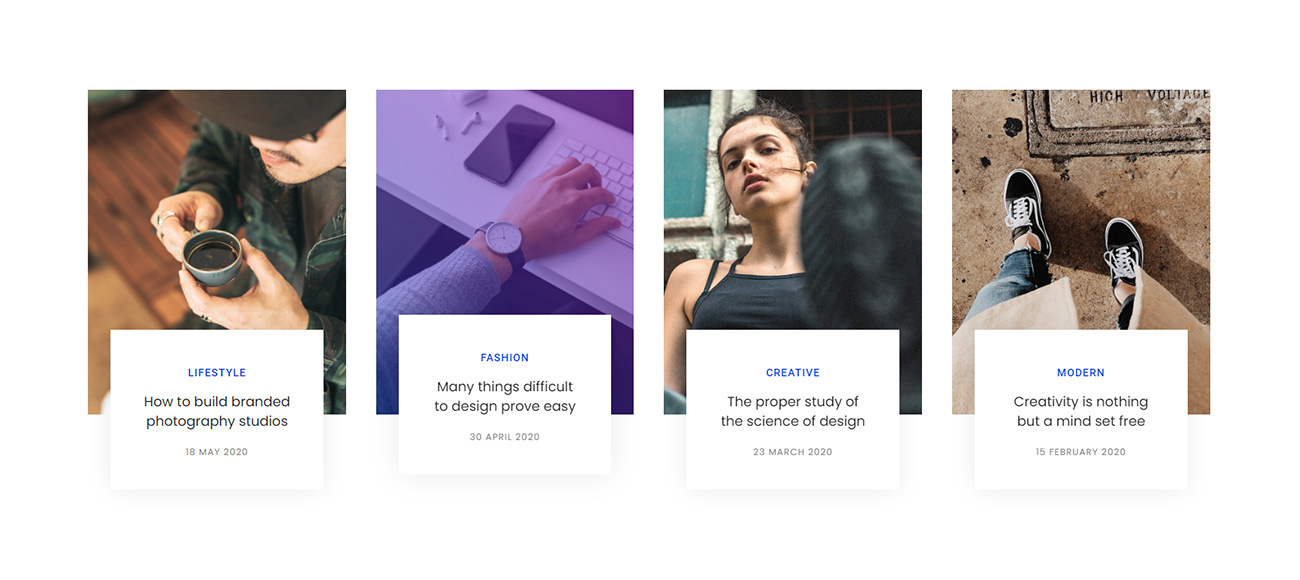
<ul class="blog-modern blog-wrapper grid grid-4col xl-grid-4col lg-grid-3col md-grid-2col sm-grid-2col xs-grid-1col gutter-double-extra-large">
    <li class="grid-sizer"></li>
    <!-- start blog item -->
    <li class="grid-item wow animate__fadeIn">
        <div class="blog-post">
            <div class="blog-post-image bg-gradient-fast-blue-purple">
                <a href="#"><img src="image path" alt=""></a>
            </div>
            <div class="post-details bg-white text-center padding-3-rem-all xl-padding-2-rem-all">
                <a href="#" class="blog-category text-fast-blue margin-15px-bottom text-medium font-weight-500 letter-spacing-1px text-uppercase">Lifestyle</a>
                <a href="#" class="alt-font text-extra-dark-gray text-extra-dark-gray-hover text-large line-height-26px d-block margin-20px-bottom">How to build branded photography studios</a>
                <a href="#" class="alt-font text-uppercase text-extra-small letter-spacing-1px d-block">18 May 2020</a>
            </div>
        </div>
    </li>
    <!-- end blog item -->
    <!-- start blog item -->
    <li class="grid-item wow animate__fadeIn" data-wow-delay="0.2s">
        <div class="blog-post">
            <div class="blog-post-image bg-gradient-fast-blue-purple">
                <a href="#"><img src="image path" alt=""></a>
            </div>
            <div class="post-details bg-white text-center padding-3-rem-all xl-padding-2-rem-all">
                <a href="#" class="blog-category text-fast-blue margin-15px-bottom text-medium font-weight-500 letter-spacing-1px text-uppercase">Fashion</a>
                <a href="#" class="alt-font text-extra-dark-gray text-extra-dark-gray-hover text-large line-height-26px d-block margin-20px-bottom">Many things difficult to design prove easy</a>
                <a href="#" class="alt-font text-uppercase text-extra-small letter-spacing-1px d-block">30 April 2020</a>
            </div>
        </div>
    </li>
    <!-- end blog item -->
    <!-- start blog item -->
    <li class="grid-item wow animate__fadeIn" data-wow-delay="0.4s">
        <div class="blog-post">
            <div class="blog-post-image bg-gradient-fast-blue-purple">
                <a href="#"><img src="image path" alt=""></a>
            </div>
            <div class="post-details bg-white text-center padding-3-rem-all xl-padding-2-rem-all">
                <a href="#" class="blog-category text-fast-blue margin-15px-bottom text-medium font-weight-500 letter-spacing-1px text-uppercase">Creative</a>
                <a href="#" class="alt-font text-extra-dark-gray text-extra-dark-gray-hover text-large line-height-26px d-block margin-20px-bottom">The proper study of the science of design</a>
                <a href="#" class="alt-font text-uppercase text-extra-small letter-spacing-1px d-block">23 March 2020</a>
            </div>
        </div>
    </li>
    <!-- end blog item -->
    <!-- start blog item -->
    <li class="grid-item wow animate__fadeIn" data-wow-delay="0.6s">
        <div class="blog-post">
            <div class="blog-post-image bg-gradient-fast-blue-purple">
                <a href="#"><img src="image path" alt=""></a>
            </div>
            <div class="post-details bg-white text-center padding-3-rem-all xl-padding-2-rem-all">
                <a href="#" class="blog-category text-fast-blue margin-15px-bottom text-medium font-weight-500 letter-spacing-1px text-uppercase">Modern</a>
                <a href="#" class="alt-font text-extra-dark-gray text-extra-dark-gray-hover text-large line-height-26px d-block margin-20px-bottom">Creativity is nothing but a mind set free</a>
                <a href="#" class="alt-font text-uppercase text-extra-small letter-spacing-1px d-block">15 February 2020</a>
            </div>
        </div>
    </li>
    <!-- end blog item -->
</ul>
NoteFor demo, You can please check this in blog-modern.html page.
Blog clean
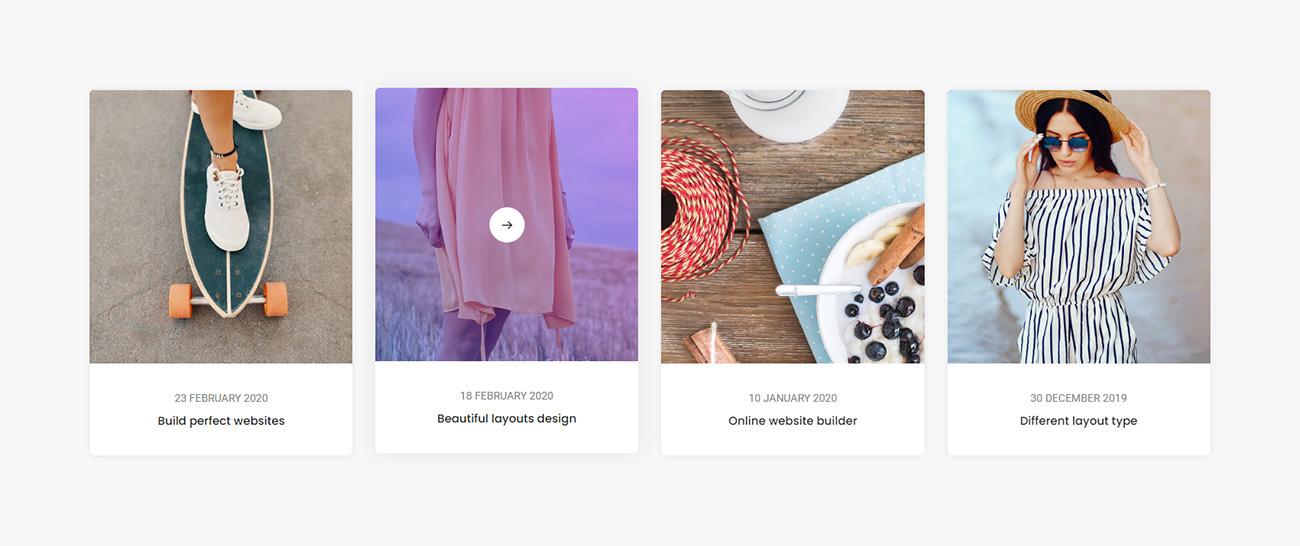
<ul class="blog-clean blog-wrapper grid grid-4col xl-grid-4col lg-grid-3col md-grid-2col sm-grid-2col xs-grid-1col gutter-extra-large">
    <li class="grid-sizer"></li>
    <!-- start blog item -->
    <li class="grid-item wow animate__fadeIn">
        <div class="blog-post text-center border-radius-6px bg-white box-shadow box-shadow-large-hover">
            <div class="blog-post-image bg-gradient-fast-blue-purple">
                <a href="#"><img src="image path" alt="">
                    <div class="blog-rounded-icon bg-white border-color-white absolute-middle-center">
                        <i class="feather icon-feather-arrow-right text-extra-dark-gray icon-extra-small"></i>
                    </div>
                </a>
            </div>
            <div class="post-details padding-30px-all xl-padding-25px-lr">
                <a href="#" class="post-author text-medium text-uppercase">23 February 2020</a>
                <a href="#" class="text-extra-dark-gray font-weight-500 alt-font d-block">Build perfect websites</a>
            </div>
        </div>
    </li>
    <!-- end blog item -->
    <!-- start blog item -->
    <li class="grid-item wow animate__fadeIn" data-wow-delay="0.2s">
        <div class="blog-post text-center border-radius-6px bg-white box-shadow box-shadow-large-hover">
            <div class="blog-post-image bg-gradient-fast-blue-purple">
                <a href="#"><img src="image path" alt="">
                    <div class="blog-rounded-icon bg-white border-color-white absolute-middle-center">
                        <i class="feather icon-feather-arrow-right text-extra-dark-gray icon-extra-small"></i>
                    </div>
                </a>
            </div>
            <div class="post-details padding-30px-all xl-padding-25px-lr">
                <a href="#" class="post-author text-medium text-uppercase">18 February 2020</a>
                <a href="#" class="text-extra-dark-gray font-weight-500 alt-font d-block">Beautiful layouts design</a>
            </div>
        </div>
    </li>
    <!-- end blog item -->
    <!-- start blog item -->
    <li class="grid-item wow animate__fadeIn" data-wow-delay="0.4s">
        <div class="blog-post text-center border-radius-6px bg-white box-shadow box-shadow-large-hover">
            <div class="blog-post-image bg-gradient-fast-blue-purple">
                <a href="#"><img src="image path" alt="">
                    <div class="blog-rounded-icon bg-white border-color-white absolute-middle-center">
                        <i class="feather icon-feather-arrow-right text-extra-dark-gray icon-extra-small"></i>
                    </div>
                </a>
            </div>
            <div class="post-details padding-30px-all xl-padding-25px-lr">
                <a href="#" class="post-author text-medium text-uppercase">10 January 2020</a>
                <a href="#" class="text-extra-dark-gray font-weight-500 alt-font d-block">Online website builder</a>
            </div>
        </div>
    </li>
    <!-- end blog item -->
    <!-- start blog item -->
    <li class="grid-item wow animate__fadeIn" data-wow-delay="0.6s">
        <div class="blog-post text-center border-radius-6px bg-white box-shadow box-shadow-large-hover">
            <div class="blog-post-image bg-gradient-fast-blue-purple">
                <a href="#"><img src="image path" alt="">
                    <div class="blog-rounded-icon bg-white border-color-white absolute-middle-center">
                        <i class="feather icon-feather-arrow-right text-extra-dark-gray icon-extra-small"></i>
                    </div>
                </a>
            </div>
            <div class="post-details padding-30px-all xl-padding-25px-lr">
                <a href="#" class="post-author text-medium text-uppercase">30 December 2019</a>
                <a href="#" class="text-extra-dark-gray font-weight-500 alt-font d-block">Different layout type</a>
            </div>
        </div>
    </li>
    <!-- end blog item -->
</ul>
NoteFor demo, You can please check this in blog-clean.html page.
Blog widget
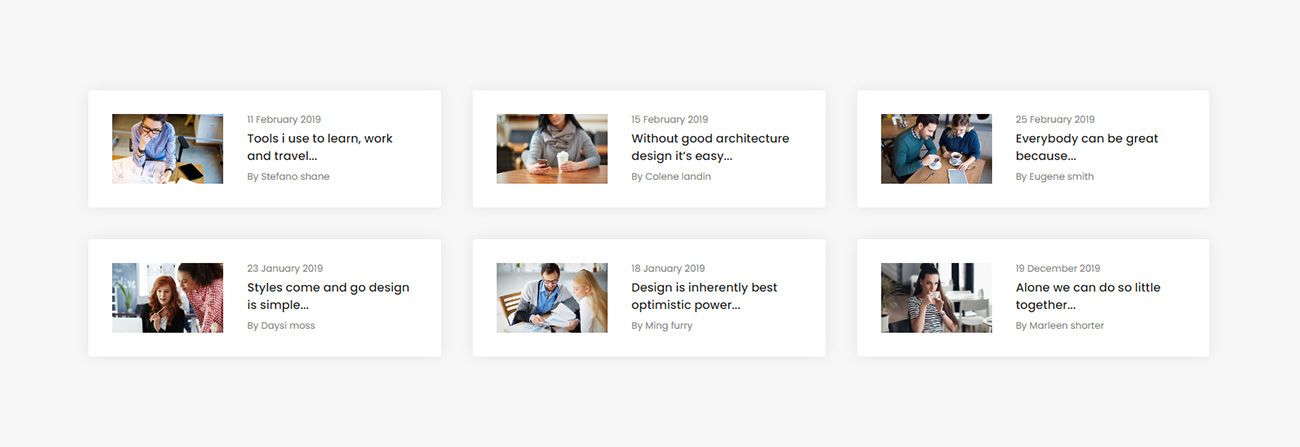
<ul class="blog-widget blog-wrapper grid grid-3col xl-grid-3col lg-grid-2col md-grid-1col sm-grid-1col xs-grid-1col gutter-double-extra-large">
    <li class="grid-sizer"></li>
    <!-- start blog item -->
    <li class="grid-item wow animate__fadeIn">
        <div class="d-flex box-shadow-medium bg-white padding-30px-all xs-padding-15px-all border-radius-4px">
            <figure class="flex-shrink-0">
                <a href="#"><img src="image path" alt=""></a>
            </figure>
            <div class="media-body flex-grow-1">
                <a href="#" class="text-extra-small alt-font d-block margin-5px-bottom">11 February 2019</a>
                <a href="#" class="alt-font font-weight-500 text-extra-dark-gray margin-5px-bottom d-block line-height-22px">Tools i use to learn, work and travel...</a>
                <span class="text-extra-small alt-font">By <a href="#">Stefano shane</a></span>
            </div>
        </div>
    </li>
    <!-- end blog item -->
    <!-- start blog item -->
    <li class="grid-item wow animate__fadeIn" data-wow-delay="0.2s">
        <div class="d-flex box-shadow-medium bg-white padding-30px-all xs-padding-15px-all border-radius-4px">
            <figure class="flex-shrink-0">
                <a href="#"><img src="image path" alt=""></a>
            </figure>
            <div class="media-body flex-grow-1">
                <a href="#" class="text-extra-small alt-font d-block margin-5px-bottom">15 February 2019</a>
                <a href="#" class="alt-font font-weight-500 text-extra-dark-gray margin-5px-bottom d-block line-height-22px">Without good architecture design it’s easy...</a>
                <span class="text-extra-small alt-font">By <a href="#">Colene landin</a></span>
            </div>
        </div>
    </li>
    <!-- end blog item -->
    <!-- start blog item -->
    <li class="grid-item wow animate__fadeIn" data-wow-delay="0.4s">
        <div class="d-flex box-shadow-medium bg-white padding-30px-all xs-padding-15px-all border-radius-4px">
            <figure class="flex-shrink-0">
                <a href="#"><img src="image path" alt=""></a>
            </figure>
            <div class="media-body flex-grow-1">
                <a href="#" class="text-extra-small alt-font d-block margin-5px-bottom">25 February 2019</a>
                <a href="#" class="alt-font font-weight-500 text-extra-dark-gray margin-5px-bottom d-block line-height-22px">Everybody can be great because...</a>
                <span class="text-extra-small alt-font">By <a href="#">Eugene smith</a></span>
            </div>
        </div>
    </li>
    <!-- end blog item -->
    <!-- start blog item -->
    <li class="grid-item wow animate__fadeIn">
        <div class="d-flex box-shadow-medium bg-white padding-30px-all xs-padding-15px-all border-radius-4px">
            <figure class="flex-shrink-0">
                <a href="#"><img src="image path" alt=""></a>
            </figure>
            <div class="media-body flex-grow-1">
                <a href="#" class="text-extra-small alt-font d-block margin-5px-bottom">23 January 2019</a>
                <a href="#" class="alt-font font-weight-500 text-extra-dark-gray margin-5px-bottom d-block line-height-22px">Styles come and go design is simple...</a>
                <span class="text-extra-small alt-font">By <a href="#">Daysi moss</a></span>
            </div>
        </div>
    </li>
    <!-- end blog item -->
</ul>
NoteFor demo, You can please check this in blog-widget.html page.
Blog standard
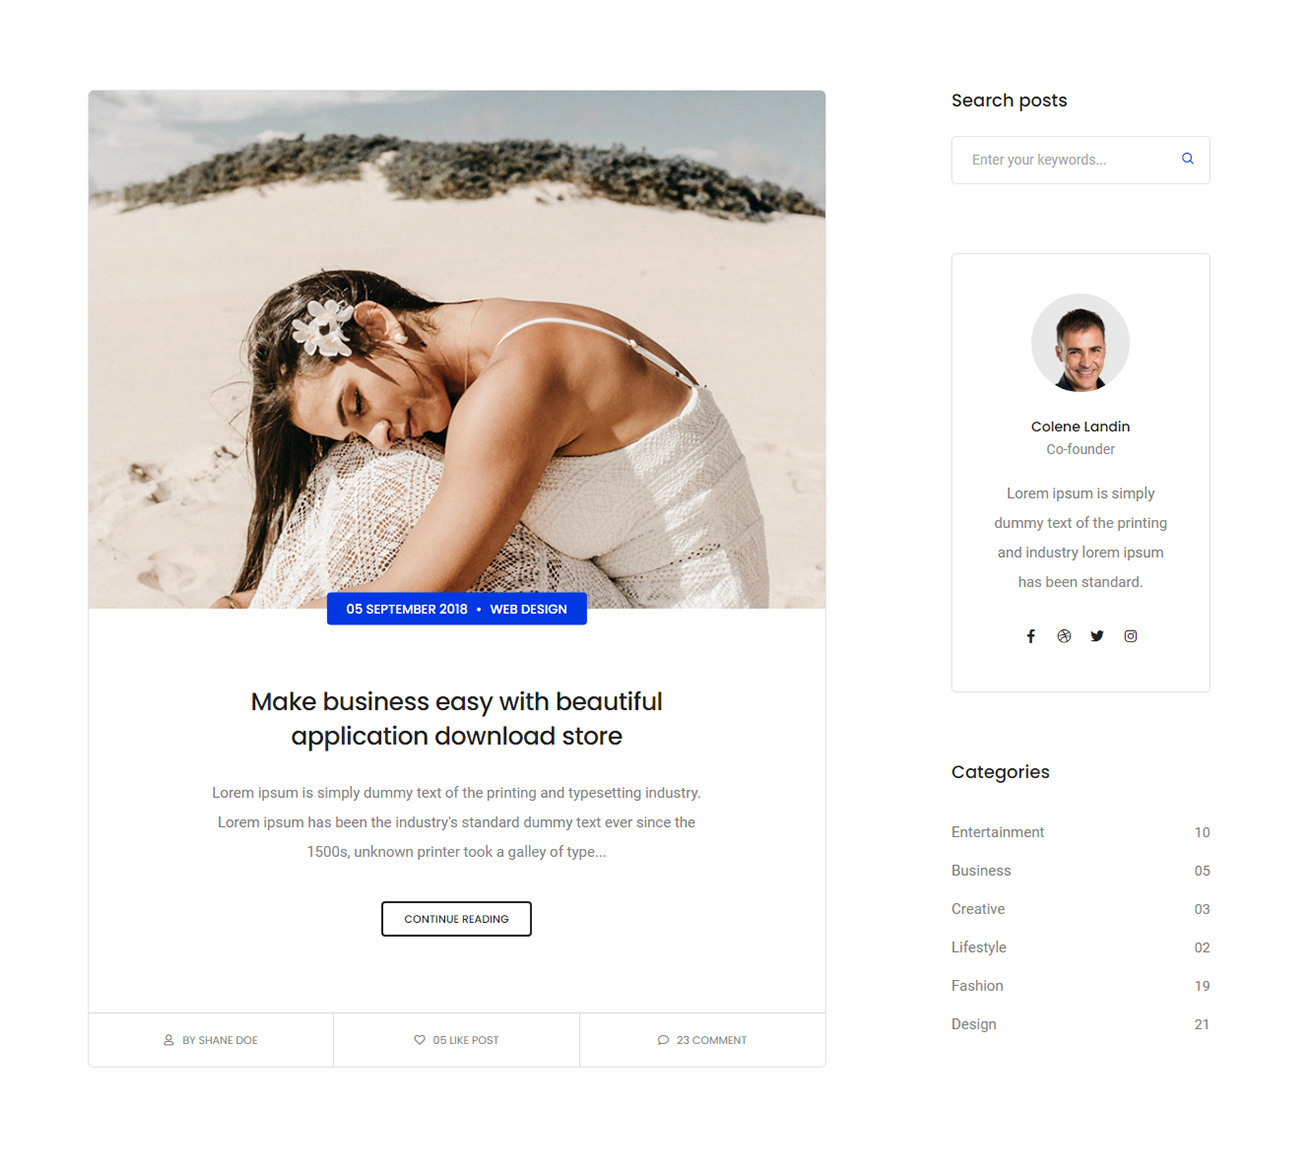
<div class="col-12 col-lg-8 right-sidebar md-margin-60px-bottom sm-margin-40px-bottom">
    <!-- start blog item -->
    <div class="col-12 blog-post-content border-all border-color-medium-gray border-radius-6px overflow-hidden text-center p-0 margin-4-half-rem-bottom wow animate__fadeIn">
        <div class="blog-image"><a href="#"><img src="image path" alt=""/></a></div>
        <div class="blog-text d-inline-block w-100">
            <div class="content padding-5-half-rem-all lg-padding-4-half-rem-all xs-padding-20px-lr xs-padding-40px-tb position-relative mx-auto w-90 lg-w-100">
                <div class="blog-details-overlap text-small font-weight-500 bg-fast-blue border-radius-4px alt-font text-white text-uppercase"><a href="#" class="text-white">05 September 2018</a> <span class="margin-5px-lr">•</span> <a href="#" class="text-white">Web Design</a></div>
                <h6 class="alt-font font-weight-500"><a href="#" class="text-extra-dark-gray text-fast-blue-hover">Make business easy with beautiful application download store</a></h6>
                <p>Lorem ipsum is simply dummy text of the printing and typesetting industry. Lorem ipsum has been the industry's standard dummy text ever since the 1500s, unknown printer took a galley of type...</p>
                <a href="#" class="btn btn-small btn-transparent-dark-gray btn-round-edge btn-slide-up-bg margin-10px-top">Continue Reading <span class="bg-extra-dark-gray"></span></a>
            </div>
            <div class="row row-cols-1 author border-top border-color-extra-medium-gray text-medium-gray text-very-small text-uppercase alt-font m-0">
                <div class="col col-sm blog-hover-btn padding-20px-tb border-right border-color-extra-medium-gray xs-no-border-right xs-border-bottom">
                    <a href="#"><i class="far fa-user blog-icon"></i><i class="far fa-user blog-icon blog-icon-hover text-sky-blue"></i>By shane doe</a>
                </div>
                <div class="col col-sm blog-hover-btn padding-20px-tb border-right border-color-extra-medium-gray xs-no-border-right xs-border-bottom">
                    <a href="#"><i class="far fa-heart blog-icon"></i><i class="far fa-heart blog-icon blog-icon-hover text-sky-blue"></i>05 Like post</a>
                </div>
                <div class="col col-sm blog-hover-btn padding-20px-tb">
                    <a href="#"><i class="far fa-comment blog-icon"></i><i class="far fa-comment blog-icon blog-icon-hover text-sky-blue"></i>23 Comment</a>
                </div>
            </div>
        </div>
    </div>
    <!-- end blog item -->
    <!-- start blog item -->
    <div class="col-12 blog-post-content border-all border-color-medium-gray border-radius-6px overflow-hidden text-center p-0 margin-4-half-rem-bottom wow animate__fadeIn">
        <div class="blog-image"><a href="#"><img src="image path" alt=""/></a></div>
        <div class="blog-text d-inline-block w-100">
            <div class="content padding-5-half-rem-all lg-padding-4-half-rem-all xs-padding-20px-lr xs-padding-40px-tb position-relative mx-auto w-90 lg-w-100">
                ...
            </div>
            <div class="row row-cols-1 author border-top border-color-extra-medium-gray text-medium-gray text-very-small text-uppercase alt-font m-0">
                ...
            </div>
        </div>
    </div>
    <!-- end blog item -->
    <!-- start pagination -->
    <div class="col-12 d-flex justify-content-center margin-7-half-rem-top lg-margin-5-rem-top xs-margin-4-rem-top wow animate__fadeIn">
        <ul class="pagination pagination-style-01 text-small font-weight-500 align-items-center">
            <li class="page-item"><a class="page-link" href="#"><i class="feather icon-feather-arrow-left icon-extra-small d-xs-none"></i></a></li>
            <li class="page-item"><a class="page-link" href="#">01</a></li>
            <li class="page-item active"><a class="page-link" href="#">02</a></li>
            <li class="page-item"><a class="page-link" href="#">03</a></li>
            <li class="page-item"><a class="page-link" href="#">04</a></li>
            <li class="page-item"><a class="page-link" href="#"><i class="feather icon-feather-arrow-right icon-extra-small  d-xs-none"></i></a></li>
        </ul>
    </div>
    <!-- end pagination -->
</div>
<!-- start sidebar -->
<aside class="col-12 col-xl-3 offset-xl-1 col-lg-4 col-md-7 blog-sidebar lg-padding-4-rem-left md-padding-15px-left">
    ...
</aside>
<!-- end sidebar -->
NoteFor demo, You can please check this in blog-standard.html page.
Blog Post Types
LITHO provides 8 different types of post types:
- Blog standard post
- Blog gallery post
- Blog slider Post
- Blog HTML5 video post
- Blog youtube video post
- Blog vimeo video post
- Blog audio post
- Blog blockquote post
Blog standard post

<!-- start standard post -->
<div class="col-12 col-lg-8 right-sidebar md-margin-60px-bottom sm-margin-40px-bottom">
    <div class="row">
        <div class="col-12 blog-details-text last-paragraph-no-margin margin-6-rem-bottom">
            <ul class="list-unstyled margin-2-rem-bottom">
                <li class="d-inline-block align-middle margin-25px-right"><i class="feather icon-feather-calendar text-fast-blue margin-10px-right"></i><a href="blog-grid.html">09 January 2020</a></li>
                <li class="d-inline-block align-middle margin-25px-right"><i class="feather icon-feather-folder text-fast-blue margin-10px-right"></i><a href="blog-grid.html">Creative</a></li>
                <li class="d-inline-block align-middle"><i class="feather icon-feather-user text-fast-blue margin-10px-right"></i>By <a href="#">Shane doe</a></li>
            </ul>
            <h5 class="alt-font font-weight-500 text-extra-dark-gray margin-4-half-rem-bottom">We believe people deserve to earn a living doing what they love - standard post</h5>
            <img src="image path" alt="" class="w-100 border-radius-6px margin-4-half-rem-bottom">
            <p>...</p>
            <p>...</p>
            <blockquote class="alt-font border-width-4px border-color-fast-blue margin-60px-left pe-0 margin-5-half-rem-tb md-margin-40px-left sm-no-margin-left wow animate__fadeIn">
                <p>...</p>
                <footer class="text-medium text-fast-blue d-inline-block text-uppercase">John Wayne</footer>
            </blockquote>
            <img src="image path" alt="" class="w-100 border-radius-6px margin-4-rem-bottom wow animate__fadeIn">
            <!-- dropcaps -->
            <p class="wow animate__fadeIn"><span class="alt-font first-letter first-letter-big text-fast-blue">M</span>...</p>
            <!-- end dropcaps -->
            <p class="wow animate__fadeIn">...</p>
        </div>
        <div class="col-12 d-flex flex-wrap align-items-center padding-15px-tb mx-auto margin-20px-bottom wow animate__fadeIn">
            <div class="col-12 col-md-9 text-center text-md-start sm-margin-10px-bottom px-0">
                <div class="tag-cloud">
                    <a href="#">Development</a>
                    <a href="#">Events</a>
                    <a href="#">Media</a>
                    <a href="#">Mountains</a>
                </div>
            </div>
            <div class="col-12 col-md-3 text-center text-md-end px-0">
                <a class="likes-count text-uppercase text-extra-dark-gray font-weight-500" href="#"><i class="far fa-heart"></i><span>05 Likes</span></a>
            </div>
        </div>
        <div class="col-12 mx-auto margin-50px-bottom md-margin-30px-bottom wow animate__fadeIn">
            <div class="d-block d-md-flex box-shadow-small align-items-center border-radius-5px padding-4-rem-all">
                <div class="w-130px text-center margin-60px-right sm-margin-auto-lr">
                    <img src="image path" class="rounded-circle w-110px" alt=""/>
                    <a href="#" class="text-extra-dark-gray alt-font font-weight-500 margin-20px-top d-inline-block text-medium">Colene Landin</a>
                    <span class="text-medium d-block line-height-18px sm-margin-15px-bottom">Co-founder</span>
                </div>
                <div class="w-75 sm-w-100 last-paragraph-no-margin text-center text-md-start">
                    <p>...</p>
                    <a href="#" class="btn btn-link btn-large text-extra-dark-gray margin-20px-top">All author posts</a>
                </div>
            </div>
        </div>
        <div class="col-12 text-center elements-social social-icon-style-09 mx-auto">
            <ul class="medium-icon">
                <li class="wow animate__fadeIn" data-wow-delay="0.2s"><a class="facebook" href="#" target="_blank"><i class="fab fa-facebook-f"></i><span></span></a></li>
                <li class="wow animate__fadeIn" data-wow-delay="0.3s"><a class="twitter" href="#" target="_blank"><i class="fab fa-twitter"></i><span></span></a></li>
                <li class="wow animate__fadeIn" data-wow-delay="0.4s"><a class="instagram" href="#" target="_blank"><i class="fab fa-instagram"></i><span></span></a></li>
                <li class="wow animate__fadeIn" data-wow-delay="0.5s"><a class="linkedin" href="#" target="_blank"><i class="fab fa-linkedin-in"></i><span></span></a></li>
                <li class="wow animate__fadeIn" data-wow-delay="0.6s"><a class="behance" href="#" target="_blank"><i class="fab fa-behance"></i><span></span></a></li>
            </ul>
        </div>
    </div>
</div>
<!-- start sidebar -->
<aside class="col-12 col-xl-3 offset-xl-1 col-lg-4 col-md-7 blog-sidebar lg-padding-4-rem-left md-padding-15px-left">
   ...
</aside>
<!-- end sidebar -->
<!-- end standard post -->
NoteFor demo, You can please check this in blog-standard-post.html page.
Blog gallery post
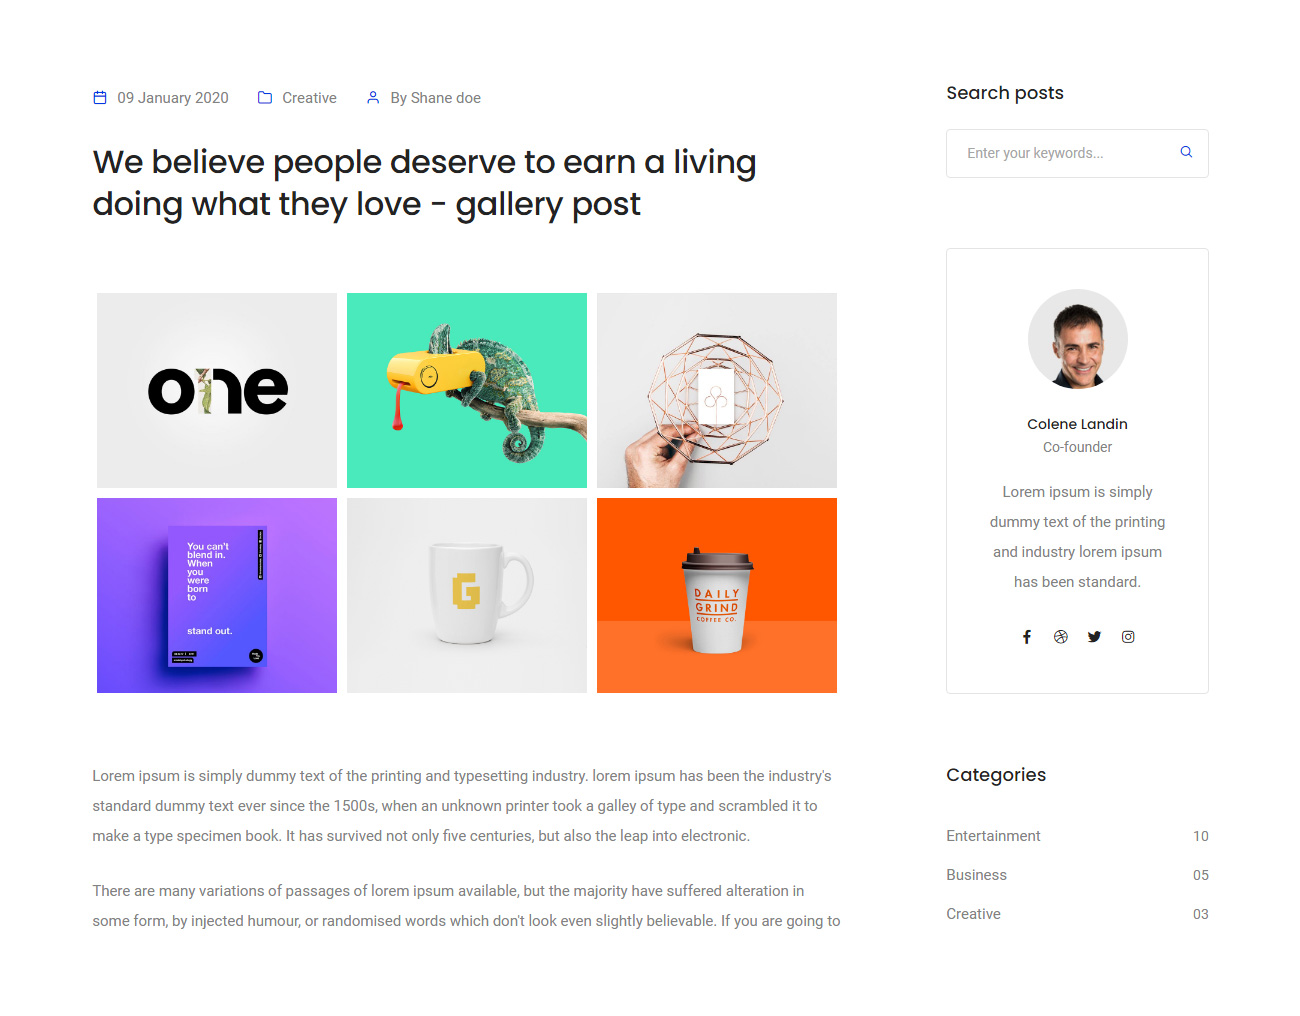
<div class="col-12 col-lg-8 right-sidebar md-margin-60px-bottom sm-margin-40px-bottom">
    <div class="row">
        <div class="col-12 blog-details-text last-paragraph-no-margin margin-6-rem-bottom">
            ...
            <ul class="portfolio-overlay portfolio-wrapper grid grid-3col xl-grid-3col lg-grid-3col md-grid-2col sm-grid-2col xs-grid-1col gutter-small text-center margin-4-half-rem-bottom">
                <li class="grid-sizer"></li>
                <!-- start lightbox gallery item -->
                <li class="grid-item">
                    <a href="image path" title="Lightbox gallery image title..." data-group="lightbox-gallery" class="lightbox-group-gallery-item">
                        <div class="portfolio-box">
                            <div class="portfolio-image bg-extra-dark-gray">
                                <img src="image path" alt="">
                                <div class="portfolio-hover justify-content-end d-flex flex-column padding-50px-tb lg-padding-30px-tb xs-padding-15px-tb">
                                    <i class="feather icon-feather-zoom-in portfolio-plus-icon font-weight-300 text-white absolute-middle-center icon-small move-top-bottom"></i>
                                </div>
                            </div>
                        </div>
                    </a>
                </li>
                <!-- end lightbox gallery item -->
                <!-- start lightbox gallery item -->
                <li class="grid-item" data-wow-delay="0.2s">
                    <a href="image path" title="Lightbox gallery image title..." data-group="lightbox-gallery" class="lightbox-group-gallery-item">
                        <div class="portfolio-box">
                            <div class="portfolio-image bg-extra-dark-gray">
                                <img src="image path" alt="">
                                <div class="portfolio-hover justify-content-end d-flex flex-column padding-50px-tb lg-padding-30px-tb xs-padding-15px-tb">
                                    <i class="feather icon-feather-zoom-in portfolio-plus-icon font-weight-300 text-white absolute-middle-center icon-small move-top-bottom"></i>
                                </div>
                            </div>
                        </div>
                    </a>
                </li>
                <!-- end lightbox gallery item -->
                <!-- start lightbox gallery item -->
                <li class="grid-item" data-wow-delay="0.4s">
                    <a href="image path" title="Lightbox gallery image title..." data-group="lightbox-gallery" class="lightbox-group-gallery-item">
                        <div class="portfolio-box">
                            <div class="portfolio-image bg-extra-dark-gray">
                                <img src="image path" alt="">
                                <div class="portfolio-hover justify-content-end d-flex flex-column padding-50px-tb lg-padding-30px-tb xs-padding-15px-tb">
                                    <i class="feather icon-feather-zoom-in portfolio-plus-icon font-weight-300 text-white absolute-middle-center icon-small move-top-bottom"></i>
                                </div>
                            </div>
                        </div>
                    </a>
                </li>
                <!-- end lightbox gallery item -->
                <!-- start lightbox gallery item -->
                <li class="grid-item">
                    <a href="image path" title="Lightbox gallery image title..." data-group="lightbox-gallery" class="lightbox-group-gallery-item">
                        <div class="portfolio-box">
                            <div class="portfolio-image bg-extra-dark-gray">
                                <img src="image path" alt="">
                                <div class="portfolio-hover justify-content-end d-flex flex-column padding-50px-tb lg-padding-30px-tb xs-padding-15px-tb">
                                    <i class="feather icon-feather-zoom-in portfolio-plus-icon font-weight-300 text-white absolute-middle-center icon-small move-top-bottom"></i>
                                </div>
                            </div>
                        </div>
                    </a>
                </li>
                <!-- end lightbox gallery item -->
                <!-- start lightbox gallery item -->
                <li class="grid-item" data-wow-delay="0.2s">
                    <a href="image path" title="Lightbox gallery image title..." data-group="lightbox-gallery" class="lightbox-group-gallery-item">
                        <div class="portfolio-box">
                            <div class="portfolio-image bg-extra-dark-gray">
                                <img src="image path" alt="">
                                <div class="portfolio-hover justify-content-end d-flex flex-column padding-50px-tb lg-padding-30px-tb xs-padding-15px-tb">
                                    <i class="feather icon-feather-zoom-in portfolio-plus-icon font-weight-300 text-white absolute-middle-center icon-small move-top-bottom"></i>
                                </div>
                            </div>
                        </div>
                    </a>
                </li>
                <!-- end lightbox gallery item -->
                <!-- start lightbox gallery item -->
                <li class="grid-item" data-wow-delay="0.4s">
                    <a href="image path" title="Lightbox gallery image title..." data-group="lightbox-gallery" class="lightbox-group-gallery-item">
                        <div class="portfolio-box">
                            <div class="portfolio-image bg-extra-dark-gray">
                                <img src="image path" alt="">
                                <div class="portfolio-hover justify-content-end d-flex flex-column padding-50px-tb lg-padding-30px-tb xs-padding-15px-tb">
                                    <i class="feather icon-feather-zoom-in portfolio-plus-icon font-weight-300 text-white absolute-middle-center icon-small move-top-bottom"></i>
                                </div>
                            </div>
                        </div>
                    </a>
                </li>
                <!-- end lightbox gallery item -->
            </ul>
            ...
        </div>
        ...
    </div>
</div>
<!-- start sidebar -->
<aside class="col-12 col-xl-3 offset-xl-1 col-lg-4 col-md-7 blog-sidebar lg-padding-4-rem-left md-padding-15px-left">
    ...
</aside>
<!-- end sidebar -->
NoteFor demo, You can please check this in blog-gallery-post.html page.
Blog slider Post
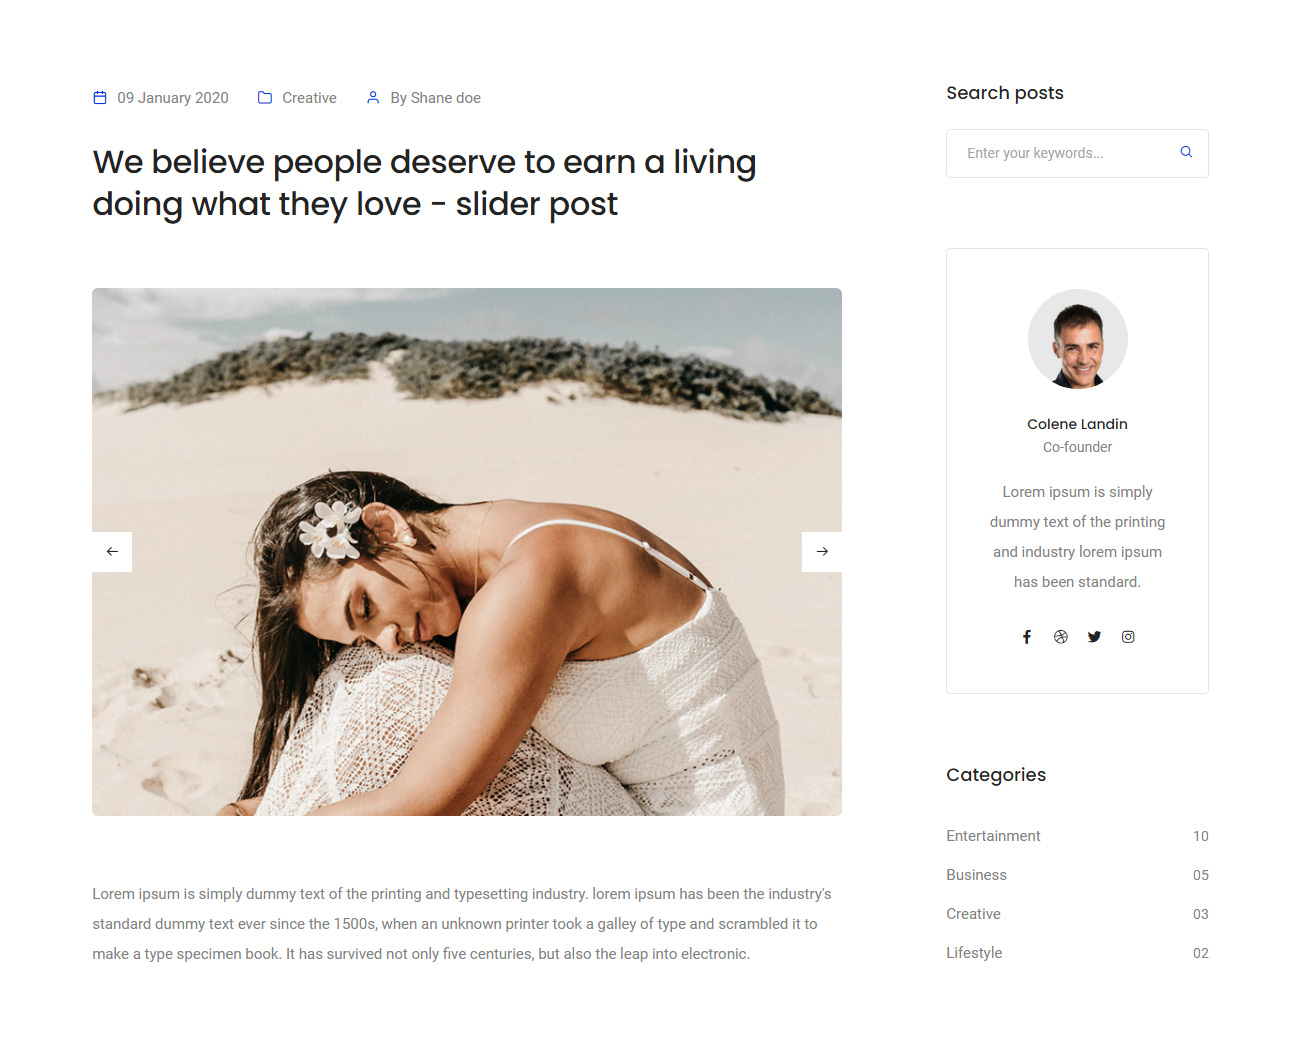
<div class="col-12 col-lg-8 right-sidebar md-margin-60px-bottom sm-margin-40px-bottom">
    <div class="row">
        <div class="col-12 blog-details-text last-paragraph-no-margin margin-6-rem-bottom">
            ...
            <!-- start slider -->
            <div class="swiper-container white-move h-auto margin-4-half-rem-bottom  border-radius-6px" data-slider-options='{ "slidesPerView": 1, "loop": true, "pagination": { "el": ".swiper-pagination", "clickable": true }, "autoplay": { "delay": 2000, "disableOnInteraction": false }, "navigation": { "nextEl": ".swiper-button-next-nav", "prevEl": ".swiper-button-previous-nav" }, "keyboard": { "enabled": true, "onlyInViewport": true }, "effect": "slide" }'>
                <div class="swiper-wrapper">
                    <!-- start slider item --><div class="swiper-slide"><img src="image path" alt=""></div><!-- end slider item -->
                    <!-- start slider item --><div class="swiper-slide"><img src="image path" alt=""></div><!-- end slider item -->
                    <!-- start slider item --><div class="swiper-slide"><img src="image path" alt=""></div><!-- end slider item -->
                </div>
                <!-- start slider pagination -->
                <div class="swiper-pagination swiper-light-pagination"></div>
                <!-- end slider pagination -->
                <div class="swiper-button-next-nav swiper-button-next light slider-navigation-style-01"><i class="feather icon-feather-arrow-right" aria-hidden="true"></i></div>
                <div class="swiper-button-previous-nav swiper-button-prev light slider-navigation-style-01"><i class="feather icon-feather-arrow-left" aria-hidden="true"></i></div>
            </div>
            <!-- end slider -->
            ...
        </div>
        ...
    </div>
</div>
<!-- start sidebar -->
<aside class="col-12 col-xl-3 offset-xl-1 col-lg-4 col-md-7 blog-sidebar lg-padding-4-rem-left md-padding-15px-left">
    ...
</aside>
<!-- end sidebar -->
NoteFor demo, You can please check this in blog-slider-post.html page.
Blog HTML5 video post

<div class="col-12 col-lg-8 right-sidebar md-margin-60px-bottom sm-margin-40px-bottom">
    <div class="row">
        <div class="col-12 blog-details-text last-paragraph-no-margin margin-6-rem-bottom">
            ...
            <!-- start html5 video -->
            <div class="blog-post-content margin-4-half-rem-bottom">
                <div class="fit-videos border-radius-6px overflow-hidden">
                    <!-- start vimeo video -->
                    <video autoplay muted loop controls><source src="video link" type="video/mp4"></video>
                    <!-- end vimeo video -->
                </div>
            </div>
            <!-- end html5 video -->
            ...
        </div>
        ...
    </div>
</div>
<!-- start sidebar -->
<aside class="col-12 col-xl-3 offset-xl-1 col-lg-4 col-md-7 blog-sidebar lg-padding-4-rem-left md-padding-15px-left">
    ...
</aside>
<!-- end sidebar -->
NoteFor demo, You can please check this in blog-HTML5-video-post.html page.
Blog youtube video post

<div class="col-12 col-lg-8 right-sidebar md-margin-60px-bottom sm-margin-40px-bottom">
    <div class="row">
        <div class="col-12 blog-details-text last-paragraph-no-margin margin-6-rem-bottom">
            ...
            <!-- start youtube video -->
            <div class="blog-post-content margin-4-half-rem-bottom">
                <div class="fit-videos">
                    <iframe width="560" height="315" src="video link" allowfullscreen></iframe>
                </div>
            </div>
            <!-- end youtube video -->
            ...
        </div>
        ...
    </div>
</div>
<!-- start sidebar -->
<aside class="col-12 col-xl-3 offset-xl-1 col-lg-4 col-md-7 blog-sidebar lg-padding-4-rem-left md-padding-15px-left">
    ...
</aside>
<!-- end sidebar -->
NoteFor demo, You can please check this in blog-youtube-video-post.html page.
Blog vimeo video post
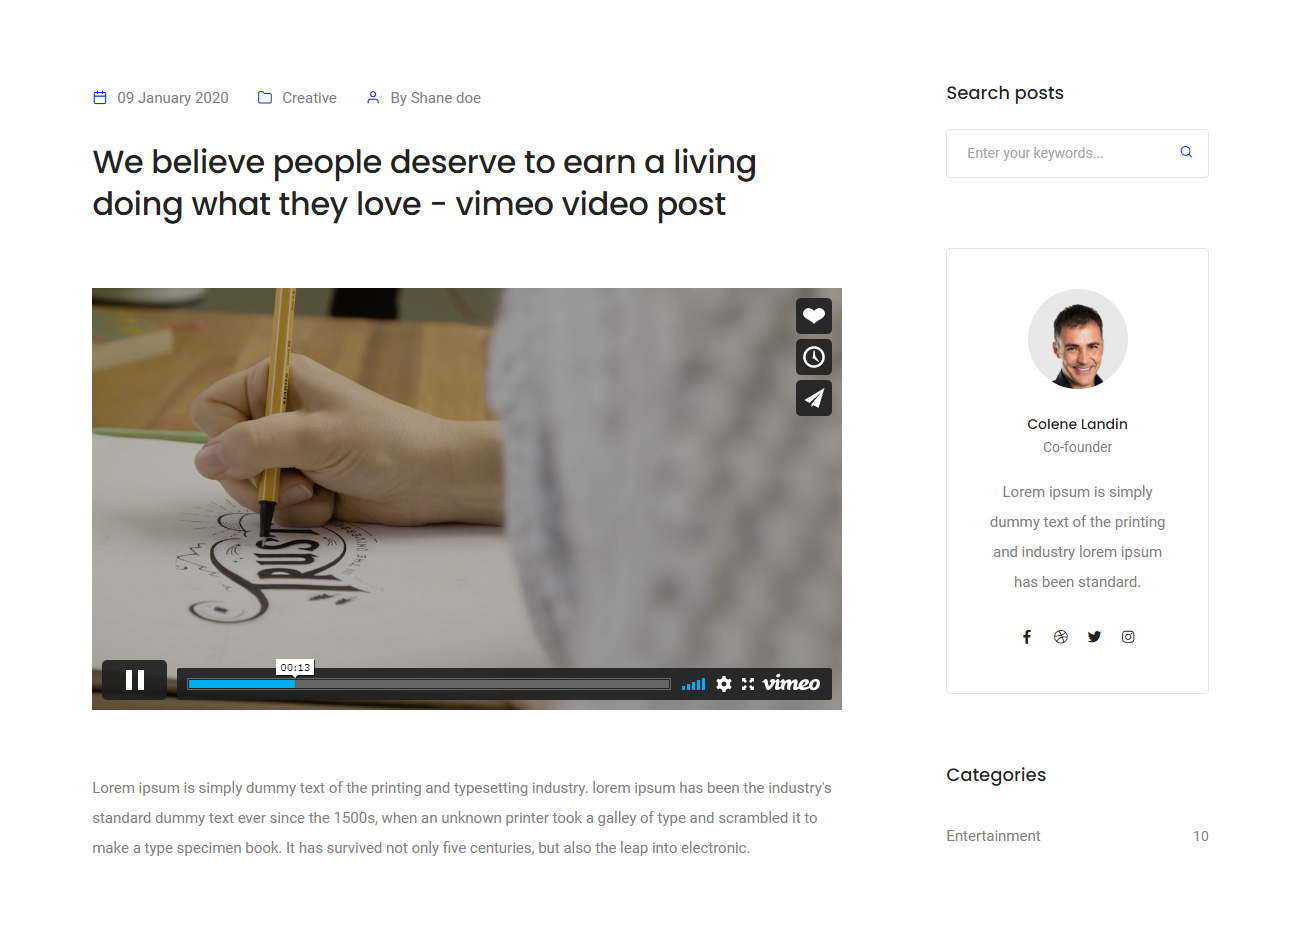
<div class="col-12 col-lg-8 right-sidebar md-margin-60px-bottom sm-margin-40px-bottom">
    <div class="row">
        <div class="col-12 blog-details-text last-paragraph-no-margin margin-6-rem-bottom">
            ...
            <!-- start vimeo video -->
            <div class="blog-post-content margin-4-half-rem-bottom">
                <div class="fit-videos">
                    <iframe src="video link" width="640" height="360" allowfullscreen></iframe>
                </div>
            </div>
            <!-- end vimeo video -->
            ...
        </div>
        ...
</div>
<!-- start sidebar -->
<aside class="col-12 col-xl-3 offset-xl-1 col-lg-4 col-md-7 blog-sidebar lg-padding-4-rem-left md-padding-15px-left">
   ...
</aside>
<!-- end sidebar -->
NoteFor demo, You can please check this in blog-vimeo-video-post.html page.
Blog audio post

<div class="col-12 col-lg-8 right-sidebar md-margin-60px-bottom sm-margin-40px-bottom">
    <div class="row">
        <div class="col-12 blog-details-text last-paragraph-no-margin margin-6-rem-bottom">
            ...
            <!-- start audio -->
            <div class="blog-post-content margin-4-half-rem-bottom">
                <iframe class="h-400px w-100" style="border: 0;" src="audio link"></iframe>
            </div>
            <!-- end audio -->
            ...
        </div>
        ...
    </div>
</div>
<!-- start sidebar -->
<aside class="col-12 col-xl-3 offset-xl-1 col-lg-4 col-md-7 blog-sidebar lg-padding-4-rem-left md-padding-15px-left">
    ...
</aside>
<!-- end sidebar -->
NoteFor demo, You can please check this in blog-audio-post.html page.
Blog blockquote post
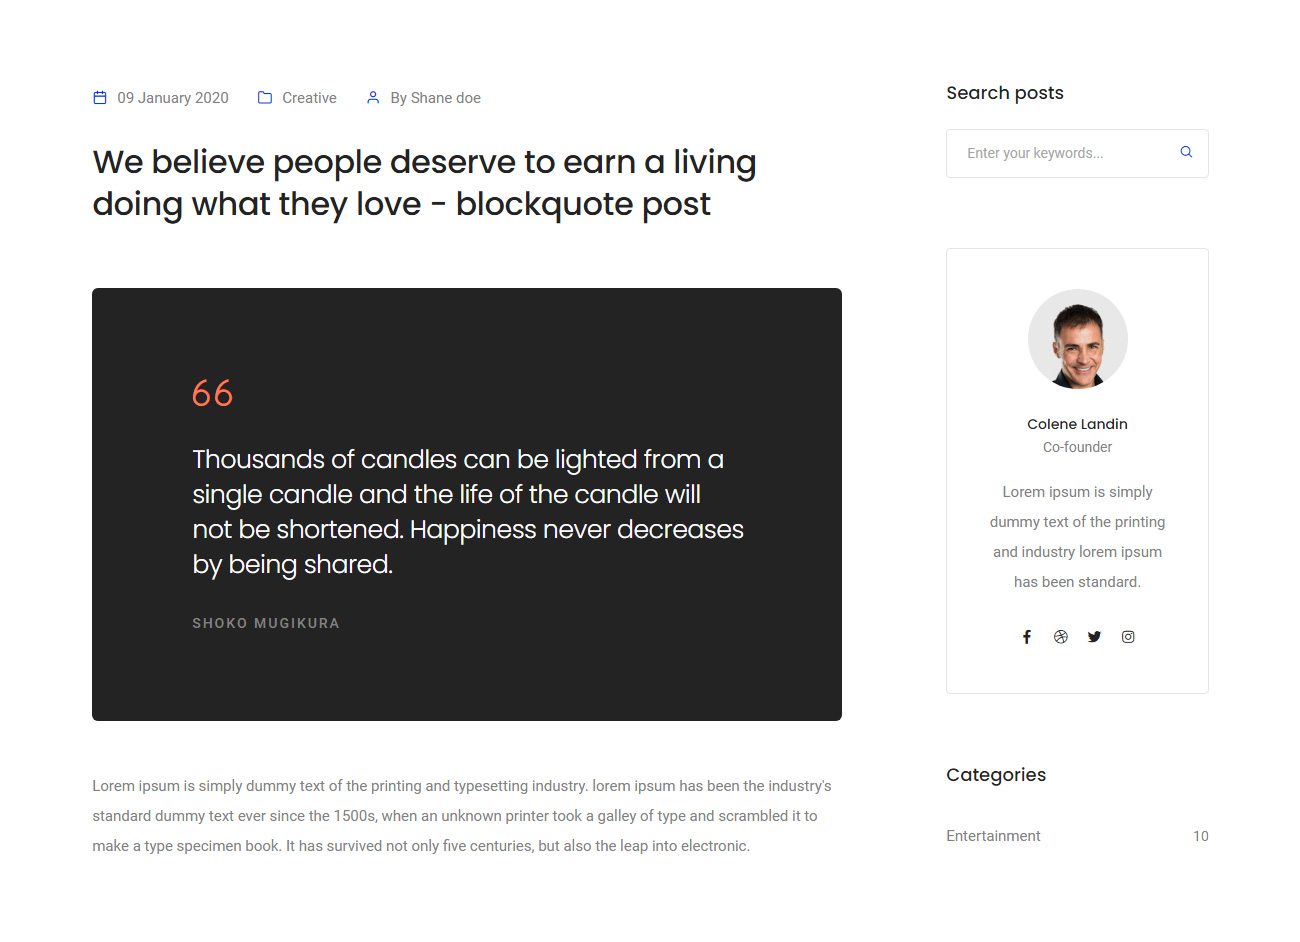
<div class="col-12 col-lg-8 right-sidebar md-margin-60px-bottom sm-margin-40px-bottom">
    <div class="row">
        <div class="col-12 blog-details-text last-paragraph-no-margin margin-6-rem-bottom">
            ...
            <!-- start blockquote -->
            <div class="blog-post-content xs-text-center margin-45px-bottom">
                <blockquote class="bg-extra-dark-gray padding-7-rem-lr padding-6-rem-tb sm-padding-3-rem-tb sm-padding-3-rem-lr border-radius-6px">
                    <i class="ti-quote-left icon-medium text-neon-orange margin-30px-bottom"></i>
                    <h6 class="alt-font font-weight-300 text-white">Thousands of candles can be lighted from a single candle and the life of the candle will not be shortened. Happiness never decreases by being shared.</h6>
                    <footer class="text-medium d-inline-block text-uppercase letter-spacing-2px">Shoko mugikura</footer>
                </blockquote>
            </div>
            <!-- end blockquote -->
            ...
        </div>
        ...
    </div>
</div>
<!-- start sidebar -->
<aside class="col-12 col-xl-3 offset-xl-1 col-lg-4 col-md-7 blog-sidebar lg-padding-4-rem-left md-padding-15px-left">
    ...
</aside>
<!-- end sidebar -->
NoteFor demo, You can please check this in blog-blockquote-post.html page.
Blog details
LITHO includes 5 unique and beautiful blog post page styles as mentioned below.


Credits
We would really love to take this opportunity to appreciate guys whose items were helpful to us to make LITHO a really beautiful theme for our awesome users:
Images and Videos
- Mixkit
- Mazwai
- Unsplash
- NothingToChance
- Design made in germany
- BluGraphic
- Lukaszdrozdz
- JonathanQuintin
- JucoPhoto
- Quimmarin
- Perkowska
- Moodley
- Veronicaformos
- RiebenbauerDesign
- Anti
- Sarapellegrino
- ToroPinto
- ToughslateDesign
- HappyFinish
- ImageBoxStudio
- A_tkinson
- Gents-Club-Identity
- Teperspective
- Lidiaminguez
- EarlyBirdCafe
- MrMockup
- Zara
JS Libraries
CSS & Fonts
A big thanks to these guys!
Version 2.0 - Current Version
Released on 19 August 2021
- Update: Upgraded whole template HTML/CSS/JS to Bootstrap 5.1.0
- Update: Updated Swiper slider with latest version
- Update: Updated Animated headlines with latest version
- Update: Updated Font Awesome icon library to latest
- Remove: Modernizr JS
- Fixed: Fixed some CSS and JS issues
Version 1.1
Released on 08 April 2021
- Added: Added new home page demo for dentist
- Added: Added youtube background video
- Added: Added Google reCAPTCHA server side validation
- Fixed: Fixed some CSS and JS issues
Version 1.0
Released on 07 January 2021
Other templates
Below are some of our other awesome Templates, Skin and Extensions: